beginners guide to eco renovation

Eco renovation is a sustainable approach to home improvement, focusing on energy efficiency, eco-friendly materials, and reducing environmental impact while enhancing comfort and value.

Why Eco Renovation Matters

Eco renovation is crucial for reducing environmental impact, lowering energy consumption, and enhancing home comfort. It helps reduce utility bills, improves indoor air quality, and promotes sustainable living. By adopting eco-friendly practices, homeowners contribute to global efforts to combat climate change and preserve natural resources. Additionally, eco-renovated homes often increase in value and appeal to eco-conscious buyers, making it a smart investment for the future.

Key Principles of Sustainable Renovation

Sustainable renovation focuses on minimizing environmental impact while enhancing home performance. Key principles include using eco-friendly materials, optimizing energy efficiency, and reducing waste. It also involves improving indoor air quality, conserving water, and incorporating renewable energy sources. Additionally, sustainable practices emphasize durability, recycling, and responsible sourcing of materials. By aligning with these principles, homeowners can create healthier, energy-efficient spaces that support long-term environmental and economic benefits.

Assessing Your Home’s Energy Efficiency

Assessing your home’s energy efficiency is crucial for identifying areas of improvement. Use tools like thermal imaging to detect heat loss and optimize insulation for significant energy savings and lower bills.

Understanding Energy Consumption Patterns

Understanding your home’s energy consumption patterns is the first step in eco renovation. Start by auditing your energy use, monitoring utility bills, and identifying inefficiencies. Use smart meters or energy monitors to track real-time consumption. Analyze seasonal variations and appliance usage to pinpoint areas wasting energy. This insights help prioritize upgrades, such as switching to LED lighting or adjusting heating habits, ensuring your eco-friendly solutions are both effective and tailored to your lifestyle for long-term sustainability.

Identifying Areas for Improvement

Identifying areas for improvement in your home is crucial for effective eco renovation. Start by conducting a thermal imaging survey to locate heat loss and drafts. Check insulation levels, especially in attics, walls, and floors. Assess window efficiency and consider energy-efficient replacements. Look for water inefficiencies, such as outdated fixtures, and evaluate lighting and appliance energy use. Prioritize upgrades based on impact and cost, ensuring sustainable solutions align with your eco goals for a greener, more efficient home.

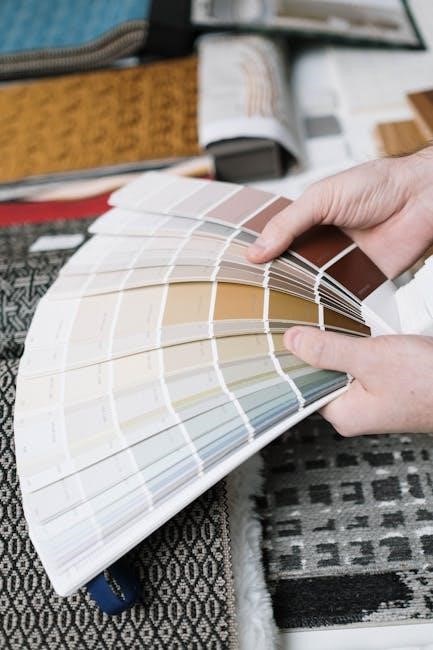
Choosing Eco-Friendly Materials

Eco-friendly materials are essential for sustainable renovation. Opt for reclaimed wood, low-VOC paints, recycled metals, and sustainable insulation to minimize environmental impact and promote health.

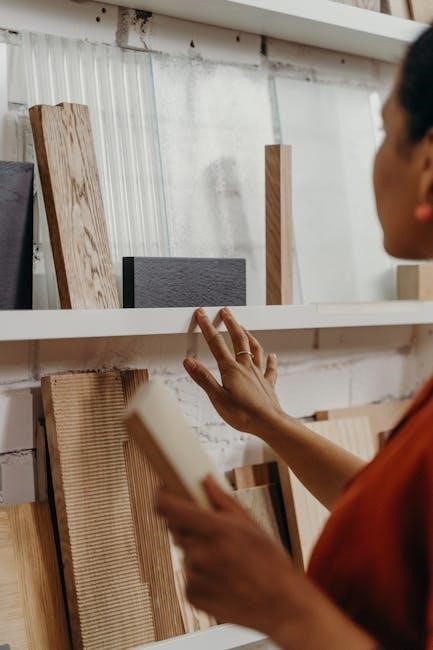
Sustainable Building Materials

Sustainable building materials are crucial for eco-friendly renovations. Reclaimed wood, low-VOC paints, recycled metals, and natural insulation like wool or hemp reduce environmental impact. Bamboo, FSC-certified wood, and locally sourced materials are excellent choices. These options minimize carbon footprints, promote energy efficiency, and support healthier living spaces. Always consider the material’s lifecycle, durability, and recyclability to align with eco-friendly goals. Using sustainable materials ensures your renovation is both environmentally responsible and cost-effective in the long run.

Reducing Waste During Renovation

Minimizing waste is essential for eco-friendly renovations. Plan meticulously to avoid excess materials, reuse existing elements when possible, and recycle debris. Donate salvageable items like doors or fixtures to reduce landfill contributions. Consider hiring contractors experienced in waste reduction strategies. Proper sorting of recyclables and compostables also helps. By prioritizing waste reduction, you can significantly lower your renovation’s environmental impact and promote sustainability throughout the project.

Insulation and Heating Solutions

Effective insulation and eco-friendly heating are crucial for energy efficiency. Proper insulation retains heat, while systems like heat pumps offer sustainable heating solutions, reducing energy consumption and costs.

Importance of Proper Insulation

Proper insulation is essential for reducing heat loss, lowering energy bills, and creating a more comfortable living space. It minimizes the need for excessive heating, cutting carbon emissions and energy consumption. Insulation also helps maintain consistent indoor temperatures, reducing strain on heating systems. Eco-friendly materials like fiberglass, cellulose, and spray foam offer sustainable solutions. Insulation is a critical first step in achieving an energy-efficient, eco-friendly home, benefiting both the environment and your wallet.

Energy-Efficient Heating Systems

Energy-efficient heating systems are crucial for minimizing environmental impact while maintaining comfort. Options like heat pumps, radiant floor heating, and condensing boilers offer high efficiency. These systems reduce energy consumption, lower emissions, and save on utility bills. Smart thermostats can optimize heating by learning usage patterns. Upgrading to eco-friendly heating solutions not only benefits the planet but also enhances home value and reduces long-term costs, making them a smart choice for eco renovations.

Lighting and Appliances

Switching to LED lighting and choosing energy-efficient appliances are essential steps in creating a sustainable home, reducing energy consumption and lowering utility bills while promoting eco-friendly living.

Switching to LED Lighting

Switching to LED lighting is a simple yet impactful step in eco renovation. LEDs use significantly less energy, last longer, and emit minimal heat, reducing energy bills and environmental impact. They are also free of harmful chemicals like mercury, making them safer and more sustainable. Consider smart lighting systems for added efficiency, allowing you to control brightness and schedules remotely. This small change contributes to a greener home and aligns with broader eco-friendly goals, as highlighted in Judith’s guide to energy-efficient living.

Selecting Energy-Efficient Appliances

Selecting energy-efficient appliances is crucial for reducing energy consumption and lowering utility bills. Look for appliances with the Energy Star certification, indicating they meet energy efficiency standards. Consider upgrading to smart appliances that optimize performance and reduce waste. When shopping, compare energy ratings and choose models with low standby power consumption. Investing in eco-friendly appliances not only benefits the environment but also enhances your home’s sustainability and long-term value, aligning with your eco renovation goals.

Budgeting and Planning

Budgeting for eco renovation involves setting realistic financial goals, creating a detailed timeline, and prioritizing eco-friendly options to ensure the project aligns with your environmental and financial objectives.

Setting a Realistic Budget

Setting a realistic budget is crucial for eco renovation. Start by assessing your financial capacity and prioritizing eco-friendly materials and energy-efficient solutions. Consider long-term savings from reduced energy consumption and potential government incentives. Allocate funds wisely, balancing immediate costs with future benefits. A well-planned budget ensures your project remains sustainable and financially viable without compromising on quality or environmental goals. Research and compare prices to make informed decisions.

Creating a Renovation Timeline

Creating a renovation timeline helps organize and track progress. Start by defining project phases, from planning to completion, with realistic deadlines. Identify key milestones, such as material deliveries and inspections. Consider potential delays and build in flexibility. A clear timeline ensures tasks are completed efficiently, aligning with your budget and eco goals. Regularly review and adjust the schedule to maintain momentum and achieve a successful, stress-free eco renovation.

Working with Professionals

Collaborating with eco-conscious architects, contractors, and designers ensures your renovation aligns with sustainability goals. Their expertise guides material selection, energy efficiency, and eco-friendly practices, enhancing your home’s environmental performance.

Choosing the Right Contractor

Selecting a contractor experienced in eco renovation is crucial. Look for certifications like Passive House or LEED. Review their portfolio for sustainable projects and check client reviews. Ensure they understand your eco goals and can suggest energy-efficient solutions. Discuss their approach to material sourcing and waste reduction. Clear communication about timelines and budgets is essential. A contractor who shares your commitment to sustainability will help achieve your eco-friendly vision effectively and efficiently.

Communicating Your Eco Goals

Clearly expressing your eco objectives to contractors ensures alignment with your sustainable vision. Discuss energy efficiency, material preferences, and waste reduction goals early. Share resources or guides, like Judith Leary-Joyce’s Beginners Guide to Eco Renovation, to set expectations. Regular communication helps avoid misunderstandings and ensures eco-friendly practices are prioritized throughout the project. This collaboration fosters a shared commitment to environmental responsibility and delivers a home that meets your sustainability aspirations.

Local Regulations and Incentives

Understand local green building codes and explore government incentives for eco-friendly renovations. These policies can help make sustainable upgrades more affordable and ensure compliance with environmental standards.

Understanding Green Building Codes

Green building codes set minimum standards for eco-friendly construction and renovation. They cover energy efficiency, water conservation, and sustainable materials. While codes vary by location, they ensure projects meet environmental goals. Understanding these regulations is crucial for compliance and avoiding legal issues. Staying informed about local codes helps homeowners make informed decisions. Adhering to green building codes not only benefits the environment but also enhances property value and reduces long-term costs. They are a cornerstone of sustainable renovation practices.

Exploring Government Incentives

Governments offer various incentives to encourage eco-friendly renovations, such as tax credits, rebates, and grants. These programs aim to reduce the cost of sustainable upgrades like energy-efficient systems or eco-friendly materials. Homeowners can benefit from lower energy bills and increased property value. Research local and national programs to discover eligible projects and requirements. Keeping track of receipts and documentation is essential for claiming incentives. These programs make eco renovation more accessible and financially rewarding for homeowners.

Maintaining an Eco-Friendly Home

Regular energy monitoring, DIY projects, and sustainable practices help maintain an eco-friendly home. Focus on reducing waste, conserving resources, and ensuring long-term environmental benefits for your space.

Post-Renovation Energy Monitoring

After completing your eco renovation, monitoring energy usage is crucial to ensure efficiency. Install smart meters to track consumption and identify areas for further improvement. Regular audits can help maintain optimal performance and verify if your eco-friendly upgrades are delivering expected results. This data-driven approach supports long-term sustainability and helps in making informed decisions for future adjustments, ensuring your home remains energy-efficient and environmentally friendly over time.

Sustainable Maintenance Practices

Sustainable maintenance practices are essential for preserving the eco-friendly features of your home. Regular inspections of insulation, HVAC systems, and energy-efficient appliances ensure optimal performance; Use natural, non-toxic cleaning products and paints to maintain indoor air quality. Implement recycling and composting routines to reduce waste. Seasonal checks on windows, doors, and seals prevent heat loss. These practices not only protect the environment but also lower long-term maintenance costs and promote a healthier living space.

Eco renovation is a meaningful journey that combines sustainability with home improvement. Start by applying the strategies learned and stay committed to eco-friendly practices for lasting impact.

Reviewed Key Takeaways

Eco renovation involves assessing energy consumption, identifying areas for improvement, and using sustainable materials. Reducing waste and ensuring proper insulation are crucial. Switching to LED lighting and energy-efficient appliances significantly lowers energy use. Budgeting and planning, including setting a realistic budget and timeline, are essential. Working with eco-focused contractors and understanding local regulations and incentives can enhance your project’s success. Stay committed to these practices for a greener, more efficient home.

Encouragement to Start Your Eco Renovation Journey

Embarking on an eco renovation journey can feel daunting, but every small step counts. Start by assessing your home’s energy efficiency and identifying simple changes, like switching to LED lighting or improving insulation. Remember, eco renovation is about progress, not perfection. Take inspiration from others who’ve successfully retrofitted their homes. With careful planning and the right support, you can create a healthier, more sustainable living space while reducing your environmental impact for future generations.

honeywell th8320u1008 installation manual pdf

The Honeywell TH8320U1008 installation manual is a comprehensive guide for setting up your programmable thermostat. It ensures proper installation, configuration, and maintenance for optimal performance and efficiency.

Overview of the Honeywell TH8320U1008 Thermostat

The Honeywell TH8320U1008 is a touchscreen programmable thermostat designed for energy efficiency and precise temperature control. It supports up to 3 Heat/2 Cool stages and is compatible with various HVAC systems. Its large, clear display and menu-driven programming simplify setup and operation, making it a user-friendly solution for modern home comfort needs.

Importance of the Installation Manual

The installation manual is crucial for correct setup and operation of the Honeywell TH8320U1008 thermostat. It provides step-by-step instructions, safety guidelines, and troubleshooting tips, ensuring a safe and efficient installation. Adhering to the manual prevents system damage and guarantees optimal performance, making it essential for both installers and users to follow its guidance carefully.

System Requirements and Compatibility

The Honeywell TH8320U1008 thermostat is compatible with 24 Vac heating and cooling systems or 750 mV heating systems. It supports up to 3 Heat/2 Cool stages, ensuring flexibility for various HVAC configurations. The manual outlines specific voltage, wiring, and system requirements for proper installation and functionality.

Supported Heating and Cooling Systems

The Honeywell TH8320U1008 supports up to 3 Heat/2 Cool stages for heat pumps or conventional systems. It is compatible with dehumidification, humidification, or ventilation systems, offering flexibility for various HVAC setups. The thermostat works with 24 Vac systems or 750 mV heating systems, ensuring adaptability for different home configurations and energy requirements.

Voltage and Power Requirements

The Honeywell TH8320U1008 operates on 24 Vac or 750 mV systems. Batteries are optional for backup power if wired to AC. Install fresh batteries immediately when needed to ensure uninterrupted operation and maintain programming during power outages.

Terminal Configurations and Wiring

The Honeywell TH8320U1008 requires proper terminal connections for heating, cooling, and power. The R terminal connects to the heating system’s secondary side. For dehumidification, wire the IAQ relay to the low-speed fan; In two-transformer systems, remove the factory-installed jumper. Ensure all wires are securely connected to avoid malfunctions and ensure safe operation.

Pre-Installation Checklist

Before installation, ensure power is disconnected, gather tools, and verify system compatibility. Remove the old thermostat and prepare the area for the new setup.

Gathering Necessary Tools and Materials

To begin installation, gather essential tools: a screwdriver, pliers, wire strippers, and a drill with bits. Ensure you have wall anchors, screws, and any additional materials specified in the manual. Having all components ready ensures a smooth and efficient setup process without delays.

Disconnecting Power and Safety Precautions

Always disconnect power to the HVAC system before starting installation. Switch off the circuit breaker or remove fuses to ensure safety. Verify power is off using a voltage tester. Handle electrical components carefully to avoid damage or injury. Wear protective gear and follow all safety guidelines outlined in the manual to prevent hazards. Manufacturer instructions must be prioritized for a safe setup.

Removing the Old Thermostat

Gently pull the old thermostat away from the wallplate. Avoid damaging wires or the wall. Disconnect wires carefully, noting their connections. Remove any screws securing the thermostat. Once detached, cover exposed wires and marks on the wall with a plate or cover to protect them during the installation process.

Wallplate Installation

Separate the wallplate from the thermostat and mount it securely. Drill holes based on wall type (drywall or plaster) and ensure the plate is level before securing it.

Separating the Wallplate from the Thermostat

To separate the wallplate, grasp the top and bottom firmly and pull gently to disengage it from the thermostat. This step is crucial for accessing wiring connections and ensures proper installation. Always ensure power is disconnected before proceeding to avoid any electrical risks or damage to the system.

Mounting the Wallplate

Mount the wallplate by drilling 3/16-inch holes for drywall or 7/32-inch holes for plaster. Ensure the wallplate is level before securing it with the provided screws. This step provides a stable base for the thermostat, ensuring proper functionality and alignment. Always follow the manufacturer’s guidelines for secure installation.

Connecting Wires to the Wallplate

Connect the wires to the wallplate terminals, ensuring each wire matches the correct terminal label (e.g., R, W, Y, G, C). Secure the connections firmly to prevent loose wires. Double-check the wiring configuration to avoid mismatches, which could disrupt system operation. Proper connections ensure reliable thermostat performance and safe system functionality. Always refer to the manual for specific terminal assignments.

Wiring the Thermostat

Proper wiring ensures safe and efficient thermostat operation. Match each wire to the correct terminal label and secure connections tightly. Always follow the manual’s instructions for accurate setup and to avoid potential issues.

Identifying Terminal Letters and Their Functions

Each terminal (R, W, Y, G, C, etc.) corresponds to specific HVAC system functions. Match wires to correct terminals as per the manual to ensure proper system operation. Incorrect connections can lead to malfunctions or safety hazards. Refer to the terminal chart in the manual for accurate wiring configurations and functions.

Connecting Wires to the Thermostat Terminal

Connect wires to the thermostat terminals by matching each wire to the correct terminal (R, W, Y, G, C, etc.) as per the HVAC system’s configuration. Ensure proper connections to avoid malfunctions or safety risks. Refer to the manual for specific wiring instructions and double-check connections before powering on the system.

Configuring the IAQ Relay for Dehumidification

Configure the IAQ relay for dehumidification by setting it to normally open or normally closed, depending on your HVAC system. Wire the IAQ relay to the low-speed fan for proper dehumidification control. Refer to the manual for specific instructions to ensure correct setup and optimal performance. Backup power via batteries is optional if using AC.

Thermostat Configuration

Configure your thermostat by selecting system type, heat/cool stages, and scheduling preferences. Use the menu-driven interface for easy setup, ensuring optimal performance and energy efficiency.

Setting the Time and Date

Access the menu to set the time and date accurately. Use the touchscreen to navigate to the clock settings, select the correct time format, and adjust as needed. Ensure the date is set properly for scheduling functionality. Accurate time and date settings are crucial for proper thermostat operation and programmed schedules.

Selecting the System Type and Stages

Access the menu to select the system type (heat pump or conventional) and configure the number of heating and cooling stages. Choose up to 3 heat and 2 cool stages for optimal performance. Proper selection ensures the thermostat operates efficiently with your HVAC system, aligning settings with its capabilities for precise temperature control.

Configuring Heat and Cool Settings

Set temperature ranges, differential, and timing for heating and cooling. Use the menu to adjust heat and cool settings according to your preferences. Ensure the temperature range is appropriate for your system and adjust the timing for accurate temperature control. Proper configuration ensures efficient operation and maintains comfort levels consistently.

Testing the Installation

Power on the thermostat and verify basic operations. Check heating, cooling, and system transitions. Ensure all functions operate correctly and settings are responsive for optimal performance.

Powering On the Thermostat

After installation, ensure the thermostat is properly connected to power. If using batteries, install fresh ones. Turn on the system at the circuit breaker. The display should light up, showing the time and temperature. Verify all buttons and functions respond correctly. If issues arise, consult the manual for troubleshooting steps.

Checking Basic Operations

After installation, power on the thermostat and ensure the display shows the current time and temperature. Test all buttons to confirm they respond correctly. Check the fan and system operations to ensure they cycle on and off as commanded. Verify there are no error messages. If issues arise, consult the manual for troubleshooting steps.

Verifying System Performance

After installation, verify the system’s heating and cooling functions by running a full cycle. Ensure the thermostat accurately maintains the set temperature and stage changes occur as programmed. Check for consistent airflow and proper dehumidification or ventilation if configured. Confirm all programmed schedules and settings operate smoothly without errors or delays.

Programming the Thermostat

Program schedules and settings using the menu-driven interface. Set temperature preferences, enable dehumidification, and configure ventilation for energy efficiency and comfort.

Menu-Driven Programming Features

The Honeywell TH8320U1008 features an intuitive menu-driven interface, simplifying the programming process. Users can easily navigate through options to set schedules, temperature preferences, and system configurations.

This design ensures effortless setup and customization, allowing for precise control over heating, cooling, and ventilation systems. The interface streamlines adjustments for optimal energy efficiency and comfort.

Setting Up Schedules

The Honeywell TH8320U1008 allows users to create custom schedules for heating and cooling. Program temperature settings for different times of the day, including weekdays and weekends. This feature enhances energy efficiency by automating system operation based on your daily routine, ensuring comfort while optimizing energy usage and reducing waste.

Enabling Dehumidification and Ventilation

Enable dehumidification and ventilation through the IAQ Relay configuration. This feature allows control of humidity levels and fresh air circulation. Proper setup ensures balanced indoor air quality and system efficiency. Follow the manual’s guidelines to configure these settings accurately for optimal home comfort and energy savings year-round.

Troubleshooting Common Issues

Address common issues like blank screens, incorrect temperature readings, or communication errors. Refer to the manual for diagnostic steps and solutions to ensure proper thermostat functionality.

Blank Screen or No Response

A blank screen or no response indicates a potential power issue. Check if batteries are installed correctly or if the thermostat is properly connected to power. Ensure wires are securely attached and no loose connections exist. Resetting the thermostat by removing batteries or power for 30 seconds may resolve the issue;

Incorrect Temperature Readings

Incorrect temperature readings can occur due to calibration issues or sensor malfunctions. Check the calibration settings in the manual. Ensure the thermostat is mounted level and away from direct sunlight or heating vents. Verify all wires are secure and there’s no power fluctuation. If issues persist, consult the manual for troubleshooting steps.

Communication Errors

Communication errors may occur if the thermostat loses connection with the system. Check the display for error codes and ensure all wires are securely connected. Verify the IAQ relay configuration and power supply. If issues persist, restart the thermostat or consult the manual for advanced troubleshooting steps to restore functionality.

Maintenance and Care

Regularly clean the thermostat screen and check for dust buildup. Replace batteries as needed and update software for optimal performance and functionality.

Cleaning the Thermostat

Regularly clean the thermostat screen and housing with a soft, dry cloth to remove dust and debris. Avoid harsh chemicals or liquids, which may damage the display; Turn off power before cleaning for safety. Ensure the screen is dry to prevent moisture damage and maintain accurate temperature readings.

Replacing Batteries

Check if your Honeywell TH8320U1008 model requires batteries. Purchase AA alkaline batteries for backup power. Power down the thermostat, remove it from the wallplate, and access the battery compartment on the back. Install new batteries, ensuring correct terminal alignment. Reattach the thermostat and verify the display. Refer to the manual for specific instructions.

Updating Software

Regular software updates ensure optimal performance and new features for your Honeywell TH8320U1008 thermostat. Check Honeywell’s official website for the latest updates. Download the update file, transfer it to a USB drive, and insert it into the thermostat’s USB port. Follow on-screen instructions to complete the update. Ensure the thermostat remains powered on during the process.

Safety Precautions

Always disconnect power before starting installation. Follow proper electrical safety practices and manufacturer guidelines to avoid hazards. Ensure the installation is performed by a trained technician.

Proper Installation Practices

Adhere to all safety guidelines and manufacturer instructions during installation. Ensure the thermostat is mounted correctly and wires are securely connected to avoid system malfunctions. Use appropriate tools and follow step-by-step instructions to guarantee a safe and efficient setup. Proper installation ensures optimal performance and prevents potential hazards.

Handling Electrical Components Safely

Always disconnect power before handling electrical components. Use appropriate tools and avoid touching live wires. Ensure all connections are secure and follow manufacturer guidelines to prevent electrical hazards. Proper handling ensures safety and prevents damage to the thermostat or connected systems.

Following Manufacturer Guidelines

Adhering to Honeywell’s instructions ensures proper installation, safety, and system compatibility. Deviating from guidelines can lead to malfunctions or hazards. Always follow recommended steps for wiring, configuration, and safety precautions to guarantee optimal performance and reliability of your Honeywell TH8320U1008 thermostat;

The Honeywell TH8320U1008 installation manual provides a clear pathway to successful thermostat setup. Follow the guide for energy efficiency, optimal performance, and hassle-free temperature control. Refer to the manual for future adjustments and troubleshooting to ensure continued reliability and functionality of your thermostat.

Final Checks and Verification

After installation, perform final checks to ensure all systems function correctly. Verify thermostat operation, system performance, and wiring connections. Test heating, cooling, and dehumidification modes. Confirm time, date, and schedules are set. Check for any error messages and ensure the thermostat is properly powered. Refer to the manual for troubleshooting if issues arise.

Ensuring Optimal Performance

Regularly clean the thermostat’s screen and check wire connections. Update software for the latest features and bug fixes. Reset the system after updates to ensure proper functionality. Configure the IAQ relay for dehumidification and ventilation. Verify all settings align with your system requirements. Refer to the manual for future adjustments.

Referencing the Manual for Future Adjustments

The Honeywell TH8320U1008 manual is essential for future adjustments, offering detailed guides for system configurations and troubleshooting. Downloadable as a PDF, it provides easy access to instructions for optimizing performance. Regularly reviewing the manual ensures compliance with manufacturer guidelines and helps resolve issues efficiently. Contact Honeywell support for additional assistance.