The EZ Bow Maker simplifies crafting beautiful bows, offering 16 bow types via an included instruction booklet! It’s a quick assembly, perfect for spreading cheer with ribbon and pipe cleaners.
What is an EZ Bow Maker?
The EZ Bow Maker is a crafting tool designed to effortlessly create a wide variety of bows for numerous applications. This innovative device, currently a top-rated option on Amazon, streamlines the bow-making process, eliminating the need for complex tools or power tools.
Featuring a 7-inch spool dowel – ideal for stacking ribbon rolls – and a detachable spool holder, the EZ Bow Maker offers convenience and versatility. It’s particularly useful for those seeking a simpler alternative to traditional methods or DIY bow maker construction. The included booklet guides users through 16 distinct bow styles, including festive designs like angel and Santa Claus bows.
Benefits of Using an EZ Bow Maker
The EZ Bow Maker provides a remarkably simple and quick method for crafting beautiful bows, making it ideal for both beginners and experienced crafters. Its ease of assembly – simply tapping the dowels into place – saves valuable time and effort.
This tool is especially beneficial for individuals with arthritis or hand pain, offering a less strenuous alternative to traditional techniques; The EZ Bow Maker’s versatility extends to various projects, including gift wrapping, hair bows, Christmas decorations, and wreath embellishments, fostering creativity and spreading happiness.
EZ Bow Maker vs. Traditional Bow Making
Compared to traditional bow making, the EZ Bow Maker streamlines the process, eliminating the need for complex hand manipulations and potentially frustrating techniques. While DIY bow makers are an option – even with readily available Dollar Tree supplies – the EZ Bow Maker offers a pre-fabricated, sturdy solution without requiring power tools.
Alternatives like Bowdabra and Pro Bow exist, but the EZ Bow Maker distinguishes itself with its quick assembly and included instructions for 16 distinct bow styles, including angel and Santa Claus designs, making it a convenient choice.

Understanding the Components
The EZ Bow Maker features a 7-inch spool dowel, a stable base, and a detachable spool holder for easy ribbon management during crafting projects.
Spool Dowel Functionality
The spool dowel within the EZ Bow Maker is a crucial component, standing at a generous 7 inches in height. This substantial height allows crafters to conveniently stack multiple rolls of ribbon simultaneously, streamlining the bow-making process and reducing interruptions for ribbon changes. Simply tap the dowels into place for quick and easy assembly – no complex tools or frustrating setups are required. This feature is particularly beneficial for projects requiring a variety of ribbon colors or materials, ensuring a smooth and efficient workflow. It’s designed for both beginners and experienced bow makers alike, enhancing overall crafting enjoyment.
The Role of the Base
The base of the EZ Bow Maker provides a stable and secure foundation for all your bow-making endeavors. It’s engineered to withstand the tension created during ribbon winding and bow formation, ensuring consistent results with every creation. This sturdy construction is vital for maintaining precision and preventing unwanted movement while crafting. Combined with the spool dowel, the base facilitates a seamless workflow, allowing crafters to focus on design and creativity. Its simple design contributes to the overall ease of use, making it accessible for all skill levels and project types.
Detachable Spool Holder Explained
The detachable spool holder is a key feature of the EZ Bowz Stow & Go Bow Maker, enhancing its versatility and convenience. This innovative design allows users to easily switch between different ribbon spools, streamlining the bow-making process and saving valuable time. The holder securely fastens to the base, providing stability while winding, yet detaches effortlessly for quick ribbon changes. This feature is particularly useful when working with multiple colors or ribbon widths, enabling seamless transitions between designs and maximizing creative possibilities.
Included Instruction Booklet Overview
The EZ Bow Maker comes with a comprehensive instruction booklet, guiding users through 16 distinct bow-making techniques. Beyond basic bows, it includes bonus instructions for crafting specialized designs like charming angel bows and festive Santa Claus bows, perfect for seasonal decorations. The booklet provides clear, step-by-step guidance, making it accessible for both beginners and experienced crafters. It simplifies the process, ensuring successful results and unlocking the full potential of the bow maker for various projects, from gift wrapping to wreath embellishments.
Setting Up Your EZ Bow Maker
Assembly is simple – just tap the dowels into place! Prepare your ribbon, choosing the right type for your project, and you’re ready to begin crafting.
Assembling the Bow Maker
The EZ Bow Maker boasts a remarkably straightforward assembly process, designed for crafters of all skill levels. Forget complicated tools or frustrating instructions; this bow maker prioritizes ease of use. Simply take the provided dowels and firmly tap them into their designated slots within the base.
The design ensures a secure fit, creating a stable foundation for your bow-making endeavors. A seven-inch spool dowel height allows for stacking multiple ribbon rolls, streamlining your workflow and keeping your materials readily accessible. This quick setup means you’ll spend less time assembling and more time creating beautiful bows!
Attaching the Spool Dowel
Securing the spool dowel is a pivotal step in preparing your EZ Bow Maker for crafting. As previously mentioned, the dowel features a generous seven-inch height, ideal for accommodating stacked ribbon rolls. This eliminates constant material changes during your projects, boosting efficiency.
To attach, simply align the base of the spool dowel with the corresponding opening on the EZ Bow Maker’s base. Apply firm, even pressure to insert the dowel fully. The snug fit ensures stability while you work, preventing wobbling or accidental dislodgement. A properly attached spool dowel is key to smooth, enjoyable bow making!
Preparing Your Ribbon
Before commencing bow creation, proper ribbon preparation is essential for optimal results with your EZ Bow Maker. Select ribbons suited to your project – consider width, material, and color. Ensure the ribbon is smoothly unrolled, free from kinks or tangles, to prevent snags during the bow-making process.
Load the ribbon onto the spool dowel, leaving a sufficient length extending for initial bow formation. The seven-inch dowel height allows for multiple ribbon rolls, minimizing interruptions. A well-prepared ribbon guarantees clean, professional-looking bows every time, enhancing your crafting experience!
Choosing the Right Ribbon for Your Project
Selecting the appropriate ribbon is crucial for achieving desired aesthetic results with the EZ Bow Maker. Consider the project’s purpose: gift wrapping benefits from vibrant, glossy ribbons, while wreaths may require weather-resistant options. Ribbon width impacts bow size and fullness – wider ribbons create bolder statements.
Experiment with materials like satin, grosgrain, or sheer ribbon to achieve varied textures and visual effects. The EZ Bow Maker accommodates diverse ribbon types, but ensure compatibility for smooth operation. Thoughtful ribbon selection elevates your crafts!

Basic Bow Making Techniques
Mastering simple bows with the EZ Bow Maker is easy! Learn to create single and double ribbon bows, securing them neatly with included twist ties for beautiful results.
Creating a Simple Ribbon Bow
Begin your bow-making journey with the EZ Bow Maker by selecting your desired ribbon and preparing it for use. The tool’s design allows for quick and effortless bow creation, even for beginners. Simply position the ribbon around the spool dowel, ensuring it’s centered and secure.
Then, begin winding the ribbon, maintaining consistent tension for a balanced bow. The included instruction booklet provides visual guidance for achieving the perfect loop size and shape. Once you’ve reached your desired fullness, use the provided twist tie to firmly cinch the center, creating a classic, beautiful ribbon bow.
Adjust the loops and tails to customize your creation!
Making a Double Ribbon Bow
Elevate your bow designs with a double ribbon bow using the EZ Bow Maker! Start by layering two complementary ribbons around the spool dowel, ensuring both are evenly distributed. Wind both ribbons simultaneously, maintaining consistent tension to create balanced loops.
The EZ Bow Maker simplifies this process, allowing for effortless layering and shaping. Refer to the instruction booklet for guidance on achieving the desired fullness and proportion. Once satisfied with the loops, secure the center firmly with a twist tie.
Fluff and adjust the ribbons for a stunning, dimensional effect!
Securing the Bow with Twist Ties
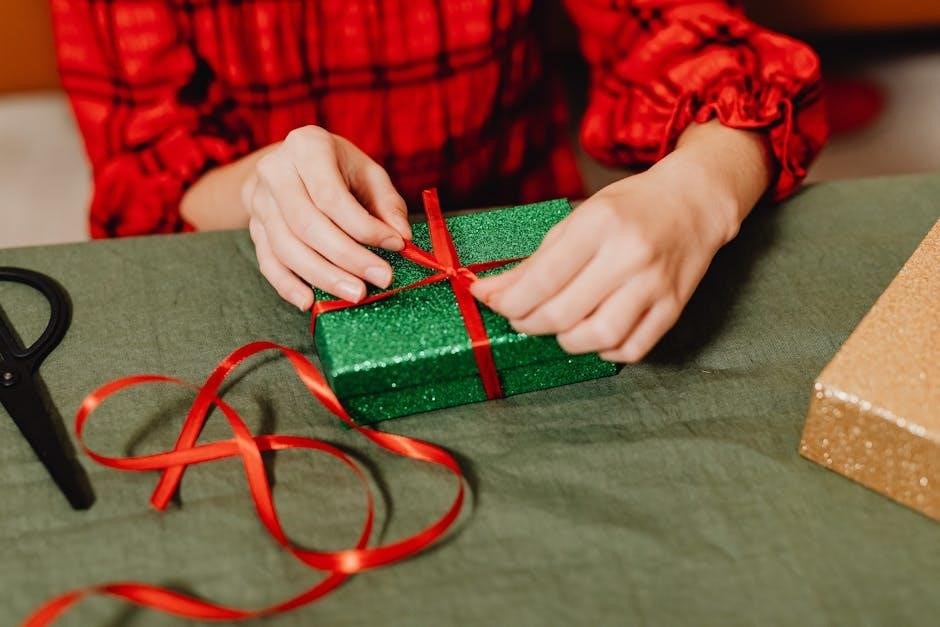
Properly securing your bow is crucial for lasting creations! After forming your desired loops with the EZ Bow Maker, utilize the included twist ties to tightly bind the bow’s center. Insert the twist tie through the channel created by the ribbons, then twist firmly until the bow feels secure and maintains its shape.
Don’t overtighten, as this could damage the ribbon. The twist tie should hold the loops in place without constricting them excessively. This simple step ensures your beautiful bows remain intact for gift wrapping, wreaths, or any craft project!
Adjusting Bow Size and Shape
The EZ Bow Maker offers versatility in bow creation! Adjusting size is achieved by varying the ribbon length used – longer ribbons yield larger bows. Shape manipulation comes from gently spreading or compressing the loops after initial formation. Experiment with different ribbon widths for varied aesthetics.
The 7-inch spool dowel allows for stacking ribbon rolls, aiding in creating voluminous bows. Remember, slight adjustments to loop tension and twist tie placement refine the final form. Practice makes perfect; explore to discover your preferred bow styles!

Advanced Bow Styles
Unlock creativity with angel and Santa Claus bow instructions! The EZ Bow Maker excels at crafting intricate designs for wreaths, tree tops, and festive décor.
Crafting Angel Bows
Creating ethereal angel bows with the EZ Bow Maker is surprisingly achievable! The included bonus instructions guide you through layering ribbons to mimic feathered wings, adding a heavenly touch to your crafts. Begin by selecting soft, flowing ribbons in white or pastel shades. Utilize the spool dowel to create loops of varying sizes, forming the angel’s wings.
Secure these loops tightly with twist ties, ensuring a balanced and symmetrical appearance. A smaller loop can represent the angel’s head, positioned centrally. Experiment with different ribbon textures and widths to enhance the angelic effect. These bows are perfect for adorning Christmas trees, wreaths, or gift packaging, bringing a touch of celestial beauty to any project.
Designing Santa Claus Bows
The EZ Bow Maker simplifies crafting charming Santa Claus bows, thanks to the bonus instructions provided! Begin with classic red and white ribbons, representing Santa’s iconic suit. Use the spool dowel to create loops, layering red over white to achieve a festive look. Secure these loops firmly with twist ties, ensuring a neat and robust construction.
Consider adding a small white “fur” trim using a narrow ribbon, mimicking the fluffy edges of Santa’s hat. These delightful bows are ideal for embellishing Christmas gifts, wreaths, or tree toppers, instantly adding a touch of holiday cheer. Experiment with ribbon widths for varied textures!
Creating Wreath Bows
The EZ Bow Maker excels at crafting stunning wreath bows, perfect for seasonal décor! Utilize a variety of ribbons – plaid, velvet, or burlap – to complement your wreath’s theme. The 7-inch spool dowel accommodates multiple ribbon rolls, allowing for layered, textured bows. Begin by creating generous loops, securing each layer with twist ties for durability.
Experiment with different loop sizes and ribbon combinations to achieve desired fullness and shape. Attach the finished bow securely to your wreath using wire or ribbon, ensuring it remains firmly in place. These bows elevate any wreath, adding a professional, polished finish!
Making Tree Top Bows
The EZ Bow Maker is ideal for creating impressive tree top bows, adding a festive focal point to your Christmas tree! Employ wider ribbons, like satin or grosgrain, for a luxurious look. The detachable spool holder simplifies working with multiple ribbon colors and textures. Construct large, cascading loops, securing them tightly with twist ties to maintain shape and volume.
Consider adding embellishments like ornaments or berries for extra sparkle. Ensure the bow is securely attached to the tree topper using wire or strong ribbon, preventing it from toppling over.

EZ Bow Maker for Specific Crafts
The EZ Bow Maker excels in diverse crafts – gift wrapping, hair bows, Christmas decor, and wreaths! It’s a versatile tool for beautiful, consistent results.
Bow Making for Gift Wrapping
Elevate your gift presentation with stunning bows effortlessly created using the EZ Bow Maker! This tool simplifies the process, allowing for consistently beautiful results, even for those new to crafting. Forget struggling with traditional methods; the EZ Bow Maker delivers professional-looking bows in minutes.
Whether you’re wrapping presents for birthdays, holidays, or special occasions, the EZ Bow Maker adds a touch of elegance. Utilize various ribbon widths and textures to customize your bows, perfectly complementing the gift wrap. The included instructions guide you through creating simple and elaborate designs, ensuring a polished finish every time. Spread happiness with beautifully wrapped gifts!
Hair Bow Creation with the EZ Bow Maker
Unleash your creativity and design adorable hair bows with the EZ Bow Maker! This versatile tool is perfect for crafting unique accessories for children, teens, or even yourself. Easily create bows in various sizes, colors, and styles to match any outfit or occasion.
The EZ Bow Maker simplifies the process, eliminating the frustration of traditional bow-making techniques. Experiment with different ribbon materials, including grosgrain, satin, and velvet, to achieve diverse textures and looks. Secure your creations with twist ties for lasting durability. Enjoy the satisfaction of handmade hair accessories!
Using the EZ Bow Maker for Christmas Decor
Transform your home into a winter wonderland with stunning Christmas decorations crafted using the EZ Bow Maker! Easily create festive bows for your Christmas tree, wreaths, garlands, and gift wrapping. Design elegant tree top bows or charming embellishments for wreaths, spreading holiday cheer throughout your home.
The EZ Bow Maker simplifies crafting angel and Santa Claus bows, adding a personalized touch to your décor. Utilize various ribbon colors and textures to complement your existing Christmas theme. Enjoy the ease and efficiency of this tool, making holiday preparations a breeze!
Crafting Bows for Wreaths
Elevate your wreath designs with professionally-looking bows created effortlessly using the EZ Bow Maker! This tool is ideal for crafting bows of any size and complexity, perfectly suited for seasonal wreaths or year-round door décor. The detachable spool holder allows for seamless ribbon changes, streamlining the bow-making process.
Whether you’re creating a classic holiday wreath or a welcoming springtime display, the EZ Bow Maker delivers consistent results. Secure your finished bows with twist ties for lasting durability. Explore different ribbon combinations to achieve a unique and personalized wreath accent!

Troubleshooting Common Issues
Address ribbon slipping, securing difficulties, or dowel instability with simple adjustments! Remember, there are no returns on the EZ Bow Maker itself.
Ribbon Slipping Problems
Experiencing ribbon slippage while using your EZ Bow Maker? This is a common issue, but easily remedied! Ensure the ribbon is tightly secured before beginning to create your bow. A firmer grip on the ribbon as you wrap it around the spool dowel can significantly reduce slippage.
Consider using slightly textured ribbons, as they tend to hold better than very slick materials. Also, double-check that the spool dowel is firmly seated in the base, providing a stable surface for the ribbon. If problems persist, experiment with different ribbon widths and materials to find what works best with your EZ Bow Maker.
Difficulty Securing the Bow
Struggling to securely fasten your finished bow created with the EZ Bow Maker? Utilizing twist ties is crucial! Ensure you’re tightly cinching the ribbon layers together in the center before tying off with the twist tie. Don’t be afraid to use multiple twist ties for extra security, especially with thicker ribbons or layered bows.
Experiment with different tightness levels of the twist ties – too loose, and the bow will unravel; too tight, and you risk damaging the ribbon. A firm, secure knot is key to a lasting, beautiful bow!
Spool Dowel Instability
Experiencing wobble with the spool dowel on your EZ Bow Maker? Remember, simple assembly involves tapping the dowels firmly into place. Ensure each dowel is fully seated within the base to prevent shifting during ribbon winding. A stable spool dowel is vital for even ribbon distribution and consistent bow creation.
The 7-inch height of the dowel allows for stacking ribbon rolls, but excessive weight can contribute to instability. If issues persist, double-check the base is on a level surface and the dowels are securely fitted.
Understanding the Return Policy
Please carefully review the EZ Bow Maker’s return policy before purchasing. It’s important to note that there are no returns accepted for bows themselves, any custom-made orders, ribbons purchased alongside the maker, complete kits, or items specifically marked as ‘sale’ items.
Furthermore, digital products are also non-refundable. This policy extends directly to the EZ Bowmaker tool itself. Be certain this crafting tool suits your needs, as returns aren’t possible post-purchase. Consider online tutorials before buying!

DIY Alternatives and Comparisons
For DIY enthusiasts, creating a sturdy bow maker is possible with Dollar Tree supplies and hot glue, or compare to options like Bowdabra and Pro Bow.
Building a DIY Bow Maker
If you prefer a hands-on approach, constructing your own bow maker is achievable and cost-effective. Utilizing readily available materials from stores like Dollar Tree, and a hot glue gun, you can replicate the functionality of commercial options. This DIY route eliminates the need for power tools, appealing to those seeking a simpler method.
Furthermore, an SVG file is available to add a ruler directly to your homemade creation, enhancing precision. This allows for consistent bow sizing and a professional finish. Building your own offers customization and a sense of accomplishment, proving a viable alternative to purchasing an EZ Bow Maker.

Comparing EZ Bow Maker to Bowdabra
When considering bow-making tools, the EZ Bow Maker and Bowdabra are popular choices. Both aim to simplify the process, but differ in approach. The EZ Bow Maker boasts a spool dowel height of 7 inches, accommodating stacked ribbon rolls, and quick assembly with tappable dowels.
Bowdabra, while well-known, may require more manual dexterity. The EZ Bow Maker’s detachable spool holder adds convenience, while Bowdabra relies on its unique wand system. Ultimately, the best choice depends on individual preference and crafting needs, but the EZ Bow Maker offers ease and efficiency.
EZ Bow Maker vs. Pro Bow
Comparing the EZ Bow Maker to the Pro Bow reveals distinct approaches to bow creation. The Pro Bow, often called “the Hand,” is a manual tool requiring more technique and practice for consistent results. The EZ Bow Maker, however, prioritizes simplicity with its quick assembly and included instruction booklet for 16 bow styles.
The EZ Bow Maker’s spool dowel and detachable holder streamline ribbon management, a feature not typically found in the Pro Bow. While the Pro Bow offers versatility, the EZ Bow Maker excels in user-friendliness, especially for those with limited dexterity.

Resources and Further Learning
Expand your skills with online tutorials, vibrant EZ Bow Maker forums, and customizable SVG files – all designed to elevate your bow-making journey!
Online Tutorials and Videos
Dive into a world of visual learning! Numerous online tutorials and videos demonstrate the EZ Bow Maker’s capabilities, from basic ribbon bows to intricate designs like angel and Santa Claus bows. These resources are invaluable for beginners seeking step-by-step guidance. Many creators showcase techniques for gift wrapping, hair bows, Christmas décor, and wreath embellishments.
Search platforms like YouTube and crafting websites for demonstrations of double ribbon bows and advanced styles. These videos often highlight how the EZ Bow Maker eases crafting, especially for individuals with hand pain. Explore content showcasing the detachable spool holder and proper ribbon preparation for optimal results.
EZ Bow Maker Forums and Communities
Connect with fellow enthusiasts! EZ Bow Maker forums and online communities provide a space to share tips, ask questions, and showcase creations. These platforms are excellent for troubleshooting common issues like ribbon slipping or securing bows. Members often exchange ideas for customizing projects and utilizing SVG files for personalized designs.
Engage in discussions about ribbon choices, spool dowel functionality, and alternative DIY bow maker methods. Discover insights from experienced users regarding the EZ Bow Maker versus competitors like Bowdabra and Pro Bow. These communities foster a collaborative environment for all skill levels.
SVG Files for Customization
Unlock creative potential! SVG files allow for personalized enhancements to your EZ Bow Maker experience. Users are creating and sharing designs, including rulers that can be added to DIY bow maker versions. These files enable customization of the bow maker itself, adding functional elements or decorative touches.
Utilize SVG files with cutting machines to create templates for unique bow shapes or embellishments. Explore online resources for pre-made designs or learn to create your own. This opens doors to truly bespoke bow-making projects, elevating your crafts beyond standard techniques.
Where to Purchase an EZ Bow Maker
Finding your EZ Bow Maker is easy! Currently, Amazon appears to be a primary retailer, often showcasing it as a best-rated option. The “EZ Bowz Stow amp; Go Bow Maker” with a detachable spool holder is readily available through their platform. Explore online marketplaces and craft supply stores for potential availability.
Keep an eye out for sales and promotions to secure the best price. Remember that direct purchases from the manufacturer or authorized dealers may also be an option. Check for bundled kits including ribbons and twist ties for a complete crafting experience!