dental assistant study guide

Dental Assistant Study Guide: A Comprehensive Plan

Embarking on a dental assisting career requires dedication! Certification is key to success, demanding thorough preparation and passing a comprehensive exam to demonstrate essential skills and knowledge․

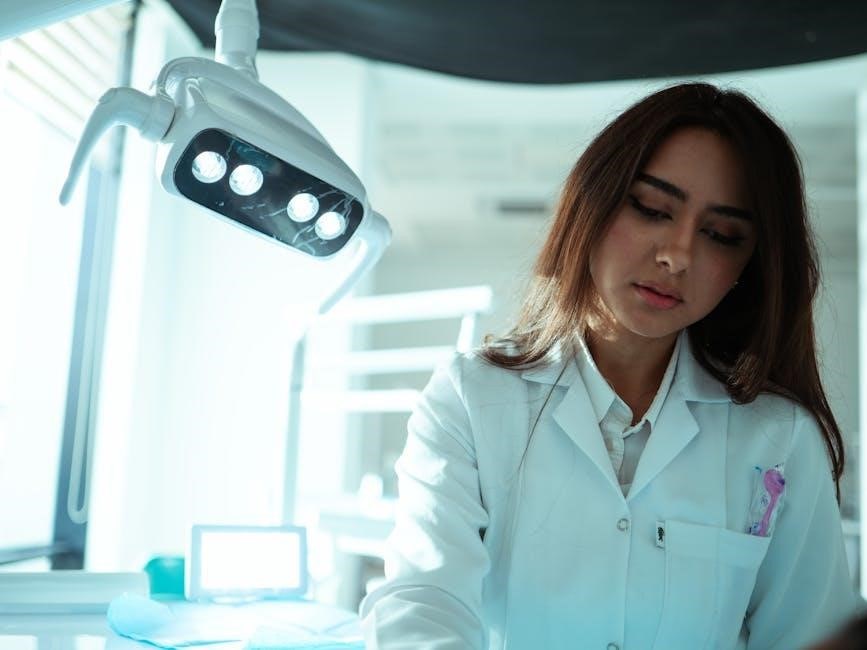
Dental assistants are vital members of the dental healthcare team, working closely with dentists to provide exceptional patient care; Their role extends far beyond simply handing instruments; it’s a multifaceted position demanding a diverse skillset and unwavering commitment to patient comfort and safety․

Core responsibilities include preparing treatment rooms, assisting the dentist during procedures, taking and developing dental radiographs, and providing post-operative instructions․ They also manage patient records, schedule appointments, and ensure a sterile environment․ A successful dental assistant possesses excellent communication skills, attention to detail, and a strong understanding of dental terminology and procedures․

The demand for qualified dental assistants is consistently high, offering excellent career stability and growth potential․ This guide serves as a comprehensive resource for aspiring and current dental assistants, covering essential knowledge, practical skills, and the pathways to certification and professional development․ Mastering these elements is crucial for thriving in this dynamic and rewarding profession, ultimately contributing to positive patient outcomes and a successful dental practice․

II․ Educational Pathways for Dental Assistants

Several routes lead to a fulfilling career as a dental assistant, each with varying levels of education and training․ The most common pathways include vocational school programs, community college courses, and on-the-job training․ Vocational schools typically offer certificate programs lasting several months, focusing on practical skills and preparing students for entry-level positions․

Community colleges provide Associate’s degrees in Dental Assisting, offering a more comprehensive education encompassing theoretical knowledge, clinical experience, and general education courses․ This degree often enhances career prospects and earning potential․ On-the-job training, while less common, involves learning directly from experienced dental assistants under the supervision of a dentist․

Choosing the right pathway depends on individual goals and circumstances․ Certificate programs offer a quick entry into the field, while an Associate’s degree provides a broader foundation and potential for advancement․ Regardless of the chosen path, seeking accreditation from recognized organizations like the Commission on Dental Accreditation (CODA) is crucial to ensure program quality and eligibility for certification exams․

III․ Accredited Dental Assistant Programs

Selecting an accredited Dental Assistant program is paramount for ensuring a high-quality education and future career success․ Accreditation, primarily through the Commission on Dental Accreditation (CODA), signifies that a program meets rigorous standards for curriculum, faculty, and clinical facilities․ CODA-accredited programs are essential for eligibility to sit for the Certified Dental Assistant (CDA) examination administered by the Dental Assisting National Board (DANB)․

When researching programs, verify their accreditation status directly on the CODA website (www․codaeducation․org)․ Accredited programs typically offer a well-structured curriculum covering foundational sciences, dental procedures, infection control, and office management․ They also provide ample clinical experience in a supervised dental setting․

Beyond CODA accreditation, consider program reputation, job placement rates, and student testimonials․ Visiting campuses and speaking with current students and faculty can provide valuable insights․ Investing in an accredited program demonstrates a commitment to professional excellence and significantly enhances employment opportunities within the dental field․

IV․ Core Curriculum: Foundational Knowledge

A robust core curriculum forms the bedrock of a successful dental assisting career․ Foundational knowledge encompasses a diverse range of subjects, meticulously designed to prepare assistants for the multifaceted demands of the profession․ This begins with a strong understanding of human anatomy and physiology, specifically as it relates to the oral cavity, teeth, and surrounding structures․

Essential coursework includes comprehensive dental terminology, enabling effective communication within the dental team and accurate charting of patient information․ Dental materials science is crucial, covering the properties, handling, and clinical applications of various materials used in restorative and preventative dentistry․

Furthermore, a solid grasp of infection control principles, sterilization techniques, and relevant legal regulations (OSHA and HIPAA) is non-negotiable․ These core elements, combined with practical training, equip dental assistants with the necessary skills and knowledge to provide safe, efficient, and high-quality patient care․

V․ Dental Terminology & Anatomy

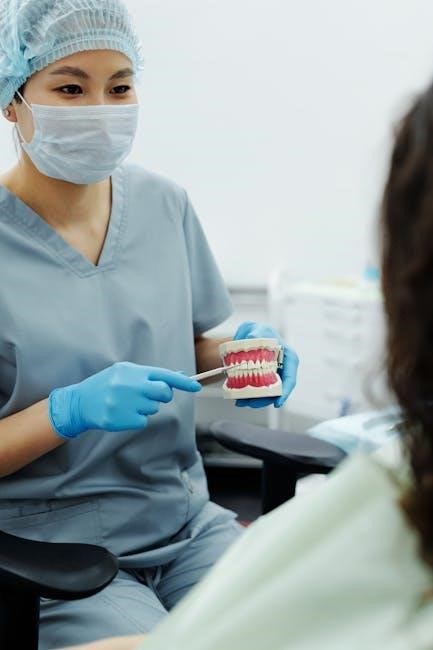
Mastering dental terminology and anatomy is paramount for effective communication and accurate clinical practice․ A comprehensive understanding of these subjects allows dental assistants to confidently interpret instructions, document procedures, and interact professionally with patients and colleagues․ Terminology extends beyond simple word definitions; it involves understanding prefixes, suffixes, and root words to decipher complex medical jargon․

Anatomical study focuses on the oral cavity, including teeth, gums, tongue, and supporting structures․ Assistants must be able to identify and locate these structures accurately, both visually and through radiographic images․ Knowledge of tooth numbering systems (Universal, FDI) is also essential for precise charting and record-keeping․

Furthermore, understanding the relationship between anatomy and physiology – how structures function – is crucial․ This foundational knowledge supports successful chairside assisting, accurate instrument handling, and effective patient education, ultimately contributing to optimal patient care․

VI․ Dental Materials Science

Dental Materials Science is a cornerstone of modern dentistry, and a dental assistant’s understanding is vital․ This field encompasses the properties, composition, and manipulation of materials used in restorative, preventative, and prosthetic treatments․ Assistants must recognize a wide array of materials, including amalgams, composites, ceramics, and impression materials․

Crucially, understanding material characteristics – such as strength, elasticity, and biocompatibility – informs proper handling and application․ Knowing how materials interact with oral tissues and other dental materials prevents complications and ensures treatment longevity․ Assistants play a key role in material preparation, mixing, and delivery to the dentist․

Furthermore, familiarity with newer materials and technologies, like resin-based composites and CAD/CAM materials, is increasingly important․ A solid grasp of dental materials science empowers assistants to contribute effectively to high-quality dental care and maintain a safe, efficient clinical environment․

VII․ Infection Control Protocols

Infection control is paramount in dental settings, safeguarding both patients and the dental team․ Strict adherence to established protocols minimizes the risk of cross-contamination and the spread of infectious diseases․ Dental assistants are at the forefront of these efforts, responsible for implementing and maintaining a sterile environment․

Key protocols include proper hand hygiene, utilizing personal protective equipment (PPE) – gloves, masks, eyewear, and gowns – and meticulous surface disinfection․ Understanding the difference between sterilization, disinfection, and sanitation is crucial․ Assistants must be proficient in handling and disposing of sharps safely, following regulated waste management procedures․

Moreover, knowledge of bloodborne pathogens and airborne disease transmission is essential․ Implementing barrier techniques, like using disposable materials and protective coverings, further reduces contamination risks․ Consistent training and updates on evolving infection control guidelines are vital for maintaining a safe and compliant dental practice․

VIII․ Sterilization and Disinfection Techniques

Mastering sterilization and disinfection is a cornerstone of a dental assistant’s role․ These processes eliminate or reduce harmful microorganisms on dental instruments and surfaces, preventing infection transmission․ Sterilization, the complete elimination of all microorganisms, is achieved through methods like autoclaving – utilizing high-pressure steam – and chemical sterilization․

Disinfection, a less rigorous process, reduces the number of microorganisms but doesn’t necessarily eliminate all․ Various chemical disinfectants are used for surfaces and instruments that cannot withstand sterilization temperatures․ Understanding dwell times – the required contact period for effective disinfection – is critical․

Dental assistants are responsible for operating and monitoring sterilization equipment, ensuring proper loading and cycle completion․ They must also meticulously inspect instruments for cleanliness and integrity before and after sterilization․ Proper packaging and storage of sterilized instruments are vital to maintain sterility․ Regular biological testing verifies the effectiveness of sterilization cycles, guaranteeing patient safety and practice compliance․

IX․ OSHA and HIPAA Compliance

Understanding and adhering to Occupational Safety and Health Administration (OSHA) and Health Insurance Portability and Accountability Act (HIPAA) regulations is paramount for dental assistants․ OSHA focuses on workplace safety, mandating protocols to protect employees from hazards like exposure to infectious materials, radiation, and chemical substances․

Key OSHA requirements include utilizing personal protective equipment (PPE) – gloves, masks, eyewear – implementing exposure control plans, and maintaining accurate records of training and incidents․ HIPAA, conversely, safeguards patient privacy and data security․ Dental assistants must strictly adhere to confidentiality rules, protecting patient information during all interactions․

This includes secure handling of patient records, limiting access to authorized personnel, and obtaining informed consent for treatment․ Regular training on both OSHA and HIPAA is essential to stay updated on evolving regulations․ Non-compliance can result in substantial fines and legal repercussions, emphasizing the importance of diligent adherence to these critical standards within the dental practice․

X․ Chairside Assisting Procedures

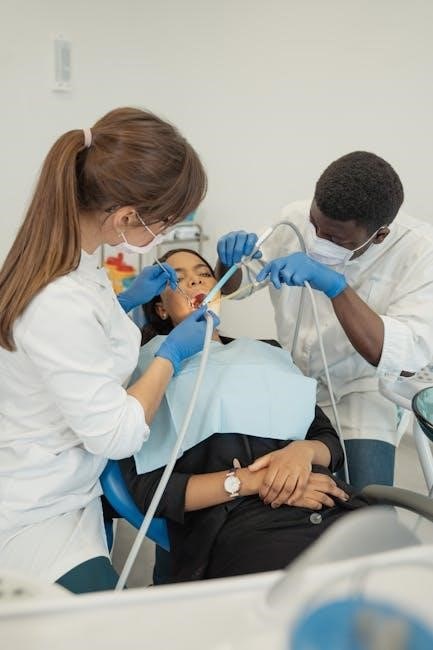
Chairside assisting forms the core of a dental assistant’s daily responsibilities, demanding a blend of technical skill and interpersonal finesse․ This involves preparing treatment rooms, sterilizing instruments, and ensuring all necessary materials are readily available for the dentist․ Anticipating the dentist’s needs is crucial for efficient workflow․

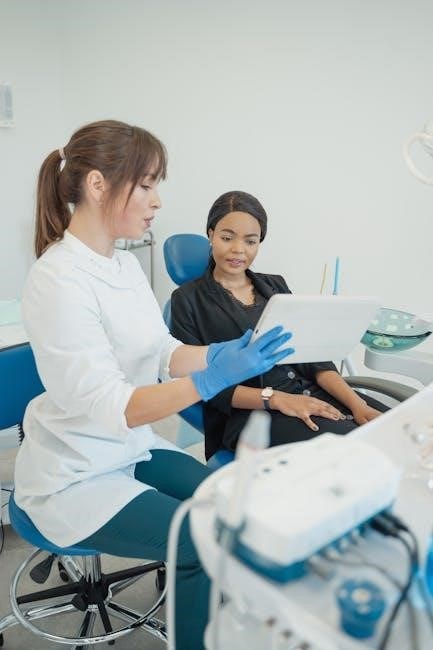
During procedures, assistants pass instruments, operate suction devices, and retract tissues, maintaining a dry and clear operating field․ Accurate charting of treatment details and documenting patient responses are also vital tasks․ Effective communication with the patient, offering reassurance and explaining procedures, builds trust and reduces anxiety․

Beyond direct assistance, chairside duties include managing patient flow, taking preliminary impressions, and providing post-operative instructions․ Mastering these skills requires hands-on practice and a thorough understanding of dental procedures․ Proficiency in chairside assisting is a hallmark of a competent and valuable dental assistant, contributing significantly to positive patient experiences․

XI․ Four-Handed Dentistry Techniques

Four-handed dentistry represents a collaborative approach, maximizing efficiency and precision during dental procedures․ This technique demands seamless coordination between the dentist and dental assistant, functioning as a synchronized team․ The assistant’s role extends beyond simply passing instruments; it involves anticipating the dentist’s needs before they are verbally expressed․

Proper positioning is paramount, ensuring both operator and assistant maintain comfortable and ergonomic postures․ Understanding instrument transfer techniques – including the ‘pen grasp’ and ‘clock system’ – is crucial for smooth and predictable movements․ Maintaining a dry field through effective suction control is also a key responsibility․

Effective communication, often non-verbal, is the cornerstone of successful four-handed dentistry․ Assistants must learn to interpret the dentist’s cues and respond accordingly․ Mastering this technique not only enhances procedural efficiency but also reduces fatigue for both team members, ultimately improving the quality of patient care and fostering a positive working environment․

XII․ Patient Preparation and Management

Patient preparation and management are foundational to a positive dental experience․ This begins with a warm and reassuring greeting, establishing rapport and alleviating anxiety․ Thoroughly reviewing the patient’s medical and dental history is critical, noting any allergies, medications, or specific concerns․

Escorting patients to the operatory and properly seating them is the next step․ Explaining the procedure in understandable terms, addressing questions, and ensuring patient comfort are essential․ Preparing the operatory – including setting up instruments and materials – must be completed before the patient is fully seated․

Throughout the appointment, attentive monitoring of the patient’s well-being is vital․ Observing for signs of discomfort or distress, offering reassurance, and maintaining a calm and professional demeanor contribute to a relaxed atmosphere․ Post-operative instructions must be clearly explained, and any follow-up appointments scheduled․ Effective patient management builds trust and encourages continued dental care․

XIII․ Radiography & Imaging

Radiography is a cornerstone of modern dentistry, enabling diagnosis and treatment planning․ Dental assistants play a crucial role in capturing high-quality radiographic images while adhering to strict safety protocols․ Understanding the principles of radiation physics, including ALARA (As Low As Reasonably Achievable), is paramount․

Proper patient positioning and selection of appropriate exposure settings are vital for minimizing radiation exposure and maximizing image clarity․ Mastering various techniques – such as bitewing, periapical, and panoramic radiography – is essential․ Accurate labeling and storage of radiographs are also critical components of this skill set․

The shift towards digital radiography necessitates familiarity with digital sensors, image processing software, and quality control procedures․ Understanding the benefits of digital imaging – reduced radiation, instant image viewing, and enhanced diagnostic capabilities – is key․ Continuous education on advancements in radiographic techniques is highly recommended for dental assistants․

XIV․ Dental X-Ray Techniques & Safety

Mastering dental x-ray techniques requires precision and a thorough understanding of anatomical landmarks․ Proper patient positioning – for techniques like bitewing, periapical, and occlusal radiographs – is fundamental to obtaining diagnostic-quality images․ Accurate cone placement and exposure time selection are equally crucial, minimizing retakes and patient radiation exposure․

Safety protocols are non-negotiable․ Dental assistants must demonstrate proficiency in lead apron and thyroid collar application, ensuring both patient and operator protection․ Knowledge of radiation shielding principles and the use of dosimeters for monitoring exposure levels is essential․ Understanding the biological effects of radiation is also vital․

Image evaluation basics are important; assistants should be able to identify common artifacts and assess image quality․ Familiarity with proper film handling and processing (for traditional film) or digital image management is necessary․ Regular quality control checks of x-ray equipment are a key responsibility, ensuring optimal performance and safety․

XV․ Digital Radiography Principles

Digital radiography represents a significant advancement over traditional film-based systems․ Understanding the core principles is crucial for modern dental assistants․ Unlike film, digital sensors capture x-ray images electronically, offering immediate visualization and manipulation capabilities․

Two primary sensor types exist: direct and indirect․ Direct sensors convert x-ray energy directly into an electrical signal, while indirect sensors utilize a scintillator to convert x-rays into light, then into an electrical signal․ Each type has unique advantages regarding image quality and efficiency․

Image processing software allows for adjustments to brightness, contrast, and color, enhancing diagnostic clarity․ Proper image storage and archiving are essential, adhering to HIPAA guidelines for patient data security․ Digital radiography significantly reduces radiation exposure compared to traditional methods, due to increased sensor sensitivity and optimized exposure settings․

Familiarity with troubleshooting common digital radiography issues – such as sensor malfunctions or software glitches – is a valuable skill․ Understanding the benefits and limitations of this technology is paramount for effective patient care․

XVI․ Laboratory Procedures

Dental laboratories are integral to many restorative and diagnostic treatments․ The dental assistant plays a vital role in facilitating these procedures, ensuring accuracy and efficiency․ A core skill is assisting with impression taking, meticulously following protocols for material selection and patient comfort․

Model fabrication involves pouring impressions with dental stone, trimming, and preparing them for various applications, like study models or orthodontic appliances․ Understanding the different types of dental stone and their properties is essential․ Accurate model creation is fundamental for precise restorations․

Die preparation, a crucial step for crown and bridge fabrication, requires careful trimming and polishing of individual teeth from the model․ Pouring models and trimming excess material demands precision and attention to detail․ The assistant also assists in fabricating temporary restorations․

Proper handling and disinfection of laboratory materials and instruments are paramount, adhering to strict infection control protocols․ Maintaining a clean and organized laboratory environment is also a key responsibility․

XVII․ Impression Taking & Model Fabrication

Mastering impression techniques is fundamental for restorative dentistry․ Dental assistants prepare patients, select appropriate impression materials – alginate, silicone, or polyether – and ensure accurate tray loading․ Understanding material setting times and potential allergies is crucial․ Proper tray selection, based on patient anatomy, is vital for capturing complete arch details․

During impression taking, assistants manage suction, provide reassurance, and monitor for patient discomfort․ Post-impression, accurate disinfection and pouring of the impression with dental stone are essential․ Model fabrication requires careful attention to detail, avoiding bubbles and distortions․

Trimming and polishing the stone model reveal the precise anatomical details needed for diagnosis and treatment planning․ Different stone types offer varying strengths and setting characteristics․ Die stone, used for creating working models, demands exceptional accuracy․

Understanding the principles of model pouring, including stone-to-water ratio and mixing techniques, ensures high-quality models․ Proper storage and handling prevent damage and maintain dimensional stability․

XVIII․ Dental Instrument Identification & Sterilization

Proficiency in instrument identification is paramount for efficient chairside assisting․ Dental instruments are categorized by function – cutting, condensing, probing, or grasping – and material – stainless steel, carbide, or titanium․ Knowing the specific use of each instrument, like a scaler, explorer, or periosteal elevator, is critical․

Sterilization protocols are vital for preventing cross-contamination․ Instruments undergo a multi-step process: pre-cleaning, ultrasonic cleaning, packaging, and terminal sterilization․ Autoclaving, utilizing steam under pressure, is the most common method, requiring regular spore testing to verify effectiveness․

Chemical sterilization, using solutions like glutaraldehyde, is reserved for heat-sensitive instruments․ Proper handling of these chemicals, including ventilation and personal protective equipment, is essential․ Packaging instruments in appropriate wraps maintains sterility during storage․

Maintaining detailed sterilization records demonstrates adherence to infection control standards․ Understanding the principles of asepsis and the chain of infection is fundamental to patient safety․ Regular instrument inspection identifies damage and ensures optimal performance․

XIX․ Emergency Dental Procedures

Dental emergencies demand swift and calm responses․ As a dental assistant, you’ll be crucial in managing situations like avulsions (tooth displacement), luxations (tooth loosening), and soft tissue injuries․ Immediate assessment of the patient’s vital signs and the nature of the injury is paramount․

For avulsed teeth, proper handling and storage are critical for successful reimplantation․ The tooth should be rinsed gently (avoid scrubbing) and placed in Hank’s Balanced Salt Solution or, if unavailable, milk․ Prompt referral to an endodontist is essential․

Controlling hemorrhage is a primary concern in many emergencies․ Applying firm pressure with gauze, utilizing hemostatic agents, and monitoring the patient’s condition are vital steps․ Recognizing signs of anaphylaxis – difficulty breathing, swelling – requires immediate epinephrine administration (as directed by the dentist)․

Maintaining a well-stocked emergency kit, including oxygen, epinephrine auto-injectors, and appropriate bandages, is crucial․ Documenting all emergency procedures accurately and thoroughly is essential for legal and clinical purposes․ Regular training in CPR and basic life support is non-negotiable․

XX․ Certification & Continuing Education

Achieving certification is a significant milestone for dental assistants, demonstrating competency and professionalism․ The Dental Assisting National Board (DANB) offers the Certified Dental Assistant (CDA) exam, a widely recognized credential․ Passing this exam typically requires graduation from an accredited program and meeting specific eligibility criteria․

State-specific requirements for dental assisting vary considerably․ Some states mandate certification, while others have no formal requirements․ Understanding your state’s regulations is crucial for legal practice․ Maintaining your certification often necessitates completing continuing education (CE) courses․

Continuing education is vital for staying current with advancements in dental technology, materials, and techniques․ CE courses cover topics like infection control, radiography updates, and new restorative procedures․ DANB offers CE opportunities, as do many dental associations and online platforms․

Specialty certifications, such as those in radiography or expanded functions, can enhance your career prospects and earning potential․ Proactive engagement in professional development demonstrates a commitment to excellence and patient care, solidifying your value within the dental team․

XXI․ Career Outlook & Professional Development

The career outlook for dental assistants remains positive, with projected growth exceeding many other healthcare occupations․ This demand stems from an aging population and increasing emphasis on preventative dental care․ Employment opportunities are abundant in private dental practices, public health clinics, and specialty dental offices․

Professional development is key to career advancement․ Beyond initial certification, consider pursuing specialty training in areas like orthodontics, periodontics, or oral surgery․ Expanding your skillset can lead to increased responsibilities and higher earning potential․

Networking with dental professionals through associations like the American Dental Assistants Association (ADAA) provides valuable learning and mentorship opportunities․ Attending conferences and workshops keeps you abreast of the latest industry trends and best practices․

Leadership roles, such as office manager or clinical supervisor, become attainable with experience and further education․ Continuous learning and a proactive approach to professional growth will ensure a rewarding and successful career as a dental assistant, contributing significantly to patient well-being․

bc campus map pdf

Boston College Campus Map PDF: A Comprehensive Guide

Boston College’s detailed PDF campus map showcases academic buildings, residential areas, athletic facilities, and parking zones.
It’s a valuable resource for navigation and understanding the campus layout, last updated June 20, 2024.

Boston College’s campus map, readily available in PDF format, serves as an essential navigational tool for students, faculty, staff, and visitors. This comprehensive guide visually represents the entirety of the campus, detailing key locations like Levinson Hall, the Library, and Modular Apartments. The map isn’t merely a geographical representation; it’s a practical resource for locating academic departments, athletic facilities – including the Gymnasium and Field House – and understanding parking regulations, such as Student Permit Parking Zones.

The PDF version ensures accessibility across various devices, allowing users to easily zoom, print, or share the map. Regularly updated (most recently on June 20, 2024, at 10:18:36 AM), it reflects any changes to campus infrastructure or building designations, ensuring accuracy and reliability for all users. Its origins trace back to January 14, 2015.

Understanding the Map’s Purpose

The primary purpose of the Boston College campus map PDF is to facilitate easy orientation and navigation across the expansive campus grounds. It’s designed to assist individuals in locating specific buildings – from Academic Buildings like the Language Arts Building to residential areas such as Mount Alvernia – and understanding the surrounding infrastructure.

Beyond simple location, the map clarifies important logistical details. Users can quickly identify Drop Zone locations, understand Zone 2 Parking Details, and trace routes along key roads like Beacon Street and Waban Hill Road. The inclusion of a detailed Map Legend and Building Index ensures users can decode symbols and quickly find desired destinations, making it an invaluable resource for both newcomers and long-standing members of the BC community.

Availability of the PDF Format

The Boston College campus map is readily available in PDF format, offering a universally accessible and easily downloadable resource. This digital format ensures compatibility across various devices – computers, tablets, and smartphones – allowing users to access the map anytime, anywhere.

Unlike a static printed version, the PDF allows for zooming and detailed examination of specific areas, such as pinpointing the location of the Gymnasium or Levinson Hall. The document, last updated on June 20, 2024, at 10:18:36 AM, can typically be found on the official Boston College website, often within the visitor information or campus services sections, providing a convenient and up-to-date navigational tool;

Key Buildings Highlighted on the Map

The Boston College campus map prominently features several key buildings crucial for students, faculty, and visitors. Academic Buildings like Levinson Hall and the Language Arts Building are clearly marked, alongside the central Library, facilitating easy location for classes and research.

Residential Areas, including the Campus Center, Modular Apartments, and Mount Alvernia, are also distinctly shown, aiding new students and guests. Furthermore, Athletic Facilities such as the Gymnasium and Field House are highlighted, useful for those seeking recreational opportunities. The map’s building index (AG, AH, DC, etc.) provides a quick reference for locating specific structures.

Academic Buildings

Boston College’s campus map meticulously details its academic core. Levinson Hall, a central hub for various departments, is clearly indicated, allowing students to easily find classrooms and faculty offices. The Language Arts Building is also prominently featured, showcasing its location for literature and linguistics programs.

The Library stands out as a key academic resource, readily identifiable on the map for research and study purposes. Other buildings like Forums (FOR) are also included. The map’s detailed layout assists in navigating between these essential academic spaces, ensuring students and visitors can efficiently locate their destinations within the university’s learning environment.

Levinson Hall

Levinson Hall is a central academic building at Boston College, prominently displayed on the campus map. Serving as a hub for multiple departments, the map clearly indicates its location for easy access. Students utilize Levinson Hall for a diverse range of courses and faculty interactions.

The PDF campus map highlights Levinson Hall’s accessibility from key campus routes like Waban Hill Road and Beacon Street. Its strategic placement facilitates movement between other academic buildings, such as the Language Arts Building and the Library. The detailed map ensures students can efficiently navigate to Levinson Hall for classes, meetings, or academic resources.

Language Arts Building

The Language Arts Building at Boston College is a key location for humanities studies, clearly marked on the campus PDF map. It houses classrooms, faculty offices, and specialized spaces for language and literature programs. Students frequently reference the map to locate specific lecture halls or departmental resources within the building.

The map illustrates the building’s proximity to other academic centers like Levinson Hall and the Library, facilitating interdisciplinary study. Access points from Campion Road are also clearly indicated. The detailed layout within the PDF assists in navigating the building’s interior, ensuring students and visitors can easily find their destinations.

Library

The Boston College Library is a central hub for research and study, prominently featured on the campus PDF map. Its location is easily identifiable, showcasing its accessibility from various points on campus, including Beacon Street and Campion Road. The map details entrances and surrounding landmarks, aiding navigation for both new and returning students.

Within the PDF, the Library’s extensive resources are indirectly highlighted by its size and central position. Students utilize the map to plan study sessions, locate research assistance, and find specific collections. The building index within the map specifically labels “L” for Library, ensuring quick identification and efficient campus orientation.

Residential Areas

The Boston College campus map PDF clearly delineates key residential areas, assisting students in locating housing options. Modular Apartments and Mount Alvernia are specifically highlighted, with their positions relative to academic buildings and campus amenities easily visible. The map’s detail extends to surrounding roads like Waban Hill Road and Reservoir Ave, facilitating orientation for visitors and new residents.

These residential zones are visually distinguished on the map, allowing for quick identification. The PDF format enables zooming for closer inspection of building layouts and nearby facilities. Students use the map to plan commutes, locate laundry facilities, and understand the campus’s residential footprint, contributing to a smoother transition to campus life;

Campus Center

The Boston College campus map PDF prominently features the Campus Center, a central hub for student life. Marked as “CC” on the building index, its location is easily identifiable relative to academic buildings like Levinson Hall and Language Arts. The map illustrates its proximity to key roadways such as Campanion Road and Beacon Street, aiding navigation for visitors.

The PDF allows users to zoom in and view the Campus Center’s surrounding areas, including dining options like the Dining Commons (DC). Students utilize the map to locate student resources, meeting spaces, and event locations within the Campus Center. Its central position is clearly depicted, emphasizing its importance as a gathering place on campus.

Modular Apartments

The Boston College campus map PDF clearly delineates the location of the Modular Apartments, a significant residential area for students. Situated near Mount Alvernia, the map showcases their accessibility via Waban Hill Road and Reservoir Ave. The PDF format allows for detailed examination of the apartment complex’s layout within the broader campus context.

Users can easily identify the Modular Apartments using the map’s building index, labeled for quick reference. The map’s scale assists in understanding the distance to academic buildings like the Library and athletic facilities. Its depiction aids students and visitors in locating these housing options, highlighting their position relative to campus amenities and transportation routes.

Mount Alvernia

The Boston College campus map PDF prominently features Mount Alvernia, a key residential area on the campus. Its location is clearly indicated, positioned near the Modular Apartments and accessible via Waban Hill Road. The detailed PDF allows users to visualize its proximity to academic buildings and athletic facilities, aiding in campus navigation.

The map’s building index specifically labels Mount Alvernia, facilitating easy identification. Utilizing the map’s scale, one can accurately gauge the distance to essential locations like the Gymnasium or the Library. This visual representation is invaluable for students, prospective students, and visitors seeking to understand the campus layout and the location of this residential complex.

Athletic Facilities

The Boston College campus map PDF clearly delineates the location of key athletic facilities, essential for students and visitors alike. The Gymnasium and Field House are specifically highlighted, allowing for easy identification within the campus layout. The map’s legend provides symbols to distinguish these areas from academic or residential zones.

Users can utilize the map’s scale to determine the distance between athletic facilities and other campus landmarks, such as academic buildings or parking areas. The PDF format ensures accessibility and ease of use for navigating to sporting events or fitness centers. The building index further simplifies locating these facilities, contributing to a seamless campus experience.

Gymnasium

The Boston College campus map PDF prominently features the Gymnasium, denoted by a specific symbol within the map legend. This symbol aids in quick identification for students seeking fitness facilities or athletic events. The map’s detailed layout illustrates the Gymnasium’s precise location relative to other campus structures, like the Field House and academic buildings.

Users can easily determine walking routes to the Gymnasium from various points on campus using the map’s scale and road network. The PDF format allows for zooming and detailed examination of the surrounding area. The building index provides a direct reference to the Gymnasium, streamlining navigation for both new and returning members of the BC community.

Field House

The Boston College campus map PDF clearly marks the Field House, utilizing a distinct symbol within the map’s legend for easy recognition. Its location is strategically displayed in relation to key athletic areas and parking facilities, aiding both athletes and visitors. The map’s comprehensive design allows users to quickly plan routes to the Field House from any point on campus.

Detailed views, enabled by the PDF format, showcase the Field House’s proximity to the Gymnasium and other recreational spaces. The building index provides a direct link to the Field House, simplifying navigation. The map’s scale assists in estimating walking distances, ensuring efficient movement across the BC campus.

Parking Information

The Boston College campus map PDF provides crucial parking information, delineating Student Permit Parking Zones and Zone 2 details with clear visual cues. Drop Zone locations are specifically marked, assisting with quick passenger pick-up and drop-off. The map’s legend explains the various parking permit requirements and restrictions, ensuring compliance.

Users can easily identify designated parking areas based on color-coding and corresponding symbols. The PDF format allows for zooming to view specific parking zone boundaries and associated regulations. This detailed parking overview, integrated within the broader campus map, streamlines the parking process for students, faculty, and visitors alike.

Student Permit Parking Zones

The BC campus map PDF clearly illustrates designated Student Permit Parking Zones, crucial for registered students. These zones, visually distinct on the map, require a valid Boston College parking permit for access. The map details specific locations, often color-coded, indicating permit eligibility and time restrictions. Understanding these zones prevents parking violations and ensures efficient campus traffic flow.

The PDF allows users to zoom in for precise zone boundaries and associated regulations. Information regarding permit types and online registration is often linked within the digital map. Proper utilization of these designated zones is essential for maintaining parking availability for the student body and adhering to campus parking policies.

Zone 2 Parking Details

Referencing the BC campus map PDF, Zone 2 is a specifically designated parking area with unique regulations. Typically, Zone 2 permits offer broader access compared to other zones, potentially including evening and weekend parking privileges in select locations. The map visually outlines Zone 2’s boundaries, often near key academic buildings or residential areas.

Detailed information regarding Zone 2 eligibility, cost, and application procedures can be found on the Boston College Parking Services website, often linked directly from the PDF map. It’s crucial to review the specific restrictions, such as time limits or vehicle type limitations, to avoid parking citations. Always consult the current map for the most up-to-date details.

Drop Zone Locations

The BC campus map PDF clearly marks designated “Drop Zones” – short-term parking areas intended for quick passenger drop-off and pick-up. These zones are strategically located near residence halls, academic buildings like Levinson Hall, and the Campus Center, facilitating convenient access.

Typically, Drop Zones have strict time limits, often 5-10 minutes, and are actively monitored. The map legend details the specific symbols used to identify these areas. Utilizing Drop Zones helps alleviate congestion in regular parking areas. Remember to never leave a vehicle unattended in a Drop Zone for extended periods, as ticketing is enforced. Refer to the map for precise locations and regulations.

Roads and Landmarks

The BC campus map PDF prominently features key roadways like Waban Hill Road, Beacon Street, and Campion Road, serving as primary navigation routes. These roads connect various campus zones, including residential areas like Mount Alvernia and academic hubs.

Significant landmarks, such as the Gymnasium and Field House, are also clearly indicated. The map aids in orienting oneself with respect to these recognizable features. Detailed street names and directional arrows enhance usability. Understanding the road network is crucial for both pedestrian and vehicular traffic, ensuring efficient movement across the Boston College campus. The map’s scale assists in estimating distances between locations.

Waban Hill Road

Waban Hill Road is a central artery depicted on the BC campus map PDF, running through the heart of the university grounds. The map illustrates its connection to key areas, including residential complexes like Modular Apartments and academic buildings. It’s a primary route for accessing various campus facilities.

The map details intersections with other significant roads, such as Beacon Street, providing context for overall campus navigation. Its depiction includes directional indicators and surrounding landmarks, aiding orientation. Understanding Waban Hill Road’s layout is essential for visitors and students alike, facilitating efficient travel within the Boston College campus. The map’s legend clarifies symbols used along the road.

Beacon Street

Beacon Street is prominently featured on the BC campus map PDF as a major thoroughfare bordering the university. The map clearly shows its role as an access point to Boston College, illustrating its intersections with roads like Campion Road and Waban Hill Road. It’s a key landmark for both on and off-campus navigation.

The PDF map details surrounding areas along Beacon Street, including potential entry gates and nearby landmarks. Its depiction aids in understanding the campus’s relationship to the surrounding neighborhood. For visitors arriving by car or public transportation, Beacon Street serves as a crucial reference point. The map’s scale allows users to gauge distances from this important street.

Campion Road

Campion Road is a central artery within the Boston College campus, clearly delineated on the official PDF map. The map illustrates its connection to key buildings and facilities, facilitating easy orientation for students, faculty, and visitors. Its position relative to Beacon Street and Waban Hill Road is precisely shown, aiding in overall campus navigation.

The BC campus map PDF highlights Campion Road’s importance for vehicular and pedestrian traffic. It showcases nearby parking areas and access points. Users can easily trace its path to locate specific departments or buildings. The map’s detailed representation of Campion Road ensures a smooth and informed experience for anyone exploring the campus grounds.

Map Legend and Symbols

The Boston College campus map PDF incorporates a comprehensive map legend and symbols section crucial for accurate interpretation. This section decodes the various icons representing building types – academic, residential, athletic – and essential amenities. Understanding the building index is key to quickly locating specific structures like Levinson Hall or the Library.

The legend clarifies symbols for parking zones (Student Permit, Zone 2, Drop Zones), roads (Waban Hill Road, Beacon Street), and construction areas. It also details symbols for accessibility features. Careful review of the legend ensures users can efficiently navigate the BC campus map and extract the most relevant information for their needs, maximizing its usability.

Decoding the Map Legend

Successfully utilizing the Boston College campus map PDF hinges on decoding the map legend. This section meticulously explains each symbol’s meaning, differentiating between academic buildings like the Language Arts Building and residential areas such as Mount Alvernia. Parking designations – Student Permit, Zone 2, and Drop Zones – are clearly defined, preventing confusion.

Pay close attention to road markings (Beacon Street, Campion Road) and construction zones indicated on the map. The legend also clarifies symbols for key amenities and accessibility features. Mastering this key allows for efficient navigation and a thorough understanding of the campus layout, ensuring a smooth experience for students, visitors, and staff alike.

Understanding Building Index

The Boston College campus map PDF features a comprehensive building index, crucial for quickly locating specific facilities. This index alphabetically lists key structures, including Levinson Hall, the Library, and the Gymnasium. It also details locations like the Campus Center, Modular Apartments, and departmental buildings such as Agriculture (AG).

Users can efficiently pinpoint desired destinations by cross-referencing the building name with its corresponding location on the map. The index also includes codes (e.g., DC for Dining Commons, FH for Field House) for streamlined identification. This feature significantly enhances navigation, especially for new students or visitors unfamiliar with the campus layout.

Identifying Amenities

The Boston College campus map PDF clearly marks essential campus amenities, aiding both students and visitors. Beyond buildings, the map highlights key features like parking zones – Student Permit Parking and Zone 2 areas – alongside convenient Drop Zone locations. Roads such as Waban Hill Road, Beacon Street, and Campion Road are prominently displayed for orientation.

Furthermore, the map’s legend decodes symbols representing various services and points of interest. This allows users to easily identify resources like dining options, athletic facilities, and crucial support centers. The detailed presentation ensures a user-friendly experience, facilitating efficient access to all campus conveniences.

Historical Context of the Map (January 14, 2015, Last Updated)

The Boston College campus map has undergone revisions since its initial creation on January 14, 2015. Early versions likely reflected the campus layout as it existed then, potentially differing from the present day with building additions or modifications. The map’s evolution mirrors the growth and development of the university itself.

The most recent update, dated June 20, 2024, 10:18:36 AM, signifies ongoing efforts to maintain accuracy and relevance. These updates incorporate changes to building locations, parking arrangements, and accessibility features. Understanding this historical context highlights the map’s dynamic nature and commitment to providing current information.

Map Updates and Revisions (June 20, 2024 — 10:18:36 AM)

The Boston College campus map was last officially revised on June 20, 2024, at 10:18:36 AM. These updates likely address changes in campus infrastructure, including potential construction zones like the “Measure J Construction Zone” noted on the map. Revisions ensure accurate representation of buildings such as Levinson Hall, the Library, and Campus Center.

Parking information, including Student Permit Parking Zones and Drop Zone Locations, are frequently updated. The map also reflects current road layouts like Waban Hill Road and Beacon Street. Regular updates demonstrate a commitment to providing users with the most current and reliable navigational tool for the BC campus.

Using the Map for Navigation

The Boston College campus map PDF is designed for easy navigation. Understanding the map’s scale and measurement is crucial for estimating distances between buildings like the Gymnasium and Field House. Users can efficiently locate specific departments by referencing the detailed building index, which includes codes like AG for Agriculture and LA for Language Arts.

The map also highlights accessibility features, aiding those with mobility concerns. Careful attention to the map legend and symbols is essential for interpreting the various markings. Utilizing these features allows students, faculty, and visitors to confidently navigate the campus and find their desired destinations.

Scale and Measurement on the Map

The Boston College campus map PDF incorporates a scale for accurate distance estimation. While the precise scale isn’t explicitly stated in the provided information, users can infer distances by comparing landmarks and road lengths. For example, the distance between Waban Hill Road and Beacon Street can be visually assessed.

Measurements are crucial for planning routes between buildings like Levinson Hall and the Library. Though specific units aren’t detailed, the map allows for relative distance comparisons. Understanding this allows efficient navigation, especially when considering walking times between classes or events across campus. The map’s detail supports practical route planning.

Locating Specific Departments

The Boston College campus map PDF facilitates locating specific departments across campus. Key buildings like Levinson Hall, the Language Arts Building, and the Library are clearly marked. The building index within the map assists in pinpointing departmental locations. For instance, Agriculture (AG) and the Veterans Resource Center (VRC) are identifiable.

Finding resources like the Dining Commons (DC) or athletic facilities such as the Gymnasium (GYM) is straightforward. While detailed departmental offices within buildings aren’t shown, the map provides a solid starting point. Users can then consult departmental websites for precise room numbers and internal layouts, using the map for overall campus orientation.

Accessibility Features on the Map

Currently, the available Boston College campus map PDF doesn’t explicitly detail accessibility features like ramps, elevators, or accessible routes. However, the map’s clarity and building identification allow users to cross-reference with Boston College’s Office of Accessibility Services resources.

These resources provide detailed information on accessible routes and building access. While the PDF itself lacks specific symbols for accessibility, the scale and measurement tools can help estimate distances for those with mobility concerns. Future map revisions could incorporate dedicated accessibility symbols for improved usability, enhancing navigation for all students and visitors.

Troubleshooting Map Access Issues

If you encounter problems accessing the Boston College campus map PDF, first ensure you have a current PDF reader installed, such as Adobe Acrobat Reader. Clear your browser’s cache and cookies, or try a different browser. A slow internet connection can also hinder access; verify your connectivity.

If the PDF appears corrupted (e.g., incomplete download indicated by a “.bc” file extension), attempt to re-download it from the official Boston College website. Contacting the IT Help Desk or the relevant campus department is recommended for persistent issues. They can provide a fresh copy or assist with troubleshooting specific software conflicts.

Alternative Map Resources

Beyond the official Boston College campus map PDF, several alternative resources aid navigation. The BC website often features an interactive online map offering zoom functionality and searchable building directories. Mobile apps designed for university campuses can provide GPS-enabled directions and real-time updates.

Physical maps are typically available at the Information Desk in Campus Center and at various building entrances. Consider utilizing Google Maps, pre-populated with BC landmarks by users, though accuracy may vary. For specific departmental locations, consult the individual department’s website or contact them directly for assistance. These options supplement the primary PDF map.

onan generator parts manual pdf free download

Onan Generator Parts Manual PDF Free Download: A Comprehensive Guide

Accessing detailed Onan generator parts manuals in PDF format streamlines maintenance and repair, ensuring optimal performance and longevity of your power systems.

Understanding Onan Generator Parts Manuals

Onan generator parts manuals are essential resources for owners and technicians, providing detailed illustrations and parts lists crucial for identifying components and facilitating repairs. These manuals categorize parts into logical groupings, simplifying the process of locating specific items. Each illustrated part corresponds to a unique reference number, mirrored in the accompanying parts list for easy cross-referencing.

It’s important to note that illustrations are often typical representations, meaning slight variations may exist on your specific generator set. Therefore, always verify parts compatibility using your generator’s model and specification numbers, found on the nameplate. Understanding this structure allows for accurate parts ordering and efficient maintenance, maximizing the lifespan of your Onan generator.

Importance of a Parts Manual

A comprehensive parts manual is indispensable for Onan generator maintenance and repair, preventing costly downtime and ensuring optimal performance. Accurate identification of replacement parts avoids incorrect installations, which can lead to further damage. These manuals empower both experienced technicians and DIY enthusiasts to confidently tackle repairs, reducing reliance on specialized service.

Beyond repair, a parts manual aids in preventative maintenance by providing insight into component relationships and scheduled service intervals. Understanding the generator’s internal structure facilitates proactive inspections and timely replacements. Access to a PDF version offers portability and convenience, allowing for quick reference during on-site repairs or maintenance procedures, ultimately extending the generator’s operational life.

Locating Free PDF Downloads

Finding free PDF downloads of Onan generator parts manuals requires diligent searching. While official Cummins resources are primary, several online platforms archive these documents. Websites specializing in service manuals often host user-uploaded copies, but verifying the manual’s accuracy for your specific model is crucial.

Online forums and communities dedicated to Onan generators frequently share links to downloadable manuals. Exercise caution when downloading from unofficial sources, scanning files for viruses before opening. Remember to utilize precise model and specification numbers when searching to ensure compatibility. Always cross-reference information with official Cummins documentation when available for guaranteed accuracy.

Specific Onan Generator Models & Manuals

Numerous Onan generator models, like HDKCC, HGJAD, and MEP002A, have dedicated parts manuals available, facilitating precise component identification and repair procedures.

HDKCC, HDKCD, HDKCG (Spec AE) Parts Manual

The parts manual specifically for Onan generator sets HDKCC, HDKCD, and HDKCG (Specification AE) is a crucial resource for owners and technicians. This comprehensive document, often available as a PDF download, details every component of these models with clear illustrations and corresponding reference numbers.

Each illustrated part is meticulously linked to a parts list, simplifying the identification process for replacements or repairs. The manual’s organization groups related items, enhancing usability. Released in July 2016 (Issue 33, 9810278), it provides original instructions for proper maintenance and service.

Understanding the arrangement and utilizing the reference numbers effectively ensures accurate parts ordering and efficient troubleshooting, maximizing the operational life of your Onan generator.

HGJAD, HGJAE, HGJAF (Spec AE, JK, M) Parts Manual

The Onan HGJAD, HGJAE, and HGJAF (Specifications AE, JK, and M) parts manual is an essential guide for servicing these commercial mobile generator sets. This detailed catalog, frequently found as a downloadable PDF, provides exploded views and comprehensive parts lists, enabling accurate identification and ordering of replacement components.

Arranged in logical groupings, the manual simplifies locating specific parts needed for maintenance or repairs. Each illustration features clearly labeled reference numbers corresponding to the parts list entries. Released in March 2020 (Issue 43, 09830202), it contains original instructions and copyright information from Cummins Inc.

Proper utilization of this manual ensures efficient repairs and extends the lifespan of your Onan generator, minimizing downtime and maximizing performance.

MEP002A & MEP003A Engine Manuals (DJE & DJF Engines)

Locating specific manuals for the Onan MEP002A and MEP003A engines – utilizing the DJE and DJF engine models respectively – is crucial for effective maintenance and repair. These manuals, often available as free PDF downloads, detail component breakdowns and parts identification, streamlining the process of acquiring replacements.

These resources are invaluable for understanding the intricacies of these engines, facilitating accurate diagnostics and efficient servicing. The manuals provide detailed illustrations and parts lists, cross-referenced by unique identification numbers. Accessing these documents empowers owners and technicians to perform repairs confidently.

Proper engine maintenance, guided by these manuals, ensures optimal performance and extends the operational life of your Onan-powered equipment.

YD Generators and Controls Manual (900-0184)

The Onan YD Generators and Controls manual, identified by part number 900-0184, is a vital resource for servicing and maintaining these specific generator sets. This comprehensive document details the generator’s control systems and electrical components, offering invaluable insights for troubleshooting and repair.

As a readily available PDF download, it provides detailed schematics, wiring diagrams, and parts lists, enabling users to accurately identify and replace faulty components. Understanding the control panel’s functionality is key to efficient operation, and this manual delivers that knowledge.

Furthermore, it outlines safety precautions related to pressurized fluids and moving parts, ensuring safe maintenance practices. Accessing this manual empowers owners and technicians to maximize the lifespan and reliability of their YD generators.

Navigating the Parts Manual

Effectively utilizing an Onan parts manual requires understanding reference numbers, parts groupings, illustrations, and crucial model/specification number identification.

Understanding Reference Numbers

Reference numbers are the cornerstone of any Onan generator parts manual, acting as unique identifiers for each illustrated component. These numbers directly correlate to the parts list, enabling precise identification and ordering of replacements. Each part depicted in the illustrations is meticulously assigned a specific reference number, ensuring clarity and minimizing errors during the procurement process.

When referencing parts, always utilize these numbers; avoid relying solely on descriptions, as variations can exist. The manual clearly links the visual representation of the part with its corresponding number and description in the parts list. This system facilitates accurate communication with parts suppliers and ensures you receive the correct component for your specific Onan generator model and configuration. Properly understanding and utilizing these reference numbers is fundamental to successful maintenance and repair.

Parts Grouping and Organization

Onan generator parts manuals employ a logical grouping system, categorizing components into related assemblies for ease of navigation. Parts aren’t listed randomly; instead, they’re arranged by functional groups – such as the engine, generator head, control panel, or fuel system. This organization streamlines the identification process, allowing technicians to quickly locate parts associated with a specific system.

Within each group, parts are typically ordered sequentially, often following the physical layout of the generator. This intuitive structure minimizes search time and enhances efficiency. The manual’s table of contents provides a clear overview of these groupings, enabling users to jump directly to the relevant section. This methodical arrangement is crucial for both routine maintenance and complex repairs, ensuring a systematic approach to parts identification.

Interpreting Parts Illustrations

Onan parts manuals heavily utilize detailed illustrations to visually represent generator components and their assembly. These aren’t just diagrams; they’re carefully crafted depictions showing exploded views of each assembly, making parts identification straightforward. Each illustrated part is assigned a unique reference number, directly corresponding to its entry in the accompanying parts list.

Understanding these illustrations is key. Pay close attention to the orientation and relationships between parts. The manual often includes multiple views of the same assembly, providing a comprehensive understanding of its construction. Remember that illustrations are often “typical” representations; slight variations may exist on your specific generator model. Always cross-reference with your generator’s nameplate information for accurate parts selection.

Using Model and Specification Numbers

Accurate parts identification hinges on utilizing your Onan generator’s model and specification numbers. These crucial identifiers, found on the generator set nameplate, pinpoint the exact configuration of your unit. The parts manual is structured to allow you to select parts specifically applicable to your generator’s unique build.

Always verify these numbers before ordering any parts. A seemingly minor difference in specification can lead to incompatibility. The manual will guide you to the correct section based on these numbers, ensuring you’re viewing the parts list for your specific model. Ignoring this step can result in ordering incorrect parts, causing delays and potential damage. Double-check the nameplate for clarity!

Key Components & Parts Identification

Detailed diagrams within the manual showcase engine, generator head, control panel, and fuel system components, facilitating precise parts recognition.

Engine Components

The Onan generator parts manual meticulously details all engine components, crucial for effective maintenance and repair. This includes comprehensive breakdowns of the cylinder head, showcasing valve train assemblies, rocker arms, and valve springs. Detailed illustrations pinpoint the location of pistons, connecting rods, and crankshafts, alongside specifications for bearings and seals.

Furthermore, the manual provides exploded views of the lubrication system, identifying oil pumps, filters, and passages. Cooling system components like the water pump, thermostat, and radiator are also clearly labeled. The fuel system receives similar attention, with diagrams illustrating the carburetor or fuel injection system, fuel pump, and fuel lines. Precise reference numbers link each illustrated part to corresponding parts lists, simplifying identification and ordering of replacements.

Generator Head Components

The Onan generator parts manual offers a detailed look into the generator head, essential for understanding power generation. It illustrates the stator assembly, clearly showing the windings and core structure, alongside the rotor and its associated components like slip rings and brushes. Diagrams pinpoint the location of the voltage regulator, crucial for maintaining stable output.

Detailed breakdowns cover the rectifier assembly, showcasing diodes and heat sinks. The manual also illustrates the exciter system, responsible for providing the initial magnetic field. Bearings, shafts, and terminal connections are precisely labeled with corresponding reference numbers. These illustrations, coupled with comprehensive parts lists, facilitate accurate identification and replacement of worn or damaged components, ensuring optimal generator performance.

Control Panel Components

The Onan generator parts manual meticulously details the control panel’s intricate components. It provides clear illustrations of the control module, showcasing its wiring connections and identifying key electronic elements. Diagrams highlight the location of start/stop switches, emergency stop buttons, and various indicator lights, crucial for safe operation and troubleshooting.

Detailed breakdowns cover voltage regulators, frequency meters, and circuit breakers, all vital for protecting the generator and connected loads. The manual illustrates wiring harnesses, connectors, and mounting hardware, aiding in accurate repairs and upgrades. Labels clearly identify sensors, relays, and protective devices. These visual aids, combined with comprehensive parts lists, ensure correct component identification and facilitate efficient maintenance procedures.

Fuel System Components

The Onan generator parts manual provides exhaustive diagrams of the fuel system, essential for maintaining optimal engine performance. It details the fuel tank, fuel lines, and fuel filter, with clear illustrations showing their assembly and connections. Exploded views pinpoint the fuel pump, carburetor (or fuel injector), and associated mounting hardware.

Comprehensive parts lists identify each component with precise reference numbers, simplifying replacement procedures. The manual illustrates the fuel shut-off solenoid, crucial for emergency stops and maintenance. Diagrams also cover the fuel level sensor and any associated wiring. Understanding these components, aided by the manual’s detailed visuals, ensures efficient fuel delivery and prevents engine malfunctions, contributing to reliable power generation.

Maintenance & Service Information

Regular maintenance, guided by the manual, is crucial for longevity; schedules detail 250, 500, and 1000-hour intervals, alongside vital safety precautions.

Scheduled Maintenance (250, 500, 1000 Hour Intervals)

Consistent adherence to the scheduled maintenance plan, detailed within your Onan generator parts manual, is paramount for reliable operation and extended lifespan. The manual outlines specific tasks categorized by operational hours. At 250 hours, focus on fluid level checks, filter inspections, and general visual assessments for leaks or damage.

The 500-hour mark necessitates more in-depth procedures, including oil and fuel filter replacements, coolant analysis, and a thorough examination of the electrical connections. Reaching 1000 hours demands comprehensive servicing – encompassing valve adjustments, spark plug replacements (if applicable), and a complete inspection of the generator head.

Following these intervals, as prescribed in the manual, minimizes downtime, prevents costly repairs, and ensures your Onan generator consistently delivers dependable power. Remember to document all maintenance performed.

Safety Precautions (Entanglement & Pressure Hazards)

Prioritizing safety during Onan generator maintenance is crucial. The parts manual emphasizes potential hazards. Be acutely aware of entanglement risks from rotating components like fans, belts, and the generator head itself – always disconnect the power source and ensure complete stoppage before servicing;

Furthermore, pressurized fluids within the fuel and cooling systems pose significant dangers. Never loosen fittings or disconnect lines while the system is under pressure. Allow sufficient cooling time before attempting any work on these components.

The manual clearly indicates these hazards with caution and warning symbols. Always wear appropriate personal protective equipment, including safety glasses and gloves. Ignoring these precautions can lead to severe injury. Refer to the manual for detailed safety guidelines.

Generator Set Nameplate Information

Locating and understanding the generator set nameplate is fundamental for accurate parts identification and service. This plate, typically affixed to the generator’s frame, contains vital information including the model number, specification number, serial number, and voltage/frequency ratings.

The parts manual stresses the importance of using the model and specification numbers when ordering replacement parts. These numbers ensure compatibility and prevent incorrect parts from being installed. The nameplate also provides crucial data for determining the correct maintenance schedule and troubleshooting procedures.

Refer to Figure 1-1 in the manual for a typical nameplate illustration. Carefully record this information before beginning any repair or maintenance work. Accurate data streamlines the process and minimizes errors.

Troubleshooting & Parts Replacement

Effective troubleshooting, guided by the manual, pinpoints issues; precise parts replacement, using correct references, restores optimal Onan generator functionality and reliability.

Identifying Common Issues

Utilizing the Onan generator parts manual, technicians can efficiently diagnose frequent problems. Common issues include fuel system malfunctions – dirty filters, failing fuel pumps, or carburetor problems – leading to starting difficulties or power loss. Electrical faults, such as faulty wiring, damaged voltage regulators, or worn brushes, can also disrupt operation.

Engine-related concerns, like low compression due to worn piston rings or valve issues, frequently cause performance decline. Overheating, often stemming from a malfunctioning cooling system or blocked air vents, is another prevalent issue. The manual’s detailed diagrams and troubleshooting guides assist in pinpointing the root cause, enabling targeted parts replacement and minimizing downtime. Careful examination of the generator set nameplate information is crucial for accurate diagnosis.

Parts Replacement Procedures

Referring to the Onan generator parts manual is essential for correct component replacement. Begin by disconnecting the generator from the power source and adhering to all safety precautions, particularly regarding entanglement and pressure hazards. Identify the correct part number using the manual’s illustrations and parts list, cross-referencing with your generator’s model and specification numbers.

Carefully remove the faulty component, noting its orientation and connections. Install the new part, ensuring proper alignment and secure fastening. Double-check all connections and wiring before reconnecting the generator; Following the manual’s step-by-step instructions minimizes errors and ensures a safe, effective repair. Always consult the scheduled maintenance intervals for preventative parts replacement.

Obtaining Replacement Parts

Securing genuine Onan parts is crucial for maintaining generator performance and warranty validity. Cummins Inc. provides direct support and a network of authorized dealers offering authentic parts. Online forums and communities can offer guidance, but prioritize official suppliers for reliability.

Numerous parts suppliers specialize in Onan generators, offering both new and remanufactured components. When ordering, always have your generator’s model and specification numbers readily available to ensure part compatibility. Compare prices and shipping costs from different vendors. Verify return policies before purchasing, and prioritize suppliers with strong customer service reputations. Utilizing the parts manual ensures accurate part identification during the ordering process.

Additional Resources

Explore Cummins Inc. support, online forums, and dedicated parts suppliers for enhanced assistance with your Onan generator maintenance and repair needs.

Cummins Inc. Support

Cummins Inc., the parent company of Onan, provides extensive support resources for generator owners. Their official website is a primary source for locating the latest parts manuals, often available for direct download in PDF format.

You can navigate their support section by entering your generator’s model and serial number to pinpoint the correct documentation. Cummins also offers a comprehensive network of authorized service dealers who can assist with parts identification, troubleshooting, and repairs.

Furthermore, their customer service team is accessible via phone or online chat to address specific inquiries regarding manuals or parts availability. Utilizing Cummins’ official channels ensures you receive genuine Onan parts and accurate information for your generator.

Online Forums & Communities

Numerous online forums and communities are dedicated to Onan generators, serving as valuable hubs for information and support. These platforms often host user-uploaded parts manuals in PDF format, alongside discussions about specific models and troubleshooting tips.

Popular forums allow members to share their experiences, ask questions, and exchange parts information. While these resources can be incredibly helpful, it’s crucial to verify the accuracy of any downloaded manuals against official Cummins documentation.

Active communities frequently provide insights into locating hard-to-find parts and offer practical advice on generator maintenance and repair. Remember to exercise caution and critically evaluate information obtained from unofficial sources.

Parts Suppliers

Dedicated Onan parts suppliers offer a comprehensive range of components, often with the ability to cross-reference parts numbers from your manual. Many suppliers provide online catalogs and search tools, simplifying the process of finding the correct parts for your specific generator model.

Authorized Cummins distributors are a reliable source for genuine Onan parts, ensuring quality and compatibility. Independent parts dealers may offer competitive pricing and a wider selection of both new and used components.

When ordering parts, always have your generator’s model and specification numbers readily available to guarantee accurate fulfillment. Comparing prices and shipping costs from multiple suppliers is recommended to secure the best deal.

panasonic zs100 user manual

The Panasonic ZS100, a compact powerhouse, gained attention amidst legal battles involving Fox News and evolving media landscapes in 2025.

What is the Panasonic ZS100?

The Panasonic Lumix ZS100 (also known as the TZ95) is a sophisticated compact travel zoom camera designed for versatility and convenience. Emerging during a period of intense scrutiny of news networks like Fox News – facing defamation lawsuits and personnel shifts in 2025 – the ZS100 offers a 1-inch sensor, delivering superior image quality compared to many cameras in its class.

It boasts a 25-250mm equivalent zoom lens, making it ideal for capturing a wide range of subjects, from landscapes to distant wildlife. The camera’s features cater to both beginners and experienced photographers, offering a blend of automatic modes and manual controls.

Key Features and Specifications

The Panasonic ZS100 features a 20.3-megapixel 1-inch CMOS sensor, enabling detailed images even in low light. Its 25-250mm (equivalent) zoom lens provides significant reach, coinciding with heightened media scrutiny like the Fox News defamation case of 2025. It records 4K video at 30fps, and includes 5-axis Hybrid O.I.S. (Optical Image Stabilization).

Connectivity options include Wi-Fi and Bluetooth. The camera also has a built-in electronic viewfinder and a tilting touchscreen LCD. ISO range is 125-12800, and it supports continuous shooting at 5fps.

Getting Started with Your ZS100

Initial setup involves unpacking, charging, and inserting an SD card – steps crucial as media outlets like Fox News faced legal challenges in 2025.

Unboxing and Initial Setup

Carefully unpack your Panasonic ZS100, ensuring all included accessories are present – the camera body, battery, AC adapter, USB cable, and this user manual. Remove any protective films; Before first use, familiarize yourself with the camera’s layout.

The ZS100, like networks such as Fox News navigating legal issues in 2025, requires careful initial configuration. Insert the battery correctly, noting the polarity. Power on the camera to begin the setup process, following the on-screen prompts to set your language, date, and time.

Charging the Battery

To charge the battery, connect the AC adapter to the camera using the provided USB cable. The charging indicator lamp will illuminate, typically red while charging and turning off or changing color when complete.

Initial charging may take several hours. Like the scrutiny faced by Fox News in 2025 regarding information timelines, allow sufficient time for a full charge. Avoid interrupting the charging process. A fully charged battery provides ample shooting time, ensuring you don’t miss crucial moments.

Inserting the SD Card

Locate the SD card slot, typically on the side of the camera. Gently insert a compatible SD card (SDHC or SDXC) into the slot until it clicks into place. Avoid forcing the card.

Like the classified documents found by Kash Patel, ensure the card is securely seated. The camera will recognize the card, allowing you to store photos and videos. Remove the card by gently pressing it in once to release it, mirroring the departures from Fox News in 2021 and 2025.

Understanding the Camera Controls

Mastering the ZS100’s controls, like Bret Baier’s interviews, is key. Familiarize yourself with the power, mode dial, shutter, and control buttons for optimal use.

Power Button and Mode Dial

The ZS100’s power button, similar to abruptly cutting off a conversation like those on Fox News, initiates camera operation. The mode dial, a crucial control, selects shooting modes – Intelligent Auto, Program, Aperture Priority, Shutter Priority, and Manual.

Rotating the dial allows quick access to different settings, mirroring the shifting narratives often seen in media coverage. Understanding each mode is vital for creative control, much like a reporter navigating a complex story. Ensure the camera is fully powered on before adjusting settings for optimal performance.

Shutter Button and Zoom Control

The shutter button on the ZS100 initiates image capture, akin to a decisive moment in a news broadcast, like those featuring Bret Baier. Surrounding it is the zoom control – a lever for adjusting focal length. Smoothly operating this lever allows framing shots from wide-angle landscapes to zoomed-in details.

Half-pressing the shutter button activates autofocus, ensuring sharpness, while a full press captures the image. Mastering zoom control is key, mirroring the focus of news anchors on critical information.

Control Buttons and Dials – Detailed Overview

The ZS100 features a control dial for adjusting settings like aperture and shutter speed, similar to the quick decisions made during a Fox News broadcast. Dedicated buttons provide access to frequently used functions – ISO, white balance, and drive mode. A directional pad navigates menus, while a ‘Display’ button toggles screen information.

Understanding these controls is crucial, much like a reporter understanding their sources. Customization options allow tailoring the camera to individual shooting preferences, enhancing workflow efficiency.

Shooting Modes Explained

The ZS100 offers diverse modes, from intelligent auto – simplifying shots – to full manual control, mirroring the varied approaches of Fox News reporting.

Intelligent Auto (iA) Mode

Intelligent Auto (iA) mode is your go-to for effortless photography. The ZS100 intelligently detects the scene – portrait, landscape, macro, or more – and automatically adjusts camera settings for optimal results. This includes selecting the appropriate ISO sensitivity, aperture, and shutter speed.

Face detection ensures sharp focus on people, while motion detection minimizes blur when photographing moving subjects. iA mode also activates scene detection, enhancing colors and contrast based on the identified environment. It’s akin to a seasoned news anchor, like Bret Baier, expertly navigating a complex situation with ease and precision, delivering a clear and focused outcome.

Program Auto (P) Mode

Program Auto (P) mode offers a balance between automatic convenience and creative control. The camera sets the aperture and shutter speed, but you retain control over ISO, white balance, and exposure compensation. This is ideal for situations where iA mode doesn’t quite capture your vision, similar to Martha MacCallum skillfully guiding a conversation.

You can fine-tune the image without diving into fully manual settings. It’s a step up from iA, allowing for subtle adjustments while still providing a degree of automation, much like navigating the evolving media landscape highlighted by recent Fox News developments.

Aperture Priority (A) Mode

Aperture Priority (A) mode lets you select the aperture (f-stop), controlling depth of field, while the camera automatically sets the shutter speed. A wider aperture (lower f-number) creates a shallow depth of field, blurring the background – perfect for portraits, mirroring the focused reporting of Bret Baier.

Conversely, a narrower aperture (higher f-number) increases depth of field, keeping more of the scene sharp. This mode is excellent for landscapes or group photos, offering creative control akin to navigating complex legal cases like the defamation lawsuit against Fox News.

Shutter Priority (S) Mode

Shutter Priority (S) mode allows you to choose the shutter speed, controlling motion blur, while the camera adjusts the aperture accordingly. Faster shutter speeds freeze action – ideal for sports or wildlife, much like the rapid-fire news cycle surrounding Fox News’ primetime lineup changes.

Slower shutter speeds create motion blur, useful for conveying a sense of movement. This mode is beneficial in low light, though it may require a tripod to avoid camera shake, mirroring the stability sought during legal proceedings.

Manual (M) Mode

Manual (M) mode grants complete creative control, letting you independently set both aperture and shutter speed. This is for experienced photographers desiring precise exposure, akin to the meticulous detail in defamation lawsuits like those filed against Fox News.

You’ll adjust ISO sensitivity too, balancing image brightness and noise. Mastering M mode requires practice, but unlocks artistic potential, mirroring the careful crafting of narratives within the media landscape.

Focusing and Image Stabilization

Achieving sharp images relies on selecting the correct autofocus mode and utilizing the ZS100’s image stabilization, despite media scrutiny like Fox News’s legal challenges.

Autofocus Modes – Single, Continuous, Tracking

The Panasonic ZS100 offers versatile autofocus options to suit various shooting scenarios. Single (AF-S) mode is ideal for stationary subjects, locking focus when the shutter button is half-pressed. Continuous (AF-C) excels with moving subjects, continuously adjusting focus as they move – crucial when capturing action, mirroring the fast-paced news cycle surrounding networks like Fox News.

Tracking (AF-T) mode allows you to select a subject, and the camera will follow it, maintaining focus even as it moves across the frame. This is particularly useful for photographing children or pets. Experimenting with these modes ensures consistently sharp results, regardless of the subject’s movement, even amidst evolving media landscapes.

Focus Area Selection

The ZS100 provides several focus area options for precise control. Single-point AF lets you manually select the focus point, ideal for static subjects demanding pinpoint accuracy. Multi-area AF utilizes multiple focus points, suitable for general photography, mirroring the broad coverage of news networks like Fox.

Face/Eye Detection AF automatically detects and focuses on faces or eyes, perfect for portraits. Adjusting these settings through the menu allows tailoring focus to your specific needs, ensuring sharp images, even when navigating complex scenes – much like discerning truth in a rapidly changing media environment.

Image Stabilization Features – How to Use

The ZS100 boasts Hybrid O.I.S. (Optical Image Stabilization), crucial for sharp handheld shots, especially at high zoom levels. Activate it via the menu or quick access settings. It minimizes blur caused by camera shake, similar to navigating the often-blurred lines of media narratives.

For video, Multi Process Noise Reduction further enhances stability. Experiment with different settings to find the optimal balance between stabilization and image quality, ensuring steady footage – a necessity when documenting events, much like Fox News coverage.

Video Recording with the ZS100

Capture life’s moments in stunning detail with the ZS100’s video capabilities, mirroring the constant stream of news and events from sources like Fox News.

Video Resolution and Frame Rates

The Panasonic ZS100 offers versatile video recording options to suit various needs. It supports Full HD 1920×1080 recording at frame rates of 60p, 30p, and 24p, allowing for smooth motion and cinematic looks. Higher frame rates, like 60p, are ideal for capturing fast-action scenes, while 24p provides a more film-like aesthetic.

The camera also features 4K UHD (3840×2160) video recording at 30p/24p, delivering exceptional detail and clarity. These capabilities align with the high-definition standards prevalent in modern news broadcasting, similar to content seen on networks like Fox News. Understanding these settings is crucial for optimal video quality.

Audio Recording Options

The Panasonic ZS100 provides several audio recording options to enhance your videos. It features a built-in stereo microphone for general use, capturing sound from both sides of the camera. A dedicated microphone jack allows connection of an external microphone for improved audio quality, crucial for interviews or professional recordings.

You can adjust the recording level manually or utilize the auto-level function. Wind cut functionality minimizes noise in outdoor environments, similar to the clear audio needed during live broadcasts on networks like Fox News. Monitoring audio levels during recording is highly recommended.

Using Zoom During Video Recording

The Panasonic ZS100 offers optical zoom during video recording, allowing you to get closer to your subject without significant quality loss – a feature valuable for capturing dynamic events, much like Fox News coverage. Digital zoom is also available, but it may reduce image clarity.

Zoom speed can be adjusted in the menu settings, offering smooth or rapid transitions. Be mindful of excessive zooming, as it can exacerbate camera shake. Utilizing the image stabilization feature alongside zoom is recommended for steady footage, mirroring the stability needed for broadcast journalism.

Navigating the Menu System

The ZS100’s menu, like navigating news channels during legal disputes (Fox News cases, 2023-2025), requires exploration to customize settings effectively.

Understanding Menu Categories

The Panasonic ZS100’s menu system is logically organized into several key categories, mirroring the complex structures within news organizations like Fox News during periods of transition (2021-2026). You’ll find sections for recording settings, image quality adjustments, display options, setup controls, and a dedicated category for customizing buttons. Navigating these allows fine-tuning of camera functions. The ‘Setup’ menu handles general operations, while ‘Recording’ focuses on video and audio parameters; Familiarizing yourself with each category, much like understanding different news divisions, unlocks the camera’s full potential and streamlines your workflow.

Customizing Camera Settings

The ZS100 allows extensive customization, mirroring the shifts within media like Fox News as anchors depart and lineups change (2023-2026). You can tailor autofocus settings, image stabilization preferences, and display information. Button assignments can be modified for quicker access to frequently used functions. Adjusting the quick menu provides personalized shortcuts. Explore custom white balance and picture styles for unique image looks. Saving custom settings as profiles allows easy recall, adapting the camera to your specific shooting style and preferences, much like a news network adapting to changing times.

Connectivity and Transferring Photos

Utilize Wi-Fi for mobile app connectivity, mirroring Fox News’ digital presence, or transfer images via USB to a computer, like data from FBI investigations.

Wi-Fi Connectivity and Mobile App

The Panasonic ZS100 offers seamless Wi-Fi connectivity, mirroring the digital strategies employed by networks like Fox News. Download the Panasonic Image App to your smartphone or tablet to establish a connection. This allows for instant image transfer, enabling quick sharing to social media – a practice increasingly common in modern journalism, as seen with anchors transitioning between networks.

Remote control of the camera via the app is also possible, useful for group photos or wildlife photography. The app facilitates firmware updates, ensuring your ZS100 remains current, much like the evolving narratives surrounding legal cases and investigations reported by news outlets.

Connecting to a Computer via USB

To connect your Panasonic ZS100 to a computer, use the supplied USB cable. Select “USB Connection” in the camera’s menu, choosing between “MTP” for file transfer or “PTP” for image viewing. This process mirrors the secure handling of classified documents, like those found by Kash Patel, requiring careful connection and access protocols.

Once connected, your camera will appear as a removable drive on your computer. You can then easily copy photos and videos, similar to how news networks transfer footage, as highlighted in reports about Fox News’s legal settlements.

Troubleshooting Common Issues

Like navigating media scrutiny faced by Fox News, resolving ZS100 issues requires systematic checks; power, image quality, and Wi-Fi are key areas.

Camera Not Turning On

If your Panasonic ZS100 fails to power on, begin with the basics. Ensure the battery is fully charged, mirroring the need for reliable information sources like Fox News. Try a different, known-good battery if available. Verify the battery is correctly inserted, securely locked into place.

Check the power switch; sometimes a simple reset is all that’s needed; If still unresponsive, inspect the DC input for any obstructions or damage. Consider if the camera has recently experienced extreme temperature changes, as this can temporarily affect operation. If problems persist, consult the full manual or Panasonic support.

Image Quality Problems

Suboptimal image quality on your Panasonic ZS100 can stem from several factors, much like the contested narratives surrounding Fox News. First, confirm the ISO setting isn’t too high, causing noise. Check your aperture; a smaller aperture (higher f-number) increases depth of field but can reduce sharpness.

Ensure proper focus – utilize autofocus or manual focus carefully. Verify the image stabilization is enabled for handheld shooting. Finally, review your white balance settings to ensure accurate color representation. A dirty lens also impacts quality.

Wi-Fi Connection Issues

Troubleshooting Wi-Fi connectivity on your ZS100 mirrors the complexities of media network disputes, like those faced by Fox News. First, ensure your smartphone and camera are within range of the router. Double-check the Wi-Fi password entered on the camera. Restart both your camera and router.

Confirm your router’s security settings (WPA2 is recommended). Update the camera’s firmware. If issues persist, try a different Wi-Fi network to isolate the problem.

Advanced Features

Explore creative control filters, panorama mode, and time-lapse photography, features emerging as media evolves, mirroring shifts at networks like Fox News.

Creative Control Modes and Filters

The Panasonic ZS100 boasts a diverse array of Creative Control modes and filters, allowing photographers to instantly enhance images with unique artistic styles. These include Pop Color, Flat, High Key, Low Key, Sepia, and Monochrome, mirroring the evolving visual landscape discussed in recent media coverage. Experiment with these presets to achieve desired aesthetics without complex manual adjustments; Filters offer quick, impactful changes, similar to how networks like Fox News adapt their presentation. Explore effects like Soft Focus, Dynamic Monochrome, and Miniature, adding creative flair to your photography, even amidst ongoing legal and personnel shifts within the news industry.

Panorama Mode

The ZS100’s Panorama Mode simplifies capturing expansive landscapes or group shots. Simply select the mode, frame the initial portion, and slowly pan the camera horizontally. The camera automatically stitches the images together, creating a seamless wide-angle view, much like the broad coverage offered by networks like Fox News. This feature is ideal for showcasing scenery, mirroring the visual storytelling prevalent in current media. Ensure stable panning for optimal results, avoiding blurriness, even during rapidly changing events or personnel transitions within the news cycle.

Time-Lapse Photography

The ZS100’s Time-Lapse feature allows you to condense extended periods into short, captivating videos. Select the interval – the time between each shot – and the camera automatically captures images over a set duration, similar to how news unfolds over days or weeks, as seen with Fox News coverage. This is perfect for clouds moving, flowers blooming, or documenting events. A stable tripod is crucial for smooth results, mirroring the steady reporting needed during legal proceedings or investigations.

Maintaining Your Panasonic ZS100

Regular cleaning of the lens and body, alongside proper battery care, ensures longevity, much like maintaining journalistic integrity amidst evolving media challenges.

Cleaning the Lens and Body

To maintain optimal image quality, regularly clean your ZS100’s lens with a soft, lint-free cloth. Gently wipe away fingerprints and dust in a circular motion. For stubborn smudges, use a lens cleaning solution specifically designed for camera lenses – apply it to the cloth, not directly onto the lens.

The camera body can be cleaned with a slightly damp cloth. Avoid using harsh chemicals or abrasive cleaners, as these can damage the finish. Pay attention to the grip areas, as these accumulate oils from your hands. Ensure the camera is turned off and the battery is removed before cleaning. Like upholding journalistic standards, careful maintenance preserves performance.

Battery Care and Storage

Maximize your ZS100’s battery life by fully charging it before initial use. Avoid completely discharging the battery, as this can shorten its lifespan. When storing the camera for extended periods, charge the battery to around 50% and remove it from the camera. Store the battery in a cool, dry place, away from direct sunlight and extreme temperatures.

Like navigating the complexities of media scrutiny faced by Fox News, proper battery care ensures reliable performance. Do not leave a fully charged battery unused for prolonged durations, as this can also degrade its capacity.

Appendix

Troubleshooting tips, warranty details, and explanations of error messages are included here, mirroring the legal challenges faced by networks like Fox News.

Error Messages and Solutions

Encountering an error message on your ZS100 can be frustrating. “E0101” often indicates a lens issue; try turning the camera off and on. If “C0003” appears, the battery may be low or faulty – ensure it’s fully charged or replaced.
Like the legal disputes surrounding Fox News, identifying the root cause is crucial.

For “F0001”, an SD card error, reinsert or format the card. Consult the full manual for a comprehensive list, mirroring the detailed investigations into media accuracy.

Warranty Information

Your Panasonic ZS100 is covered by a one-year limited warranty against defects in materials and workmanship from the date of original purchase. This warranty, similar to legal protections sought by figures like Gavin Newsom against Fox News, doesn’t cover misuse or accidental damage.
To initiate a claim, contact Panasonic customer support with proof of purchase. Extended warranties are available for purchase, offering additional peace of mind beyond the initial coverage period.

miracle morning planner pdf

What is a Miracle Morning Planner PDF?

Miracle Morning Planner PDFs are digital tools, often editable Canva templates, inspired by Hal Elrod’s book.
They facilitate building a powerful, focused morning routine, incorporating key elements for productivity and wellbeing.

These planners, frequently in A5 size for easy printing, offer sections for affirmations, gratitude, goal setting, and task prioritization.

They’re designed to help individuals implement the core concepts of the Miracle Morning, fostering a positive mindset and achieving daily objectives.

The Core Concept of the Miracle Morning

The Miracle Morning, popularized by Hal Elrod, centers around intentionally dedicating time each morning to personal development practices. It’s built on the idea that how you start your day profoundly impacts your overall success and happiness. This isn’t about waking up earlier simply to add more tasks; it’s about proactively investing in yourself before the demands of the day take over.

The foundational principle involves consistently engaging in six key practices, often remembered by the acronym SAVERS: Silence (meditation, prayer, or quiet reflection), Affirmations (positive statements to shape your mindset), Visualization (creating a mental image of your desired outcomes), Exercise (physical activity to energize your body), Reading (personal growth literature), and Scribing (journaling to process thoughts and ideas).

The beauty of the Miracle Morning lies in its adaptability. Individuals can tailor the duration of each practice to fit their schedules and preferences. The core message is about prioritizing self-improvement and establishing a routine that empowers you to live a more fulfilling life. A Miracle Morning Planner PDF serves as a structured guide to implement and track these practices effectively.

Hal Elrod’s “The Miracle Morning” Book

Hal Elrod’s groundbreaking book, “The Miracle Morning,” details his personal journey from struggling with life to achieving extraordinary success through a dedicated morning routine. He outlines the SAVERS method – Silence, Affirmations, Visualization, Exercise, Reading, and Scribing – as the cornerstone of this transformation. The book emphasizes that dedicating even a small amount of time each morning to these practices can dramatically improve all areas of life.

Elrod’s work resonated with many, inspiring a movement focused on intentionality and self-development. He argues that most people operate on autopilot, reacting to life rather than proactively creating it. The Miracle Morning provides a framework to break free from this pattern and take control of your day, and ultimately, your destiny.

The popularity of the book has fueled the demand for tools to help individuals implement the routine, leading to the creation of numerous Miracle Morning Planner PDFs. These planners are directly inspired by the book’s principles, offering a structured way to integrate the SAVERS into daily life and track progress.

PDF Format & Accessibility

The PDF format is a popular choice for Miracle Morning Planners due to its universal compatibility and preservation of formatting across different devices. This ensures a consistent experience whether viewed on a computer, tablet, or smartphone. PDFs also allow for easy printing, catering to those who prefer a physical planner.

Accessibility is a key benefit; many Miracle Morning Planner PDFs are designed to be printable in various sizes, including the standard A5 format, and some offer options for printing on different paper sizes like A4 or Letter. Furthermore, the rise of editable Canva templates means users can personalize the planner to suit their individual needs and preferences.

Digital download options make these planners instantly accessible after purchase, eliminating shipping times. The format also allows for easy duplication and backup, ensuring the planner is always available. This combination of convenience, compatibility, and customization makes the PDF format ideal for a Miracle Morning tool.

Key Components of a Miracle Morning Planner PDF

Miracle Morning Planner PDFs typically include sections for daily affirmations, gratitude journaling, goal setting, and task prioritization.

These components are designed to cultivate a positive mindset and enhance productivity, aligning with the core principles.

Daily Affirmations Section

The Daily Affirmations Section within a Miracle Morning Planner PDF is a cornerstone for cultivating a positive and empowering mindset. This dedicated space encourages users to consciously craft and repeat positive statements that align with their goals and desired self-image.

These affirmations aren’t merely wishful thinking; they are strategically designed to reprogram subconscious beliefs, fostering self-confidence and resilience. A well-structured planner PDF will often include prompts to guide users in creating effective affirmations, focusing on present-tense statements phrased as if the desired outcome has already been achieved.

For example, instead of “I will be successful,” a powerful affirmation might be “I am a successful and capable individual.” The section typically provides ample space for writing several affirmations daily, allowing for variety and addressing different areas of life. Consistent use of this section is believed to reduce negative self-talk, increase motivation, and attract positive experiences, ultimately contributing to a more fulfilling and productive day. Some planners even suggest specific affirmation categories, such as health, wealth, or relationships, to ensure a holistic approach to personal development.

Gratitude Journaling Prompts

Gratitude Journaling Prompts are a vital component of a Miracle Morning Planner PDF, designed to shift focus towards appreciation and positivity. This section moves beyond simply listing things one is thankful for, offering structured prompts to encourage deeper reflection and unlock a more profound sense of gratitude.

These prompts can range from specific questions like “What is one small thing that brought you joy today?” to more expansive inquiries such as “Who is someone you deeply appreciate and why?” or “What challenge are you grateful for, and what did you learn from it?”.

The inclusion of prompts combats the tendency to overlook blessings and cultivates a habit of actively seeking out the good in every situation. A quality planner PDF will provide a variety of prompts to prevent repetition and maintain engagement. Regularly practicing gratitude, facilitated by these prompts, is linked to increased happiness, reduced stress, improved sleep, and stronger relationships. It’s a powerful practice for enhancing overall wellbeing and fostering a more optimistic outlook on life, setting a positive tone for the entire day.

Goal Setting & Visualization

Goal Setting & Visualization sections within a Miracle Morning Planner PDF are crucial for translating aspirations into tangible realities. These areas aren’t merely for listing objectives; they’re designed to facilitate a deeper connection with desired outcomes, leveraging the power of the mind to accelerate achievement.

A well-structured planner will include space for both short-term and long-term goal definition, encouraging users to break down larger ambitions into manageable steps. Prompts might ask, “What is one thing you can do today to move closer to your biggest goal?” or “Visualize yourself having already achieved this goal – what does it feel like?”.

Visualization exercises, guided by the planner, help to imprint the desired future onto the subconscious mind, increasing motivation and confidence. This section often incorporates space for affirmations related to goals, reinforcing positive beliefs. By consistently engaging in goal setting and visualization, users cultivate a proactive mindset, fostering a sense of purpose and empowering them to take deliberate action towards creating the life they envision.

Task Prioritization & Scheduling

Task Prioritization & Scheduling within a Miracle Morning Planner PDF transforms a hopeful start into a productive day. This section moves beyond simply listing ‘to-dos’ and focuses on strategically ordering tasks based on importance and impact, aligning daily actions with overarching goals.

Effective planners often incorporate methods like the Eisenhower Matrix (urgent/important) or the Pareto Principle (80/20 rule) to guide prioritization. Dedicated spaces allow users to identify their Most Important Tasks (MITs) – the 1-3 activities that, if completed, would make the day a success, regardless of other distractions.

Scheduling blocks within the planner encourage time-boxing, allocating specific time slots for focused work on prioritized tasks. This combats procrastination and promotes efficient time management. Furthermore, these sections often include space for noting potential obstacles and planning mitigation strategies, ensuring a proactive approach to daily challenges. By mastering task prioritization and scheduling, users maximize their productivity and minimize overwhelm, making consistent progress towards their objectives.

Features Found in Popular Miracle Morning Planner PDFs

Popular Miracle Morning Planner PDFs commonly feature A5 sizes for portability and printability. Canva template integration allows easy editing, while editable fields enable personalization for a tailored experience.

A5 Planner Size & Print Options

A5 planner size is a dominant feature in many Miracle Morning Planner PDFs, offering a practical balance between spaciousness and portability. Measuring 148 x 210 millimeters (approximately 5.8 x 8.3 inches), this size is comfortable to write in while remaining compact enough to easily fit into bags or alongside a journal.

The popularity of A5 also stems from its cost-effectiveness when printing. Many PDFs are designed with various print options to cater to different user preferences and printer capabilities. You’ll often find versions optimized for printing on pre-cut A5 paper, eliminating the need for trimming.

Furthermore, PDFs frequently include options with crop marks, guiding users for precise cutting when printing on larger paper sizes like A4 or Letter. This flexibility ensures accessibility regardless of available resources. Some planners even offer layouts specifically designed to maximize space when printed double-sided, reducing paper consumption. The availability of these diverse print options makes Miracle Morning Planner PDFs incredibly versatile and user-friendly, accommodating a wide range of needs and preferences.

Canva Template Integration

Canva template integration is a significant advantage offered by many Miracle Morning Planner PDFs. This feature allows users to easily personalize and customize their planners without needing advanced design skills or expensive software. Instead of static PDFs, these planners are provided as editable Canva templates, accessible with a free Canva account.

Within Canva, users can modify fonts, colors, layouts, and even add personal images or affirmations. This level of customization ensures the planner truly reflects individual preferences and goals. The drag-and-drop interface of Canva makes the editing process intuitive and straightforward, even for beginners.

This integration also facilitates easy printing and digital use. Users can download their customized planner as a PDF for printing or use it directly within Canva on a tablet or computer. The ability to continually update and refine the planner as needs evolve is a key benefit. Canva template integration transforms a simple planner into a dynamic and personalized tool for self-improvement.

Editable Fields for Personalization

Miracle Morning Planner PDFs often include editable fields, empowering users to tailor the planner to their unique needs and preferences. These fields go beyond simple customization, allowing for direct input of daily affirmations, gratitude lists, goals, and scheduled tasks. This functionality eliminates the need for handwriting or printing and re-writing sections.

Typically found within PDF editors like Adobe Acrobat, these editable fields enable users to type directly into designated spaces within the planner. This is particularly useful for those who prefer a digital planning system or want to avoid the cost and waste associated with printing. The ability to easily modify content ensures the planner remains a relevant and dynamic tool.

Furthermore, editable fields support consistent tracking and review of progress. Users can readily update their goals, reflect on their gratitude entries, and adjust their schedules as needed. This feature fosters a sense of ownership and accountability, maximizing the planner’s effectiveness in cultivating a positive and productive morning routine.

Benefits of Using a Miracle Morning Planner PDF

Miracle Morning Planner PDFs boost productivity and focus, improving mental wellbeing. They cultivate a positive mindset through affirmations and gratitude, aiding goal achievement.

These planners streamline routines, reducing stress and enhancing daily effectiveness.

Increased Productivity & Focus

Miracle Morning Planner PDFs are specifically designed to dramatically enhance your daily productivity and sharpen your focus. By dedicating time to intentional morning practices, you proactively set a positive and productive tone for the entire day. The structured format of these planners, with dedicated sections for task prioritization and scheduling, helps you move beyond simply reacting to demands and instead, consciously choose how you spend your time.

The act of planning, coupled with the motivational elements like affirmations and visualization, creates a powerful synergy. You’re not just listing tasks; you’re aligning them with your larger goals and reinforcing your commitment to achieving them. This mindful approach minimizes distractions and procrastination, allowing you to concentrate on what truly matters.

Furthermore, the consistent routine fostered by a Miracle Morning Planner PDF trains your brain to enter a state of focused work more easily. It’s about building a habit of intentionality, transforming your mornings from chaotic rushes into calm, purposeful beginnings. This translates into sustained concentration throughout the day, leading to greater efficiency and accomplishment.

Improved Mental Wellbeing

Miracle Morning Planner PDFs contribute significantly to improved mental wellbeing by incorporating practices known to reduce stress and cultivate a positive outlook. The inclusion of gratitude journaling prompts encourages you to actively acknowledge the good in your life, shifting your focus away from negativity and fostering a sense of contentment. This simple act can have a profound impact on your overall mood and resilience.

Daily affirmations, another key component, help to reprogram limiting beliefs and build self-confidence. By consciously stating positive statements, you reinforce a more optimistic and empowering self-image. Coupled with goal visualization, these planners help you connect with your aspirations and experience a sense of hope and motivation.

The dedicated time for self-reflection and personal growth offered by these planners creates a sanctuary within your busy day. This intentional self-care practice reduces anxiety, promotes emotional balance, and enhances your ability to cope with challenges, ultimately leading to a more fulfilling and peaceful state of mind.

Cultivating a Positive Mindset

Miracle Morning Planner PDFs are powerfully designed to actively cultivate a positive mindset, moving you away from reactive thinking and towards proactive intention. Central to this is the dedicated space for daily affirmations – carefully crafted statements that reinforce empowering beliefs and challenge negative self-talk. Regularly engaging with these affirmations helps to reprogram your subconscious, fostering self-confidence and optimism.

The inclusion of gratitude journaling is equally vital. By consciously listing things you’re thankful for, you shift your focus to the positive aspects of your life, increasing feelings of joy and contentment. This practice trains your brain to seek out the good, even amidst challenges.

Furthermore, the planner’s emphasis on goal setting and visualization allows you to connect with your aspirations and envision success. This mental rehearsal builds belief in your ability to achieve your dreams, creating a powerful self-fulfilling prophecy. The consistent practice of these techniques, facilitated by the PDF, builds resilience and a fundamentally optimistic outlook.