Mattress-in-a-box options‚ including memory foam and hybrid types‚ offer convenient delivery and setup. These compressed mattresses arrive rolled and packed for easy transport.
This innovative approach simplifies the process of acquiring a new sleep surface‚ making it accessible to a wider audience.
What is a Mattress-in-a-Box?
Mattresses-in-a-box represent a modern evolution in bedding retail‚ offering a convenient alternative to traditional mattress shopping. These aren’t simply smaller versions of standard mattresses; they’re engineered using specialized foams – often memory foam‚ latex‚ or hybrid combinations – that allow them to be tightly compressed and rolled for efficient shipping.
The compression process involves removing air from the mattress layers‚ enabling it to fit into a relatively compact box. Upon unboxing‚ the mattress gradually expands‚ regaining its original shape and size. This method streamlines delivery‚ reduces logistical costs‚ and provides a hassle-free experience for consumers‚ eliminating the need for bulky in-store transport.
Essentially‚ it’s a fully functional mattress delivered directly to your doorstep‚ ready for a comfortable night’s sleep after a short expansion period.

Benefits of Choosing a Mattress-in-a-Box
Opting for a mattress-in-a-box delivers numerous advantages; Convenience is paramount‚ with direct-to-door delivery eliminating the need for stressful in-store visits and transportation. Cost savings are also significant‚ as brands often bypass traditional retail markups‚ offering competitive pricing.

These mattresses frequently come with generous trial periods‚ allowing you to test the comfort level in your own home. The simplified setup process‚ requiring only unboxing and expansion‚ is a major draw. Furthermore‚ the compressed packaging makes them ideal for navigating tight spaces‚ like apartment stairwells or smaller doorways.
Ultimately‚ a mattress-in-a-box provides a modern‚ affordable‚ and convenient path to a better night’s sleep.

Preparing for Unboxing
Before unboxing‚ select the room where the mattress will reside. Clear ample space around your bed frame‚ removing obstacles for easy expansion.
Choosing the Right Location
Selecting the ideal location for unboxing is crucial for a smooth experience. The mattress should be unpacked in the room where it will ultimately be used‚ avoiding unnecessary maneuvering of the heavy‚ expanding item. Ensure the chosen space is free from obstructions like furniture‚ boxes‚ or rugs that could hinder the expansion process.
Consider the ventilation in the room‚ as some off-gassing may occur during expansion. A well-ventilated space will help dissipate any initial odors more quickly. Protect your flooring with a sheet or cardboard to prevent potential scuffs or marks during the unboxing process. Prior planning ensures a hassle-free setup!
Clear the Area
Before unboxing‚ dedicate ample space around your bed frame. Removing chairs‚ storage containers‚ and even area rugs is essential‚ as the mattress will significantly expand in size. This prevents accidental damage to your belongings and ensures a clear path for maneuvering the mattress into its final position.
Aim for at least a six-foot radius of unobstructed space. This allows sufficient room for the mattress to fully inflate and prevents feeling cramped during the setup process. A clutter-free environment streamlines the unboxing and minimizes the risk of tripping or bumping into objects. Preparation is key for a successful setup!
Tools You Might Need
While generally straightforward‚ a few tools can enhance your mattress-in-a-box unboxing experience. A box cutter or scissors is crucial for safely opening the packaging. Though not always necessary‚ a utility knife can be helpful for stubborn tape. Consider having gloves available to protect your hands during unwrapping‚ especially if you’re sensitive to materials.
A vacuum cleaner is useful for tidying up any packaging debris afterward. Finally‚ a camera or smartphone can document the unboxing process‚ which is helpful if you encounter any issues and need to contact customer support. These simple tools contribute to a smoother‚ more efficient setup.

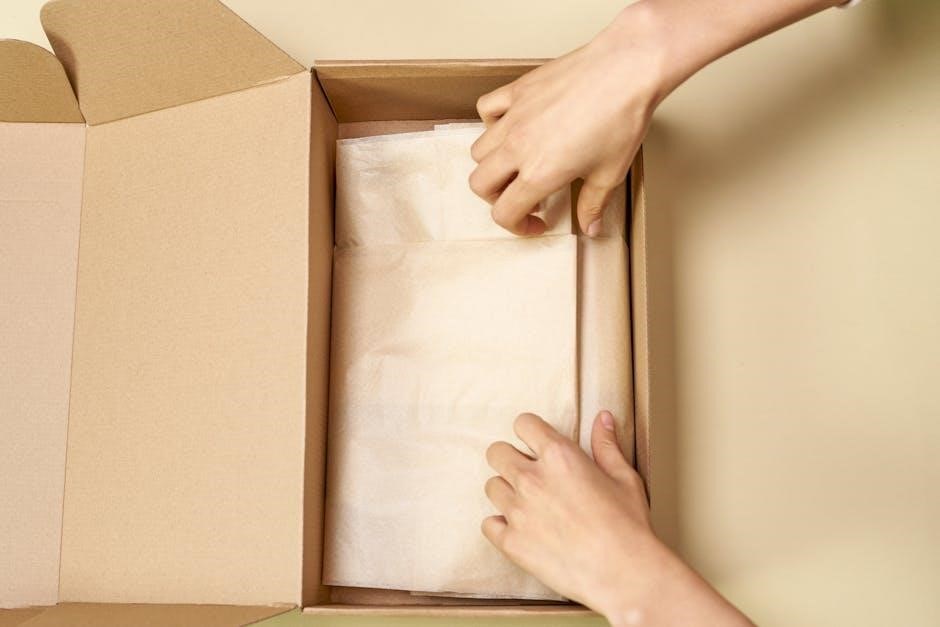
The Unboxing Process
Begin by carefully opening the box‚ then remove the compressed mattress. Unwrap the plastic layers to allow the mattress to expand and air out.
Step 1: Opening the Box
Initiating the unboxing process begins with carefully opening the mattress box. Use a box cutter or scissors‚ being extremely cautious not to damage the mattress itself during this step. Gently slice along the taped seams‚ avoiding deep cuts that could compromise the inner packaging.
Once the initial seals are broken‚ fully open the box flaps. You’ll find the tightly rolled and compressed mattress inside‚ often encased in multiple layers of plastic. Take your time and ensure you have enough space to maneuver as you proceed to the next step – removing the compressed mattress from its packaging. Remember safety first!
Step 2: Removing the Compressed Mattress
Carefully extract the compressed mattress from the box. It will be tightly rolled and may require a bit of effort to unroll. Gently pull the mattress out‚ avoiding any forceful yanking that could potentially damage the internal components. As you unroll‚ observe how it slowly begins to expand‚ regaining its original shape.
Lay the rolled mattress flat on the floor in the room where it will be used. Avoid lifting or folding it excessively at this stage‚ as this can hinder the expansion process. The mattress may feel surprisingly light and compact initially‚ but it will progressively increase in size and weight as it decompresses.
Step 3: Unwrapping the Mattress
Now‚ carefully unwrap the plastic covering surrounding the mattress. Typically‚ there’s an outer layer and potentially an inner layer. Use scissors or a box cutter‚ but be extremely cautious not to cut into the mattress itself! Gently slice along the plastic‚ avoiding deep cuts. Remove both layers of plastic‚ revealing the mattress surface.
Inspect the mattress for any visible damage during the unwrapping process. While rare‚ it’s best to identify any imperfections immediately. Allow the mattress to fully expand before placing bedding on it. Proper unwrapping is crucial for optimal expansion and to ensure a comfortable sleep experience.

Mattress Expansion & Off-Gassing
Allow 12-24 hours for full expansion‚ as air re-enters the foam layers. A slight odor during off-gassing is normal and will dissipate quickly.
Understanding the Expansion Process
The expansion process begins immediately after unwrapping your mattress. Compressed for shipping‚ the foam layers need time to breathe and regain their original shape. This isn’t an instant transformation; it’s a gradual unfolding and aeration of the materials within.
Think of it like releasing a tightly coiled spring – it doesn’t snap back instantly‚ but slowly extends. Air is crucial for this process‚ allowing the foam to decompress and fully inflate. The mattress will initially appear smaller and firmer than its final form‚ but will progressively grow in size and soften as it expands. Patience is key during this phase‚ as forcing or manipulating the mattress can hinder the process.
How Long Does Expansion Take? (12-24 Hours)
Generally‚ most boxed mattresses require 12 to 24 hours to fully expand once unwrapped. However‚ this timeframe can vary slightly depending on the mattress type‚ thickness‚ and the room’s temperature. Cooler temperatures may slow down the expansion‚ while warmer environments can accelerate it.
During the initial hours‚ you’ll notice significant growth‚ but complete expansion‚ including achieving optimal comfort and support‚ typically takes a full day. Avoid placing heavy objects or sleeping on the mattress before it’s fully expanded‚ as this can permanently compress the foam and affect its long-term performance.
Dealing with Off-Gassing & Odor
A slight odor is common after unboxing a mattress-in-a-box‚ known as off-gassing. This is a natural byproduct of the manufacturing process and consists of volatile organic compounds (VOCs). Don’t worry‚ it’s typically harmless! Proper ventilation is key to minimizing the smell.
Open windows and doors‚ or use fans to circulate air in the room. The odor usually dissipates within a few hours to a few days; Avoid prolonged exposure if you are sensitive to smells. The scent will fade as the mattress airs out‚ allowing you to enjoy your new‚ comfortable sleep surface without any lingering odors.

Setting Up Your New Mattress
Once expanded‚ carefully place your new mattress onto your bed frame. Add your preferred bedding – sheets‚ pillows‚ and comforters – to complete your cozy sleep setup!
Placing the Mattress on the Bed Frame
Carefully lift your fully expanded mattress and position it onto your bed frame. Ensure the frame is stable and properly assembled before placing the mattress to prevent any accidental slips or damage. If you have a slatted frame‚ double-check that all slats are securely in place to provide adequate support.
Consider using mattress handles‚ if available‚ for easier maneuvering. Gently guide the mattress onto the frame‚ avoiding dragging it‚ which could potentially cause wear and tear. Center the mattress on the frame for even weight distribution and optimal sleep comfort. A properly supported mattress will contribute to a better night’s rest and prolong its lifespan.
Adding Bedding
Now that your mattress is securely placed on the bed frame‚ it’s time to add your bedding! Begin with a mattress protector to shield your investment from spills‚ stains‚ and allergens‚ extending its lifespan. Follow with fitted sheets‚ ensuring a snug and wrinkle-free fit for maximum comfort.
Next‚ add your desired blankets‚ comforters‚ or duvets‚ layering them according to the season and your personal preference. Finish with pillows and decorative cushions to create a cozy and inviting sleep sanctuary. Freshly laundered bedding enhances the overall sleep experience‚ promoting relaxation and a restful night’s sleep.

Troubleshooting Common Issues
If your mattress doesn’t fully expand or has minor imperfections‚ allow the full 24-hour expansion time and contact the retailer for assistance.
Mattress Not Fully Expanding
Occasionally‚ a mattress may not immediately reach its full size after unboxing. Patience is key‚ as most boxed mattresses require 12-24 hours to fully expand and regain their shape. Ensure the mattress is placed on a supportive bed frame‚ allowing air to circulate around all sides.
Avoid placing heavy objects on the mattress during this expansion period‚ as this can hinder the process. If‚ after 24 hours‚ the mattress still appears significantly compressed‚ double-check that all packaging has been removed. Contact the retailer or manufacturer; they can offer specific guidance or address potential defects.
Proper ventilation in the room will also aid in the expansion process‚ allowing air to re-enter the foam layers.
Dealing with Imperfections
Minor imperfections are sometimes present in mattress-in-a-box models due to the compression and shipping process. Slight variations in firmness or minor cosmetic flaws are generally normal and shouldn’t affect the overall sleep experience. Allow the mattress a full 24 hours to settle before assessing these imperfections.
If you notice significant indentations or structural issues‚ document them with photos and contact the retailer immediately. Most companies offer warranties covering manufacturing defects. Don’t attempt to repair the mattress yourself‚ as this could void the warranty.
Remember to review the warranty details upon purchase to understand your rights and options.

Care and Maintenance
Regular rotation of your mattress helps distribute wear evenly‚ prolonging its lifespan and maintaining comfort. Routine cleaning keeps it fresh and hygienic.
Rotating Your Mattress
Consistent mattress rotation is a crucial aspect of long-term care‚ significantly impacting its lifespan and maintaining optimal comfort levels. Rotating your mattress every three to six months helps to evenly distribute wear and tear across the surface.
This practice prevents the development of permanent body impressions‚ ensuring a consistently supportive sleep experience. For mattresses with a specific top and bottom‚ rotation isn’t possible; instead‚ flip the mattress over. However‚ many modern mattress-in-a-box designs are designed for rotation only.
Regular rotation minimizes sagging and extends the overall usability of your investment‚ contributing to years of restful nights. It’s a simple yet effective maintenance step!
Cleaning Your Mattress
Regular cleaning maintains hygiene and extends the life of your mattress-in-a-box. Vacuuming the mattress surface monthly removes dust mites‚ allergens‚ and debris. Use the upholstery attachment for a thorough clean‚ paying attention to seams and crevices.
For spills‚ blot immediately with a clean cloth – avoid rubbing‚ which can spread the stain. Mild detergent mixed with water can be used for stubborn marks‚ but ensure the mattress is only slightly dampened. Always allow the mattress to air dry completely before replacing bedding.
Consider a mattress protector for added defense against spills and stains‚ simplifying cleaning and preserving your investment.

Final Thoughts & Tips
Enjoying your new mattress-in-a-box is about more than just unboxing; it’s about creating a comfortable sleep environment. Remember ventilation is key during and after expansion to minimize any initial odor. Don’t rush the full expansion process – allow the recommended 12-24 hours for optimal comfort.
Prioritize a supportive bed frame and quality bedding to maximize your sleep experience. Regularly rotate your mattress to promote even wear and tear‚ extending its lifespan. Addressing minor imperfections is normal‚ but contact the retailer if concerns persist.
Sweet dreams await with your convenient and comfortable mattress-in-a-box!