The Shred Diet Plan, created by Dr. Ian Smith, is a 4-week rapid weight loss program designed to kickstart metabolism and burn fat effectively, offering a structured approach to shedding pounds quickly while maintaining nutritional balance.
1.1 Overview of the Shred Diet
The Shred Diet is a structured 4-week weight loss program designed to help individuals shed pounds rapidly while maintaining a balance of nutrients. Created by Dr. Ian Smith, it focuses on high-protein meals, low-glycemic carbohydrates, and healthy fats to promote fat loss and boost metabolism. The diet is divided into phases, each tailored to specific goals, ensuring a gradual and sustainable approach to weight loss. It emphasizes portion control, meal timing, and avoiding processed foods. By prioritizing whole, nutrient-dense foods, the Shred Diet aims to reset eating habits and improve overall health. Its flexibility makes it suitable for various fitness levels and dietary preferences, providing a clear roadmap for achieving a leaner, healthier physique.
1.2 How the Shred Diet Works
The Shred Diet operates by focusing on strategic meal planning and portion control to maximize fat loss while preserving muscle mass. It emphasizes high-protein, low-glycemic meals to stabilize blood sugar levels and reduce cravings. The diet is structured in phases, with each phase targeting specific fat-loss zones, ensuring gradual and sustainable weight loss. By incorporating healthy fats, lean proteins, and complex carbohydrates, the Shred Diet helps boost metabolism and suppress appetite. It also encourages meal timing to optimize fat burning and energy levels. The program avoids processed foods and sugars, promoting whole, nutrient-dense ingredients to support overall health and longevity. This structured approach ensures users stay on track and achieve visible results within a short period.
1.3 Why the Shred Diet is Popular
The Shred Diet has gained widespread popularity due to its promise of rapid yet sustainable weight loss. Its structured, easy-to-follow meal plans and focus on nutrient-dense foods appeal to those seeking visible results quickly. The diet’s emphasis on metabolism boosting and fat burning resonates with individuals aiming for a lean physique. Additionally, its flexibility in accommodating different lifestyles and dietary preferences makes it accessible to a broad audience. The availability of a PDF guide provides users with a convenient, comprehensive resource to track their progress and stay motivated. Overall, the Shred Diet’s combination of scientific backing, practicality, and proven results has made it a favored choice among fitness enthusiasts and dieters alike.

Key Components of the Shred Diet Plan
The Shred Diet Plan focuses on balancing daily caloric needs with macronutrient ratios, emphasizing protein, healthy fats, and complex carbs. It also stresses meal frequency and timing to optimize fat loss and energy levels.
2.1 Daily Caloric Needs and Macronutrient Balance
The Shred Diet Plan emphasizes calculating individual daily caloric needs to ensure a deficit for weight loss while maintaining macronutrient balance. It typically recommends a distribution of 40% protein, 30% carbohydrates, and 30% fats. Protein is prioritized to preserve muscle mass, while carbs and fats provide energy. By adjusting these ratios, the diet tailors to different body types and goals, ensuring sustained fat loss without muscle loss. This balance supports metabolism and prevents plateaus, making it effective for those seeking visible results quickly. The plan also advises adjusting calories based on progress and activity levels to maintain optimal fat-burning conditions.

2.2 Meal Frequency and Timing
The Shred Diet Plan recommends eating 5-6 smaller meals daily to keep metabolism active and prevent hunger. Meals should be spaced every 2-3 hours, starting with breakfast within an hour of waking up. This approach helps maintain energy levels and supports fat burning. Timing is crucial, with the last meal consumed 2-3 hours before bedtime to avoid overnight fat storage. Snacks are included to curb cravings and maintain metabolic activity. The plan emphasizes consistency in meal timing to regulate digestion and optimize weight loss. Adjustments can be made based on individual schedules and goals, ensuring the diet remains sustainable and effective for rapid results. Proper timing enhances the plan’s effectiveness and supports overall metabolic health.
Sample 7-Day Shred Diet Meal Plan
This structured plan provides a detailed daily menu, including balanced meals and snacks, designed to maximize fat loss and boost metabolism over a week-long period effectively.
3.1 Breakfast Options
Breakfast is the cornerstone of the Shred Diet, designed to kickstart your metabolism. Options include scrambled eggs with spinach and whole-grain toast, Greek yogurt with berries, or a protein smoothie. These meals are high in protein and fiber, ensuring sustained energy and satiety. Avoid sugary foods and opt for nutrient-dense choices to support fat loss and overall health. Incorporating healthy fats like avocado or nuts can also enhance meal satisfaction. Stay hydrated by drinking water or green tea with breakfast to boost your metabolic rate. Each breakfast option is carefully balanced to provide the right mix of macronutrients, keeping you on track with your weight loss goals.
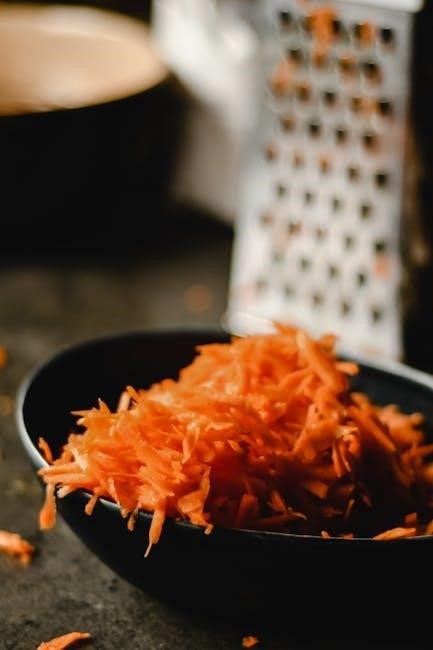
3.2 Lunch and Dinner Ideas
Lunch and dinner on the Shred Diet focus on lean proteins, vegetables, and whole grains to promote fat loss and muscle retention. Grilled chicken breast with steamed broccoli and quinoa, or baked salmon with asparagus and brown rice, are excellent options. Stir-fries with tofu, mixed vegetables, and a small portion of brown rice are also ideal. For dinner, consider turkey or lean beef stir-fries with zucchini noodles or cauliflower rice. Ensure meals are balanced with a mix of protein, healthy fats, and complex carbs to keep you satisfied and support your metabolic goals. Avoid heavy sauces and opt for herbs and spices for flavor. Portion control is key to maintaining caloric balance while still enjoying nutritious, filling meals. Stay hydrated by drinking water or herbal tea with your meals.
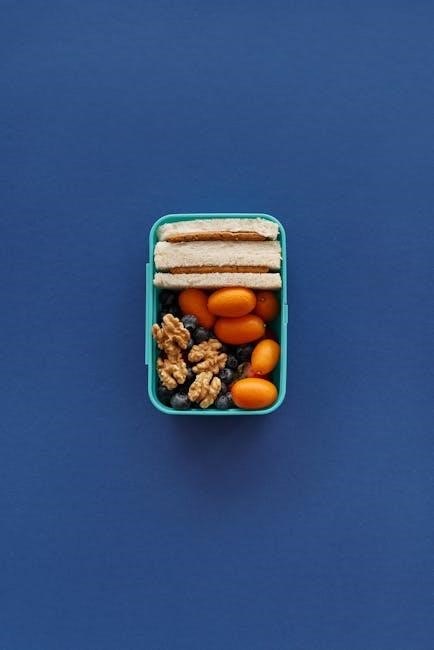
3.3 Snacks and Desserts
Snacks and desserts on the Shred Diet are designed to be low in calories and high in nutrients to support fat loss without cravings. Opt for fresh fruits like berries, citrus, or apples, paired with a handful of almonds or walnuts. Greek yogurt with a drizzle of honey and chia seeds is another excellent choice. For desserts, consider protein-rich options like a small portion of dark chocolate or a homemade fruit smoothie with protein powder. Avoid sugary treats and instead satisfy sweet cravings with natural sources like baked apples with cinnamon or a small serving of sorbet. Portion control is crucial to maintain the diet’s effectiveness, ensuring snacks and desserts contribute positively to your overall weight loss journey.

Grocery Shopping Tips for the Shred Diet
Grocery shopping for the Shred Diet involves planning meals, making a list, and focusing on whole, unprocessed foods like lean proteins, vegetables, and whole grains to ensure adherence to the diet’s guidelines and support weight loss effectively.


4.1 Essential Foods to Buy
Stocking your pantry with whole, nutrient-dense foods is key to the Shred Diet. Focus on lean proteins like chicken, fish, and tofu, along with plenty of colorful vegetables and leafy greens. Whole grains such as brown rice, quinoa, and whole-grain bread provide sustained energy. Incorporate healthy fats like avocados, nuts, and olive oil for satiety and hormone balance. Low-sugar fruits like berries and citrus are great for snacks, while Greek yogurt and cottage cheese offer protein-rich options. Herbs, spices, and vinegar add flavor without excess calories. Avoid processed foods and opt for fresh or frozen alternatives to maintain nutritional integrity and support rapid weight loss.
4.2 Avoiding Unhealthy Choices
To successfully follow the Shred Diet, it’s crucial to steer clear of processed foods, sugary snacks, and saturated fats. These items can derail progress and hinder fat loss. Limit your intake of refined carbohydrates, fast food, and high-calorie beverages. Instead, opt for whole, nutrient-dense foods like lean proteins, vegetables, and whole grains; Stay hydrated by drinking plenty of water, as this helps suppress cravings and boosts metabolism. Avoid mindless snacking by planning meals in advance and using tools like a meal plan to stay on track. By eliminating unhealthy choices and focusing on nourishing options, you’ll maintain discipline and achieve your weight loss goals more effectively.
Maintaining Discipline on the Shred Diet
Maintaining discipline involves setting clear goals, tracking progress, and planning meals. Drinking water before meals and healthy snacks prevent cravings, keeping you focused and committed.
5.1 Tracking Progress
Tracking progress on the Shred Diet involves monitoring food intake, weekly weigh-ins, and adjusting caloric needs. Keeping a food diary helps identify patterns and ensures adherence to the plan. Regularly measuring body fat percentage and tracking physical changes, like increased energy or improved muscle definition, also motivates consistency. By documenting meals and portion sizes, users can identify areas for improvement and stay accountable. Additionally, scheduling weekly check-ins provides a clear view of progress toward goals, allowing for necessary adjustments. This systematic approach ensures users stay on track and maintain discipline throughout the program. Consistency is key, and tracking progress helps celebrate small victories, reinforcing the commitment to achieving a leaner, healthier body.

5.2 Staying Motivated
Staying motivated on the Shred Diet requires a combination of mindset shifts and practical strategies. Setting realistic goals and celebrating small victories, like increased energy or improved physical appearance, helps maintain enthusiasm. Surrounding yourself with supportive individuals who encourage your journey can also boost motivation. Additionally, focusing on how the diet makes you feel—rather than just the number on the scale—keeps the process positive. Drinking water, brushing your teeth, and planning meals in advance are simple yet effective ways to stay on track and resist cravings. By redirecting your focus and staying accountable, you can overcome challenges and remain committed to achieving your shredding goals. Motivation is key to long-term success.