keurig duo plus manual

Product Overview

The Keurig Duo Plus is a versatile coffee maker that combines single-serve K-Cup pod brewing with carafe brewing using ground coffee. It offers flexibility, programmable features, and a compact design, making it ideal for both single-serve and full-pot coffee needs. The machine includes a removable water reservoir, multiple brew size options, and a sleek, user-friendly interface. Perfect for coffee lovers who appreciate convenience and customization, the Keurig Duo Plus delivers high-quality coffee in every cup or carafe.

1.1 Key Features of the Keurig Duo Plus

The Keurig Duo Plus offers a blend of versatility and convenience, featuring programmable controls, a removable 12-cup water reservoir, and compatibility with both K-Cup pods and ground coffee. It includes multiple brew size options (6, 8, 10, and 12 ounces) and a strong brew option for bolder flavors. The machine also has a carafe brewing function, allowing users to prepare up to 12 cups of coffee when using ground beans. Its sleek design and user-friendly interface make it easy to navigate, while the programmable features ensure a personalized coffee experience every time.

1.2 Compatibility with K-Cup Pods and Ground Coffee

The Keurig Duo Plus seamlessly supports both K-Cup pods and ground coffee, catering to diverse brewing preferences. For single-serve convenience, it accepts K-Cup pods, offering a wide range of flavors and blends. When using ground coffee, the Duo Plus allows users to brew carafes of up to 12 cups, providing flexibility for entertaining or household needs. This dual compatibility ensures that users can enjoy their favorite coffee without compromising on variety or quantity, making it a versatile choice for any coffee enthusiast.

Initial Setup and First Use

Unbox, remove packaging, rinse the brewer, and power it on. Fill the water reservoir, set the clock, and run a cleansing brew to prepare for first use.

2.1 Unboxing and Removing Packaging

Begin by carefully unboxing the Keurig Duo Plus. Remove all packaging materials, including plastic wrap, tape, and protective coverings from the machine, water reservoir, and drip tray. Lay the coffee maker on a flat, stable surface to ensure proper setup. Locate and remove any additional packaging from the base or internal components. Ensure all parts, such as the K-Cup pod holder and carafe, are included and free from damage. Discard all packaging materials and prepare for the next steps in the setup process.

2.2 Filling the Water Reservoir

Locate the removable water reservoir on the side of the Keurig Duo Plus. Carefully lift it from its base and fill it with fresh, cold water from a sink. Ensure the water level does not exceed the maximum mark indicated on the reservoir. If using a Keurig Water Filter, install it according to the manual before filling. Once filled, place the reservoir back into its designated slot, aligning it properly to secure it. Make sure the reservoir is seated correctly to prevent leaks or water flow issues during brewing.

2.3 Powering On and Setting the Clock

Plug the Keurig Duo Plus into a nearby power outlet. Press the Power button to turn it on. The display screen will illuminate, and the clock will show 12:00. Use the HR and MIN buttons to set the current time. Press the HR button to adjust the hour and the MIN button for minutes. Once the correct time is displayed, press the center dial to save the settings. The machine is now powered on and ready for use. This step ensures your brewer operates on the correct time for programmed features.

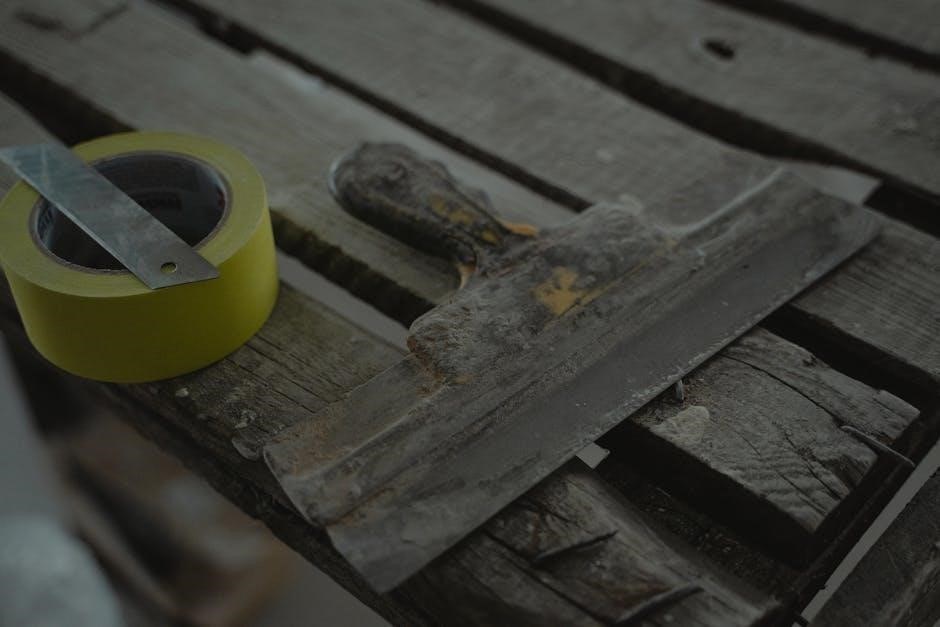
2.4 Rinsing the Brewer

To rinse the Keurig Duo Plus, ensure the K-Cup pod holder is empty. Fill the water reservoir with fresh water. Place a cup under the spout. Press the Power button and select the largest brew size. Allow the machine to complete the cycle without inserting a K-Cup. Repeat if desired for a thorough rinse. This process ensures the system is clean and ready for use. For maintenance, a Keurig Rinse Pod can also be used. Always rinse the brewer before first use or after descaling to maintain optimal performance and water quality. Regular rinsing helps prevent mineral buildup and ensures great-tasting coffee.

Brewing Options

The Keurig Duo Plus offers versatile brewing options, including single-serve with K-Cup pods and carafe brewing with ground coffee. Easily customize brew size and strength.

3.1 Single Serve Brewing with K-Cup Pods

For single-serve brewing, insert a K-Cup pod into the holder, ensuring it clicks into place; Close the pod holder and select your desired brew size using the buttons. Press the POD button to start brewing. The machine punctures the pod, and the brew indicator light will flash when brewing is complete. For optimal taste, use a Keurig water filter and rinse the brewer regularly. This method offers quick, convenient brewing with minimal cleanup, ideal for individual servings of your favorite coffee blends.

3.2 Carafe Brewing with Ground Coffee

For carafe brewing, fill the included thermal carafe with fresh, cold water and pour it into the water reservoir. Add ground coffee to the included filter basket, using one tablespoon per cup. Place the filter in the machine, select your desired brew size, and press the CARAFE button. The Keurig Duo Plus will brew a full pot of coffee. You can also program the brew time up to 24 hours in advance for fresh coffee when you wake up. This method is perfect for households that enjoy multiple cups or hosting guests.

3.3 Customizing Brew Size and Strength

The Keurig Duo Plus allows you to customize your brew size and strength to suit your preferences. For single-serve brewing, choose from 6, 8, 10, or 12-ounce options. When brewing a carafe, select 6, 8, 10, or 12 cups. To adjust strength, use the Strong Brew feature, which brews a more concentrated cup. Experiment with different coffee-to-water ratios by adjusting the number of tablespoons in the filter basket. This flexibility ensures every cup or carafe is tailored to your taste, whether you prefer a bold, rich coffee or a lighter roast.

Maintenance and Cleaning

Regularly clean the K-Cup pod holder and drip tray to prevent buildup. Descale every 3-6 months to maintain performance. Check for scale buildup and clean as needed.

4.1 Descaling the Brewer

Descaling is essential to remove mineral buildup and maintain performance. Use a Keurig descaling solution or approved alternative. Empty the water reservoir and remove any filters. Pour the solution into the reservoir, then run a brew cycle without a K-Cup pod. Repeat until the reservoir is empty. Rinse thoroughly by running 4-6 cycles with fresh water to remove any solution taste. Regular descaling ensures optimal functionality and prevents scale damage. Follow the manual’s specific instructions for best results and to avoid machine damage.

4.2 Cleaning the K-Cup Pod Holder and Drip Tray

Clean the K-Cup Pod Holder and Drip Tray regularly to maintain hygiene and prevent residue buildup. Remove the pod holder and drip tray, then rinse with warm, soapy water. For tougher stains, soak them in warm water before scrubbing gently. Avoid abrasive cleaners to prevent damage. Dry thoroughly with a soft cloth before reinstalling. Wipe the area around the pod holder with a damp cloth to remove any splatters. Cleaning these parts ensures optimal performance and keeps your coffee tasting fresh. Follow manual guidelines for best results.

Troubleshooting Common Issues

Troubleshoot issues like no power, poor coffee taste, or low flow by checking the power cord, ensuring proper water levels, and descaling regularly. Clean the brewer and K-Cup holder to maintain performance. Refer to the manual for detailed solutions to address specific problems effectively. Regular maintenance helps prevent issues and ensures optimal brewing results. Always follow Keurig’s recommended troubleshooting steps for best outcomes. Keep your brewer functioning smoothly with consistent care. Addressing issues promptly prevents further complications and extends the machine’s lifespan. Troubleshooting ensures your Keurig Duo Plus continues to deliver great-tasting coffee consistently. For persistent problems, contact Keurig support for assistance. Maintain your brewer’s health by resolving issues quickly and efficiently. Troubleshooting is key to enjoying perfect coffee every time. Ensure all parts are clean and functional to avoid common issues. Regular checks and maintenance prevent unexpected problems. Keep your Keurig Duo Plus in top shape with easy troubleshooting tips. Solve issues like clogs or weak brews by following the manual’s guidance. Troubleshooting common issues ensures your coffee maker performs at its best. Addressing problems early prevents costly repairs. Keep your Keurig Duo Plus running smoothly with routine troubleshooting and maintenance. Ensure every cup is perfect by resolving issues promptly. Troubleshooting is essential for longevity and performance. Solve common problems with simple steps outlined in the manual. Keep your brewer in great condition with regular checks and quick fixes. Troubleshooting ensures your Keurig Duo Plus remains reliable and efficient. Address issues quickly to enjoy uninterrupted coffee brewing. Maintain your machine’s performance with easy troubleshooting solutions. Solve common problems with the help of the user manual. Keep your Keurig Duo Plus working perfectly with regular maintenance and troubleshooting. Addressing issues promptly ensures consistent coffee quality. Troubleshooting common problems is key to extending the life of your brewer. Keep your Keurig Duo Plus in top shape with simple solutions. Solve issues like low flow or poor taste by following the manual’s advice. Troubleshooting ensures your coffee maker continues to perform optimally. Address common issues quickly to maintain your brewer’s health. Keep your Keurig Duo Plus running smoothly with routine troubleshooting and care. Solve problems like no power or weak brews with easy fixes. Troubleshooting ensures your coffee maker remains reliable and efficient. Address issues promptly to enjoy perfect coffee every time. Keep your Keurig Duo Plus in great condition with regular maintenance. Troubleshooting common issues prevents major problems. Solve issues like clogs or poor taste with simple steps. Keep your brewer functioning smoothly with routine checks and quick fixes. Troubleshooting ensures your Keurig Duo Plus continues to deliver great coffee. Address common problems quickly to maintain performance. Keep your coffee maker in top shape with easy troubleshooting solutions. Solve issues like low flow or weak brews with the manual’s guidance. Troubleshooting ensures your Keurig Duo Plus remains in excellent condition. Address problems promptly to enjoy uninterrupted brewing. Keep your brewer running smoothly with regular maintenance and troubleshooting. Solve common issues with simple steps outlined in the manual. Troubleshooting ensures your Keurig Duo Plus continues to perform at its best. Address issues quickly to maintain coffee quality. Keep your brewer in great condition with routine checks and quick fixes. Troubleshooting common problems is key to extending the life of your Keurig Duo Plus. Solve issues like no power or poor taste with easy solutions. Keep your coffee maker running smoothly with regular troubleshooting and care. Address common issues promptly to ensure optimal performance. Troubleshooting ensures your Keurig Duo Plus remains reliable and efficient. Solve problems like clogs or weak brews with simple fixes. Keep your brewer in top shape with routine maintenance and troubleshooting. Address issues quickly to enjoy perfect coffee every time. Troubleshooting common problems ensures your Keurig Duo Plus continues to deliver great results. Keep your coffee maker in excellent condition with regular checks and quick fixes. Solve issues like low flow or poor taste with the manual’s advice. Troubleshooting ensures your brewer remains functional and efficient. Address common problems promptly to maintain performance. Keep your Keurig Duo Plus running smoothly with routine troubleshooting and maintenance. Solve issues like no power or weak brews with easy solutions. Troubleshooting ensures your coffee maker continues to perform optimally. Address common issues quickly to enjoy uninterrupted brewing. Keep your brewer in great condition with regular care and quick fixes. Troubleshooting common problems is essential for extending the life of your Keurig Duo Plus. Solve issues like clogs or poor taste with simple steps. Keep your coffee maker functioning smoothly with routine checks and troubleshooting. Address problems promptly to maintain your brewer’s health. Troubleshooting ensures your Keurig Duo Plus remains in top shape. Solve common issues with easy fixes outlined in the manual. Keep your brewer running smoothly with regular maintenance and troubleshooting. Address issues quickly to enjoy perfect coffee every time. Troubleshooting common problems ensures your Keurig Duo Plus continues to perform at its best. Keep your coffee maker in excellent condition with routine care and quick fixes. Solve issues like low flow or weak brews with the manual’s guidance. Troubleshooting ensures your brewer remains reliable and efficient. Address common problems promptly to maintain performance. Keep your Keurig Duo Plus in great condition with regular troubleshooting and maintenance. Solve issues like no power or poor taste with simple solutions. Troubleshooting ensures your coffee maker continues to deliver great results. Address common issues quickly to enjoy uninterrupted brewing. Keep your brewer in top shape with routine checks and quick fixes. Troubleshooting common problems is key to extending the life of your Keurig Duo Plus. Solve issues like clogs or weak brews with easy fixes. Keep your coffee maker running smoothly with regular troubleshooting and care. Address problems promptly to maintain your brewer’s health. Troubleshooting ensures your Keurig Duo Plus remains functional and efficient. Solve common issues with simple steps outlined in the manual. Keep your brewer in great condition with regular maintenance and troubleshooting. Address issues quickly to enjoy perfect coffee every time. Troubleshooting common problems ensures your Keurig Duo Plus continues to perform optimally. Keep your coffee maker in top shape with routine checks and quick fixes. Solve issues like low flow or poor taste with the manual’s advice. Troubleshooting ensures your brewer remains reliable and efficient. Address common problems promptly to maintain performance. Keep your Keurig Duo Plus running smoothly with regular troubleshooting and care. Solve issues like no power or weak brews with easy solutions. Troubleshooting ensures your coffee maker continues to deliver great coffee. Address common issues quickly to enjoy uninterrupted brewing. Keep your brewer in excellent condition with regular maintenance and troubleshooting. Solve problems like clogs or poor taste with simple steps. Troubleshooting ensures your Keurig Duo Plus remains in top shape. Keep your coffee maker functioning smoothly with routine checks and quick fixes. Address issues promptly to maintain your brewer’s health. Troubleshooting common problems is essential for extending the life of your Keurig Duo Plus. Solve issues like low flow or weak brews with easy fixes. Keep your brewer running smoothly with regular troubleshooting and maintenance. Address common problems quickly to enjoy perfect coffee every time. Troubleshooting ensures your Keurig Duo Plus continues to perform at its best. Keep your coffee maker in great condition with routine care and quick fixes. Solve issues like no power or poor taste with simple solutions. Troubleshooting ensures your brewer remains functional and efficient. Address common issues promptly to maintain performance. Keep your Keurig Duo Plus in top shape with regular troubleshooting and maintenance. Solve problems like clogs or weak brews with easy fixes. Troubleshooting ensures your coffee maker continues to deliver great results. Address common issues quickly to enjoy uninterrupted brewing. Keep your brewer in excellent condition with routine checks and quick fixes. Troubleshooting common problems ensures your Keurig Duo Plus remains reliable and efficient. Solve issues like low flow or poor taste with the manual’s guidance. Keep your coffee maker running smoothly with regular troubleshooting and care. Address problems promptly to maintain your brewer’s health. Troubleshooting ensures your Keurig Duo Plus continues to perform optimally. Keep your brewer in top shape with routine maintenance and quick fixes. Solve common issues with easy solutions outlined in the manual. Address issues quickly to enjoy perfect coffee every time. Troubleshooting common problems is key to extending the life of your Keurig Duo Plus. Solve issues like clogs or weak brews with simple steps. Keep your coffee maker functioning smoothly with regular checks

Official User Manual and Resources

5.1 No Power or Display Issues

If your Keurig Duo Plus has no power or the display is unresponsive, ensure the power cord is securely plugged into both the brewer and a working outlet. Check for any visible damage to the cord. Press and hold the power button for 10 seconds to reset the machine. If the issue persists, unplug the brewer for 30 seconds, then plug it back in. Clean the Brewer’s electrical contacts to ensure proper connectivity. If the display is dim or unlit, verify that the brightness settings are adjusted correctly. Contact Keurig support if the problem remains unresolved.

iliotibial band stretches pdf

The iliotibial (IT) band is a thick tendinous fascia running from the hip to the knee, vital for maintaining flexibility and stability during movement. Stretching this area helps prevent injuries and improves mobility, especially for athletes and regular exercisers.

Regular IT band stretches target tightness and inflammation, common in runners and cyclists, reducing discomfort and enhancing performance. Proper stretching routines can alleviate pain and promote long-term muscle health.

What Is the Iliotibial Band?

The iliotibial (IT) band is a thick tendinous fascia that runs along the outer portion of the thigh, extending from the hip to the knee. It originates from the tensor fasciae latae muscle and the iliac crest, connecting to the tibia just below the knee joint. This band plays a crucial role in stabilizing the knee and hip during movement, such as walking, running, or cycling. While it is not a muscle, the IT band can become tight or inflamed, leading to discomfort and pain, particularly in individuals who engage in repetitive or high-impact activities. Understanding its structure and function is essential for preventing and managing related issues.

Importance of Stretching the IT Band

Stretching the IT band is crucial for maintaining flexibility, reducing tightness, and preventing injuries. Tightness in this area can lead to discomfort, pain, and limited mobility, especially for athletes and frequent exercisers. Regular stretching helps alleviate tension, reducing the risk of IT band syndrome and related issues. It also enhances flexibility, improves joint mobility, and supports overall lower body stability. For individuals engaged in activities like running or cycling, consistent IT band stretching can prevent chronic pain and inflammation, ensuring optimal performance and long-term musculoskeletal health.

Common Causes of IT Band Tightness

Tightness in the IT band often results from overuse, repetitive stress, or poor training techniques. Activities like running or cycling, which involve repetitive knee flexion, can lead to strain. Weakness in hip muscles forces the IT band to compensate, causing tightness. Anatomical factors, such as leg length discrepancies, can also contribute. Inadequate footwear and improper warm-up routines exacerbate the issue. Additionally, insufficient stretching and strengthening of surrounding muscles can lead to IT band tightness, making it essential to address these factors to maintain flexibility and prevent discomfort.

Understanding IT Band Syndrome

IT Band Syndrome (ITBS) is an overuse injury causing pain on the outer side of the knee. It occurs when the iliotibial band becomes inflamed due to repetitive friction.

Causes and Symptoms of IT Band Syndrome

IT Band Syndrome primarily results from repetitive friction and tightness in the iliotibial band, often due to overuse in activities like running or cycling. Causes include weak hip muscles, poor training techniques, and inadequate stretching. Symptoms involve sharp pain on the outer side of the knee or thigh, swelling, and discomfort during movements like climbing stairs or squatting. Pain typically worsens with activity and may radiate along the IT band, from hip to knee. Early symptoms can be mild but may escalate without proper intervention, leading to inflammation and prolonged recovery if left untreated.

How IT Band Syndrome Affects Athletes and Exercisers

IT Band Syndrome significantly impacts athletes and exercisers, particularly runners, cyclists, and those engaging in repetitive knee-bending activities. It causes sharp pain on the outer thigh and knee, limiting mobility and performance. Athletes may experience discomfort during movements like running, climbing stairs, or squatting, which can hinder training and competition. Weak hip muscles and poor training techniques exacerbate the condition, leading to prolonged recovery. If untreated, IT Band Syndrome can disrupt training schedules, reduce endurance, and lower overall athletic performance, making it essential to address symptoms early to prevent further complications and maintain physical fitness.

Benefits of Stretching the IT Band

Stretching the IT band reduces knee, hip, and back pain, prevents injuries, and enhances flexibility, improving overall mobility for athletes and exercisers.

Reducing Knee, Hip, and Back Pain

Stretching the IT band is essential for alleviating pain in the knees, hips, and lower back. Tightness in the IT band often leads to discomfort in these areas due to increased friction and inflammation. By incorporating targeted stretches, individuals can reduce tension and restore proper movement mechanics, minimizing pain and improving joint function. This is particularly beneficial for athletes and exercisers who frequently experience strain from repetitive motions.

Regular stretching helps address the root causes of pain, such as overuse or poor alignment, promoting long-term relief and preventing chronic issues. Techniques like the standing wall-assisted stretch and foam rolling can effectively target the IT band, reducing muscle tension and enhancing overall comfort.

Preventing Injuries and Improving Flexibility

Stretching the IT band plays a crucial role in injury prevention and enhancing flexibility. Tightness in this area can lead to imbalances and strain on surrounding muscles and joints, increasing the risk of overuse injuries. Regular stretching helps maintain optimal flexibility, allowing for smoother movement and reduced stress on the hips, knees, and lower back. This is particularly important for runners, cyclists, and individuals engaging in repetitive activities. By improving flexibility, these stretches also enhance athletic performance and reduce the likelihood of chronic issues, promoting overall musculoskeletal health and resilience. Consistent practice ensures long-term benefits and supports an active lifestyle.

Effective IT Band Stretching Techniques

Effective IT band stretching techniques include wall-assisted, seated, and side-lying stretches, along with foam rolling, to reduce tightness and improve flexibility, enhancing overall mobility and comfort.

Standing Wall-Assisted IT Band Stretch

To perform the standing wall-assisted IT band stretch, stand with your affected leg farthest from the wall and your other leg crossed in front. Slowly lean toward the wall, bending your front knee slightly, until you feel a gentle stretch on the outer thigh of the back leg. Hold for 20-30 seconds and repeat 2-3 times on each side. This stretch helps reduce tightness and improves flexibility, especially for runners and cyclists; Ensure your back leg remains straight and your spine stays neutral to target the IT band effectively. Perform this stretch regularly to prevent discomfort and enhance mobility.

Seated IT Band Stretch

Sit on the floor with your affected leg crossed over your other leg, placing your foot on the inner thigh. Gently press your knee toward your chest until you feel a stretch on the outer side of your leg. Hold for 20-30 seconds and repeat 2-3 times. This stretch targets the IT band, helping to reduce tightness and improve flexibility. Keep your back straight and avoid bouncing to ensure a safe and effective stretch. Regular practice can help alleviate discomfort and prevent injuries, making it ideal for runners, cyclists, and individuals with IT band syndrome. Perform this stretch consistently for optimal results.

Side-Lying IT Band Stretch

Lie on your side with your legs extended, placing your affected leg on top. Bend the knee of your bottom leg for stability and stack your feet. Slowly lift your top leg away from your bottom leg until you feel a stretch along the outer side of your thigh. Hold for 20-30 seconds, then lower and repeat 2-3 times. This stretch effectively targets the IT band, improving flexibility and reducing tightness. Maintain proper alignment and avoid arching your back to maximize the stretch’s benefits. Regular practice can help alleviate IT band syndrome symptoms and enhance overall lower limb mobility, especially for athletes and active individuals. Consistency is key for optimal results and injury prevention;

Foam Rolling for IT Band Release

Foam Rolling for IT Band Release

Foam rolling is an effective self-myofascial release technique to alleviate IT band tightness and inflammation. Using a large foam roller, position it under the outside of your thigh, just above the knee. Slowly roll upward toward your hip, focusing on tender areas. Spend 20-30 seconds on each section, repeating 2-3 times. While it may feel uncomfortable, avoid painful pressure. This method promotes blood flow, reduces muscle tension, and enhances flexibility. Regular foam rolling can complement stretching routines, helping to prevent IT band syndrome and improve overall lower limb mobility. For best results, incorporate this practice 2-3 times weekly, adjusting pressure as needed.

Treatment and Recovery Options

Treatment involves rest, ice, and compression to reduce inflammation. Physical therapy exercises, including stretching and strengthening, promote recovery. Recovery typically takes 2-8 weeks with proper care.

Physical Therapy Exercises for IT Band Syndrome

Physical therapy exercises focus on improving flexibility, strengthening surrounding muscles, and addressing hip weakness. Common exercises include side-lying leg raises, hip abduction, and glute bridges. These exercises target muscle imbalances and reduce tension on the IT band. Consistency is crucial, with noticeable improvement often occurring after 6-8 weeks. Additionally, incorporating low-impact activities like swimming or cycling can aid recovery without overloading the knee. A structured rehabilitation program, tailored to individual needs, helps restore normal function and prevent future issues. Regular practice of these exercises promotes long-term relief and enhances overall lower limb mobility.

Rest, Ice, and Compression Techniques

Rest, Ice, and Compression (RIC) are essential for managing IT Band Syndrome. Rest allows the inflamed tissue to heal, while ice reduces swelling and numbs pain. Apply ice for 15-20 minutes several times daily. Compression, using an elastic bandage or sleeve, helps minimize swelling and provides support. Elevating the leg can also aid in reducing inflammation. These techniques are most effective in the acute phase of injury. Combining RIC with gentle stretching and strengthening exercises promotes recovery. Consistency in applying these methods helps alleviate symptoms and prevents further irritation, supporting the healing process and restoring normal function to the IT band and surrounding tissues.

Regular stretching, adequate rest, and proper techniques are crucial for maintaining IT band health and preventing future issues, ensuring optimal mobility and injury prevention for athletes and exercisers alike.

Final Tips for Maintaining IT Band Health

Consistently incorporate IT band stretches into your daily routine to maintain flexibility and prevent tightness. Use foam rolling to release tension and improve circulation. Strengthen surrounding muscles, such as glutes and core, to reduce strain on the IT band. Avoid overtraining and ensure proper warm-up and cool-down during workouts. Apply ice or compression to reduce inflammation if discomfort arises. Prioritize rest and recovery to allow the IT band to heal and adapt. Maintain good posture and biomechanics during physical activities to minimize repetitive stress. Lastly, wear appropriate footwear and consider orthotics if needed to support your lower body alignment and reduce strain.

electric choke vs manual.

Electric and manual chokes are devices used in carburetors to regulate the air-fuel mixture during engine startup and warm-up. Electric chokes operate automatically‚ while manual chokes require driver adjustment. Both designs aim to improve engine performance and efficiency under varying conditions.

Overview of Electric Chokes

Electric chokes are automatic devices that regulate the air-fuel mixture in carburetors during engine startup and warm-up. They use an electric heater and a bi-metal spring to open the choke plate gradually as the engine warms up. This design eliminates the need for manual adjustment‚ providing convenience and consistency. Electric chokes are often integrated with modern carburetors and rely on a 12V power supply. They are known for their ease of use but can be temperamental‚ requiring occasional fine-tuning to ensure proper functionality.

Overview of Manual Chokes

Manual chokes are straightforward mechanisms that require driver input to regulate the air-fuel mixture during engine startup and warm-up. Unlike electric chokes‚ they rely on a manual lever or cable to adjust the choke plate‚ providing direct control over the fuel flow. This simplicity makes them cost-effective and reliable‚ with no dependence on electrical systems. Manual chokes are often preferred in basic applications where driver involvement is acceptable and automatic functionality is not necessary. They are easy to maintain and offer a high level of adjustability.

Key Differences Between Electric and Manual Chokes

Electric chokes operate automatically via sensors and timers‚ while manual chokes require driver adjustment. Electric chokes offer convenience but depend on electrical systems‚ whereas manual chokes provide simplicity and direct control without such reliance. Electric chokes are ideal for modern vehicles‚ while manual chokes suit basic applications and classic cars.

Operation and Mechanism

Electric chokes operate automatically using sensors and timers to regulate the choke plate based on engine temperature. This eliminates manual intervention‚ ensuring smooth transitions during warm-up. Manual chokes‚ however‚ rely on driver input‚ requiring adjustment of a lever or knob to control the choke plate. While electric chokes offer hands-free convenience‚ manual chokes provide direct control‚ appealing to drivers who prefer tactile adjustments for specific conditions or classic vehicles.

Driver Involvement and Adjustments

Electric chokes reduce driver involvement by automatically adjusting the choke plate‚ eliminating the need for manual input. This hands-free operation is ideal for modern drivers seeking convenience. Manual chokes‚ however‚ require active driver engagement‚ as the choke must be adjusted via a cable or knob based on engine conditions. While this demands more awareness‚ it offers precise control‚ appealing to those who prefer a more tactile and customizable driving experience‚ especially in classic or simple engine setups.

Reliability and Maintenance

Electric chokes are more complex and prone to malfunctions due to their reliance on electrical systems and automatic mechanisms. They require periodic adjustments and can fail if the timer or heating element stops working. Manual chokes‚ with fewer components‚ are generally more reliable and need less maintenance. However‚ they must be cleaned regularly to ensure proper function. Overall‚ manual chokes are simpler and less prone to failure‚ while electric chokes may need more attention over time.

Advantages of Electric Chokes

Electric chokes offer automatic functionality‚ simplifying engine starting and warm-up. They provide consistent air-fuel mixture adjustments‚ enhancing performance and reducing driver intervention.

Convenience and Ease of Use

Electric chokes simplify the driving experience by eliminating manual adjustments. Drivers don’t need to constantly monitor or adjust the choke‚ as it operates automatically. This hands-off approach ensures optimal performance during engine warm-up and reduces the need for constant driver input. The automatic functionality makes electric chokes ideal for drivers seeking a hassle-free experience‚ especially in varying weather conditions or when frequent engine restarts are necessary. This convenience enhances overall driving comfort and efficiency without compromising engine performance.

Automatic Functionality

Electric chokes offer seamless operation through automatic functionality‚ eliminating the need for manual adjustments; They utilize sensors and timers to gradually open the choke plate as the engine warms up‚ ensuring optimal performance. This automation provides consistent results‚ reducing the risk of human error. Modern electric chokes often integrate with engine control units (ECUs) for precise control‚ enhancing drivability and efficiency. The automatic nature of electric chokes makes them ideal for drivers seeking a hands-off‚ modern solution to engine management.

Modern Technology Integration

Electric chokes leverage modern technology by integrating with engine control units (ECUs) and advanced sensors. These systems monitor engine temperature‚ airflow‚ and operating conditions in real-time. By adjusting the choke plate automatically‚ electric chokes optimize the air-fuel mixture for efficient combustion. This seamless integration enhances performance‚ reduces emissions‚ and ensures compatibility with contemporary vehicles. The use of electronic controls makes electric chokes a preferred choice for drivers seeking a technologically advanced‚ hands-free solution for engine management.

Disadvantages of Electric Chokes

Electric chokes can malfunction due to sensor or circuit failures‚ requiring frequent adjustments. They are also more expensive and depend on electrical systems‚ which may fail.

Dependence on Electrical Systems

Electric chokes rely on a vehicle’s electrical system to function‚ requiring a constant 12-volt power supply. This dependency can lead to issues if the electrical system fails or malfunctions. Sensors and circuits in electric chokes can be prone to damage from voltage spikes or corrosion‚ disrupting their operation. Additionally‚ electric chokes may not work during battery drain or alternator failure‚ making them less reliable in such scenarios compared to manual chokes‚ which operate independently of electrical systems.

Potential for Malfunction

Electric chokes can malfunction due to faulty sensors‚ wiring issues‚ or circuit failures. Malfunctions often occur when the choke fails to open or close properly‚ disrupting the air-fuel mixture. This can lead to poor engine performance‚ difficulty starting‚ or reduced fuel efficiency. Additionally‚ electric chokes may require recalibration or replacement if they fail to function correctly. Their reliance on electronic components makes them more prone to failure compared to manual chokes‚ which have fewer moving parts and simpler mechanisms.

Higher Cost

Electric chokes are generally more expensive than manual chokes due to their complex design and reliance on electronic components. They require sensors‚ wiring‚ and a power source‚ which increases production and installation costs. In contrast‚ manual chokes are simpler‚ with fewer parts and no need for electrical integration. This makes manual chokes more cost-effective for drivers seeking a budget-friendly solution. The added expense of electric chokes may not justify their benefits for users prioritizing affordability and simplicity.

Advantages of Manual Chokes

Manual chokes are simple‚ cost-effective‚ and reliable. They offer direct control‚ making them ideal for drivers who prefer straightforward‚ affordable solutions without advanced features.

Simplicity and Cost-Effectiveness

Manual chokes are renowned for their straightforward design and budget-friendly nature. With fewer components compared to electric chokes‚ they are easier to understand and maintain. This simplicity reduces the likelihood of malfunctions and eliminates the need for complex repairs. Additionally‚ manual chokes are more affordable to purchase and maintain‚ making them a cost-effective solution for drivers seeking reliable performance without the added expense of advanced technology. Their basic mechanism ensures long-term durability and minimal upkeep‚ appealing to those who prefer uncomplicated systems.

Driver Control and Flexibility

Manual chokes offer drivers direct control over the air-fuel mixture‚ allowing for precise adjustments based on engine temperature and driving conditions. This flexibility enables drivers to optimize performance‚ especially in scenarios where automatic systems might not respond as effectively. By providing immediate feedback‚ manual chokes empower drivers to fine-tune their engine’s operation‚ enhancing both fuel efficiency and responsiveness. This hands-on approach appeals to those who value customization and the ability to adapt to varying driving situations effortlessly.

Reliability in Basic Applications

Manual chokes are highly reliable in basic applications‚ requiring minimal setup and maintenance. Their straightforward design ensures consistent performance‚ especially in simpler engines or older vehicles where advanced features are unnecessary. Unlike electric chokes‚ they don’t depend on electrical systems‚ making them less prone to malfunctions. This simplicity reduces the risk of mechanical failure and makes them ideal for everyday use‚ providing a dependable solution for drivers who prefer uncomplicated‚ efficient operation without the need for advanced technology or adjustments.

Disadvantages of Manual Chokes

Manual chokes require constant driver attention and precise adjustments‚ which can be inconvenient. They lack automation‚ relying solely on user input‚ and improper adjustments can lead to poor engine performance or increased emissions.

Requires Driver Awareness and Adjustment

Manual chokes demand consistent driver attention‚ as they must be adjusted to ensure proper engine operation. This requires a good understanding of when and how much to open or close the choke‚ which can be challenging for inexperienced drivers. Incorrect adjustments may lead to poor engine performance‚ decreased fuel efficiency‚ or increased emissions. The need for constant monitoring and manual intervention can be inconvenient‚ especially in stop-and-go traffic or during frequent engine restarts. This dependency on driver input highlights a significant drawback compared to automated systems.

Lack of Automation

Manual chokes lack automation‚ requiring the driver to physically adjust the choke plate during engine warm-up and operation. This absence of automatic functionality means the driver must constantly monitor and manually fine-tune the choke‚ especially when driving conditions change. Unlike electric chokes‚ manual systems do not gradually open or close based on engine temperature or performance needs‚ relying solely on the driver’s input. This hands-on requirement can be inconvenient‚ particularly in situations demanding frequent adjustments or when the driver prefers a more hands-free experience.

Potential for Overuse or Misadjustment

Manual chokes are prone to overuse or misadjustment‚ as drivers may not always accurately gauge the correct choke position. Overuse can lead to excessive fuel enrichment‚ wasting fuel and increasing emissions. Misadjustment‚ such as closing the choke too much or too little‚ can result in poor engine performance‚ rough idling‚ or difficulty starting. This reliance on driver accuracy highlights a key disadvantage of manual systems compared to electric chokes‚ which automatically adjust based on engine conditions and minimize such risks.

twisted hate free pdf download

“Twisted Hate” by Ana Huang is a steamy enemies-to-lovers romance, part of the Twisted series. Known for its intense themes and complex characters, the book has gained popularity among romance readers seeking daring stories. Its availability as a free PDF download has made it a sought-after title for those exploring contemporary romance with edgy twists.

1.1 Overview of the Book

Twisted Hate by Ana Huang is the third installment in the Twisted series, offering a steamy enemies-to-lovers romance. The book explores intense themes, complex characters, and a gripping plot that captivates readers. Known for its explicit content and emotional depth, it has become a favorite among fans of contemporary romance. Available as a free PDF download, it continues to attract readers seeking bold and passionate stories.

1.2 Author Background: Ana Huang

Ana Huang is a contemporary romance author known for her intense, steamy narratives. Her Twisted series, including Twisted Hate, has gained a dedicated fan base. With a focus on complex characters and passionate storylines, Huang’s writing often explores themes of love, power, and redemption. Her books, available as free PDF downloads, continue to captivate readers seeking bold and emotional romance stories.

Plot and Themes

“Twisted Hate” delves into a passionate yet volatile relationship, exploring themes of power, revenge, and forbidden love. The story intertwines intense emotions with mature content, creating a gripping narrative for readers who enjoy complex, steamy romances.

2.1 Enemies-to-Lovers Romance

The core of Twisted Hate lies in its intense enemies-to-lovers dynamic, where rivalry and resentment gradually evolve into passionate attraction. Ana Huang masterfully crafts tension, blending sharp dialogue with emotional depth, making this trope a compelling centerpiece of the story. Readers are drawn into the characters’ volatile relationship, which balances animosity and desire, creating a captivating narrative arc.

2.2 Complex Characters and Relationships

In Twisted Hate, Ana Huang crafts deeply complex characters, each with rich backstories and multifaceted personalities. Their relationships are layered with tension, loyalty, and betrayal, creating a web of emotional connections that drive the story. The interplay between characters adds depth, making their journeys and interactions both compelling and relatable, while also exploring themes of power, trust, and vulnerability.

Where to Download “Twisted Hate” for Free

Twisted Hate can be downloaded for free from platforms like PDF Room, Yumpu, or through direct links shared on forums and social media groups, often in PDF or EPUB formats.

3.1 Popular Platforms for Free PDF Downloads

Popular platforms for downloading Twisted Hate for free include PDF Room, Yumpu, and online forums. Users often share direct links to download the book in PDF or EPUB format. Additionally, social media groups and community forums frequently circulate download links, making it accessible to readers worldwide. Always verify the source to ensure a safe and quality download experience.

3.2 EPUB and Other Formats Availability

The EPUB version of Twisted Hate is widely available alongside PDF, offering readers flexibility in their preferred format. Platforms like eBook platforms and community forums provide easy access to both formats. While EPUB is popular for its readability, PDF remains the most downloaded format due to its faithful representation of the original layout. File sizes range from 235 KB to 2.35 MB, ensuring compatibility across devices.

Book Details

Twisted Hate by Ana Huang is published by Little, Brown, with 418 pages and a file size of 2.35 MB. It was released in 2022 as part of the Twisted series.

4.1 Publisher and Publication Date

Twisted Hate is published by Little, Brown, a renowned publishing house. The book was officially released in 2022, marking its place in the Twisted series. This publication has garnered significant attention for its engaging storyline and intense character dynamics. The release date aligns with the growing popularity of contemporary romance novels, making it a notable addition to the genre.

4.2 Page Count and File Size

Twisted Hate spans 418 pages, offering an immersive reading experience. The PDF version is approximately 2.35 MB, making it easily accessible for download and storage on various devices. This file size ensures portability while maintaining quality, catering to readers who prefer digital formats without compromising on readability or convenience.

Reviews and Ratings

“Twisted Hate” averages a 3.9/11 rating, praised for its steamy, enemies-to-lovers plot and complex characters. Popular among romance readers, it’s a sought-after download.

5.1 Reader Feedback and Reviews

Readers praise “Twisted Hate” for its intense, steamy plot and complex characters, resonating with fans of enemies-to-lovers romance. The book averages a 3.9/11 rating, highlighting its popularity. Many appreciate Ana Huang’s bold storytelling, while some note triggering themes. Overall, it’s a compelling read for those enjoying edgy contemporary romance.

5.2 Popularity Among Romance Readers

“Twisted Hate” has garnered significant attention among romance readers, particularly for its steamy, enemies-to-lovers dynamic and complex characters. Its bold storytelling appeals to fans of contemporary romance, making it a popular choice. The book’s availability as a free PDF download has further boosted its reach, attracting readers who enjoy edgy, intense narratives in the romance genre.

Legal Considerations

Copyright protections apply to “Twisted Hate” by Ana Huang, emphasizing the importance of legal purchases. Supporting authors through authorized platforms ensures respect for intellectual property rights and creative work.

6.1 Copyright Information

“Twisted Hate” by Ana Huang is copyrighted, with rights reserved to the author and publisher. The book, part of the Twisted series, is protected under intellectual property laws. Unauthorized distribution or download without proper licensing constitutes copyright infringement. Respect for the author’s rights is essential, ensuring fair compensation for their creative work. Always obtain copies through legitimate sources to support authors and adhere to legal standards.

6.2 Importance of Supporting Authors

Supporting authors through legal purchases ensures they receive fair compensation for their work. Buying books like “Twisted Hate” legally funds future projects and promotes the creation of quality literature. It also shows respect for the time and effort invested in crafting stories. By choosing legitimate sources, readers contribute to sustaining the literary community and encouraging authors to continue producing engaging content for their audiences.

Similar Books in the Series

“Twisted Love” and “Twisted Games” are earlier installments in the series, offering similar themes of intense romance and complex relationships. These books set the stage for “Twisted Hate,” completing the series with compelling narratives and dynamic character arcs that captivate readers seeking emotional depth and passionate storytelling.

7.1 “Twisted Love” and “Twisted Games”

“Twisted Love” and “Twisted Games” are earlier books in the series, setting the foundation for “Twisted Hate.” These stories explore intense, passionate relationships and complex character dynamics, drawing readers into a world of emotional conflict and desire. Like “Twisted Hate,” they are known for their bold themes and are available as free PDF downloads, making the series accessible to fans of contemporary romance.

7.2 “Twisted Lies” and Other Titles

“Twisted Lies” continues the series, offering another gripping narrative filled with intrigue and passion. Alongside other titles, these books form a cohesive yet distinct collection, each exploring themes of love, power, and deception. Fans of “Twisted Hate” often seek these titles, which are also available as free PDF downloads, ensuring the series remains a favorite among romance enthusiasts looking for intense stories.

Reading Formats

“Twisted Hate” is available in PDF and EPUB formats, ensuring compatibility with various eBook platforms. Both formats are accessible for free, catering to diverse reader preferences.

8.1 PDF vs. EPUB: Which is Better?

When choosing between PDF and EPUB for “Twisted Hate,” consider readability and device compatibility. PDFs preserve the book’s layout, ideal for reading on larger screens. EPUBs, however, offer adjustable fonts and reflow text, making them perfect for mobile devices. Both formats are available for free, catering to different preferences and reading experiences, ensuring accessibility and convenience for all readers.

8.2 Availability on eBook Platforms

“Twisted Hate” is widely available on popular eBook platforms, offering free downloads in PDF and EPUB formats. Platforms like PDF Room and Yumpu provide easy access, while others like Open Office and flip PDFs cater to diverse reader preferences. This accessibility ensures fans of Ana Huang’s work can effortlessly find and enjoy the book in their preferred format, enhancing their reading experience.

Book Covers and Design

The cover of “Twisted Hate” features striking visuals designed by Quirah Casey, incorporating photography by Igor Ustynskyy. The design emphasizes bold, eye-catching elements that reflect the book’s intense themes, aligning with the series’ branding for a cohesive and visually appealing look.

9.1 Cover Art and Designers

The cover art for “Twisted Hate” was crafted by designer Quirah Casey, featuring a striking image by photographer Igor Ustynskyy; The design captures the book’s intense themes with bold, contrasting elements, creating a visually compelling and cohesive look that aligns with the Twisted series’ aesthetic, enhancing its brand recognition and reader appeal significantly through its artistic presentation and layout.

9.2 Visual Appeal and Branding

The cover of “Twisted Hate” features bold, contrasting elements designed by Quirah Casey, enhancing its visual appeal. The striking imagery by Igor Ustynskyy aligns with the book’s intense themes, creating a cohesive brand identity for the Twisted series. The design captivates readers, ensuring the book stands out while maintaining consistency with the series’ aesthetic, making it instantly recognizable to fans of contemporary romance and edgy storytelling.

Content Warnings

The book contains explicit content, mature themes, and sensitive topics, which may be triggering for some readers due to their intense and graphic nature.

10.1 Mature Themes and Explicit Content

“Twisted Hate” contains explicit sexual content and mature themes, including graphic scenes that may be triggering for some readers. The book explores intense relationships and sensitive topics, making it unsuitable for younger audiences. Reader discretion is strongly advised due to its provocative and emotionally charged narrative.

10.2 Trigger Warnings for Sensitive Topics

“Twisted Hate” includes trigger warnings for toxic relationships, emotional manipulation, and intense power dynamics. Themes of betrayal, jealousy, and morally ambiguous situations are prevalent, which may unsettle some readers. The narrative tackles dark, sensitive topics, making it essential for readers to be aware of these elements before engaging with the story.

Technical Details

The free PDF download of “Twisted Hate” typically ranges from 235 KB to 2.35 MB, depending on the source. It is available in EPUB and PDF formats, ensuring compatibility with most eBook readers.

11.1 File Sizes and Compatibility

The “Twisted Hate” free PDF download typically ranges from 235 KB to 2.35 MB, depending on the source. It is compatible with most eBook readers and platforms.
The file size ensures quick downloads and smooth reading experiences across devices. EPUB formats are also available for enhanced compatibility with modern eBook platforms.
Users can easily access the book on various devices without compromising quality.

11.2 Download Speed and Quality

The “Twisted Hate” free PDF download offers quick access due to its manageable file size, typically between 235 KB and 2.35 MB. The quality of the PDF ensures clear text and proper formatting, making it easy to read on various devices. Popular platforms like PDF Room and Yumpu provide reliable download speeds, ensuring a seamless experience for readers eager to dive into the story.

Community and Discussions

The “Twisted Hate” community is vibrant, with fans actively discussing the book on forums like PDF Room and social media groups. Readers share insights, theories, and enthusiasm, fostering connections among enthusiasts of Ana Huang’s work.

12.1 Online Forums and Groups

Online forums and groups dedicated to “Twisted Hate” have become hubs for discussion. Platforms like Reddit, Goodreads, and specialized PDF communities host vibrant conversations about the book’s themes, characters, and plot twists. Fans share their interpretations, theories, and favorite quotes, creating a dynamic space for engagement and debate among readers passionate about Ana Huang’s work.

12.2 Social Media and Fan Engagement

Social media platforms like Instagram, TikTok, and Facebook host lively discussions about “Twisted Hate.” Fans share quotes, fan art, and theories, fostering a sense of community. Readers often post about their favorite scenes or characters, while others seek recommendations for similar books. This digital engagement highlights the book’s impact and its ability to connect readers worldwide, further fueling its popularity and appeal.

“Twisted Hate” is a captivating read with its steamy romance and complex characters. Its availability as a free PDF download has made it accessible to many readers, ensuring its popularity endures as a favorite in the romance genre.

13.1 Final Thoughts on “Twisted Hate”

“Twisted Hate” is an engaging, steamy enemies-to-lovers romance with complex characters and intense themes. Its availability as a free PDF download has broadened its reach, appealing to fans of contemporary romance. While it contains mature content, the story’s bold and passionate narrative makes it a compelling read for those who enjoy daring and emotionally charged stories.

13.2 Encouragement to Read the Book

With its intense themes, complex characters, and steamy romance, “Twisted Hate” offers a compelling read for fans of contemporary romance. The enemies-to-lovers dynamic and bold narrative make it a must-read for those who enjoy emotionally charged stories. Accessible as a free PDF download, it’s an excellent choice for readers seeking a daring and passionate tale that explores love’s darker edges.

guide pin

Guide pins are essential mechanical components used to align and position parts accurately, ensuring proper fit and function in various industrial applications.

1.1 Definition and Purpose

Guide pins are cylindrical fasteners used to align and position components in mechanical systems. Their primary purpose is to ensure accurate mating of parts, preventing misalignment and damage. Made from materials like steel or hardened steel, they are designed for durability and precision. Guide pins are essential in various industries, including aerospace, automotive, and machinery manufacturing, where precise alignment is critical. They reduce wear and tear by guiding moving parts into correct positions, ensuring smooth operation and extending component life.

1.2 Importance in Mechanical Systems

Guide pins are crucial in mechanical systems for ensuring accurate alignment and preventing component misalignment. They facilitate smooth operation by guiding parts into correct positions, reducing wear and tear. In industries like aerospace and automotive, guide pins are essential for maintaining precision and reliability. Their role in enhancing efficiency, minimizing downtime, and ensuring safety makes them indispensable in modern machinery.

Types of Guide Pins

Guide pins are categorized into standard, precision, and self-lubricating types, each designed for specific applications requiring different levels of accuracy, durability, and maintenance.

2.1 Standard Guide Pins

Standard guide pins are widely used in general manufacturing for aligning parts and ensuring proper assembly. They are typically made from durable materials like steel or stainless steel, offering reliable performance in everyday applications. Their straightforward design makes them cost-effective and easy to install. These pins are ideal for applications where high precision is not critical but basic alignment is necessary. They are commonly found in automotive and industrial machinery.

2.2 Precision Guide Pins

Precision guide pins are designed for high-accuracy applications, offering tight tolerances and smooth surfaces. Made from materials like hardened steel or ceramic, they minimize wear and ensure consistent alignment. These pins are crucial in industries requiring extreme precision, such as aerospace and high-end manufacturing. Their advanced features make them ideal for applications where even slight misalignment could lead to operational issues. Regular maintenance is essential to maintain their performance and longevity.

2.3 Self-Lubricating Guide Pins

Self-lubricating guide pins are engineered with materials that reduce friction and eliminate the need for external lubrication. They are ideal for applications where maintenance is challenging. These pins often feature coatings or embedded lubricants, ensuring smooth operation over time. Common in heavy machinery and automotive systems, they enhance durability and performance, reducing wear and tear. Their design simplifies installation and extends service life, making them a cost-effective solution for demanding environments.

Design and Material Considerations

Design and material choices for guide pins are crucial for ensuring durability, precision, and optimal performance across various industrial applications and load conditions, requiring careful material selection and manufacturing processes.

3.1 Materials Used

Guide pins are typically made from high-strength, durable materials such as hardened steel, stainless steel, or advanced alloys. These materials are chosen for their ability to withstand heavy mechanical stress, corrosion, and wear. Stainless steel is often preferred in corrosive environments, while coated or plated options provide additional protection. Ceramic or polymer-based guide pins are used in specialized applications requiring low friction or non-magnetic properties. The choice of material depends on the specific application, load-bearing requirements, and environmental conditions.

3.2 Diameter and Length Selection

The diameter and length of guide pins are critical for ensuring proper alignment and load-bearing capacity. The diameter must match the hole size in the mating part, while the length should accommodate the assembly’s thickness without causing interference. Standard sizes are available, but custom dimensions can be specified for unique applications. Proper selection ensures optimal fit, minimizes wear, and prevents misalignment. Choosing the right size is essential for maintaining precision and durability in mechanical systems.

3.3 Surface Finish and Hardness

Surface finish and hardness are crucial for guide pins’ performance. A smooth surface reduces friction, preventing wear and ensuring precise alignment. Hardness determines durability, with harder materials resisting deformation under stress. Common materials like hardened steel offer a balance of durability and precision. Surface treatments, such as chrome plating, can enhance wear resistance. Proper hardness and finish ensure longevity and accuracy, making them vital for reliable mechanical operations.

Installation and Alignment

Proper installation and alignment of guide pins are crucial for ensuring accurate part positioning. Use specific tools and techniques to avoid misalignment, which can cause wear or damage. Always follow manufacturer guidelines for optimal performance and longevity.

4.1 Proper Installation Techniques

Proper installation of guide pins requires careful preparation and precision. Ensure the mating surfaces are clean and free from debris. Use a press or suitable tool to avoid damaging the pin or surrounding material. Align the pin with the hole, applying steady pressure to prevent skewing. Once seated, secure the pin according to the manufacturer’s specifications. Proper installation ensures reliable performance and minimizes wear over time. Always consult specific guidelines for your application.

4.2 Alignment Tips and Tricks

Accurate alignment is crucial for optimal performance. Always clean and inspect surfaces before installation to prevent debris interference. Use alignment fixtures or jigs to ensure precise positioning. Apply a small amount of lubricant to reduce friction during insertion. Check for parallelism between the pin and hole to avoid angular misalignment. Use precision measuring tools, like dial indicators, to verify alignment. Proper alignment ensures smooth operation and extends the lifespan of guide pins in mechanical systems.

4.3 Common Mistakes to Avoid

Common mistakes include improper alignment, insufficient lubrication, and using incorrect pin sizes. Over-tightening can cause damage, while under-tightening leads to misalignment. Neglecting surface preparation and ignoring material compatibility can reduce performance. Using worn-out pins or improper tools increases error risks. Always follow manufacturer guidelines and double-check measurements to ensure accurate and secure installations, preventing costly repairs and extending component lifespan in mechanical systems.

Applications of Guide Pins

Guide pins are widely used in aerospace for precise aircraft assembly, automotive manufacturing for aligning engine parts, and heavy machinery to ensure accurate component fitting and operation.

5.1 Aerospace Industry

In the aerospace industry, guide pins are crucial for assembling aircraft components with high precision. They ensure accurate alignment of wings, fuselage sections, and other critical parts, minimizing errors and enhancing safety. The use of durable materials like stainless steel or hardened alloys ensures longevity under harsh conditions. Proper installation and alignment techniques are essential to maintain structural integrity and meet stringent industry standards, making guide pins indispensable in aircraft manufacturing.

5.2 Automotive Manufacturing

In automotive manufacturing, guide pins are vital for ensuring precise alignment during assembly processes. They are used to position components like engine blocks, gearboxes, and chassis parts accurately. Made from durable materials such as steel or titanium, guide pins withstand the rigors of high-volume production. Their role in maintaining consistency and reducing assembly errors makes them indispensable in the industry, contributing to faster production cycles and higher-quality vehicles.

5.3 Heavy Machinery

In heavy machinery, guide pins play a crucial role in ensuring the alignment and stability of large components. They are commonly used in construction equipment, agricultural machinery, and industrial robots; Made from high-strength materials like hardened steel, these pins withstand heavy loads and harsh environments. Proper installation and maintenance of guide pins are essential to prevent equipment downtime and ensure smooth operation, making them a cornerstone of reliable machinery performance and longevity.

Maintenance and Care

Regular cleaning and lubrication of guide pins are crucial to prevent wear and ensure smooth operation. Inspect them frequently for damage or corrosion and replace when necessary.

6.1 Cleaning and Lubrication

Cleaning and lubricating guide pins are vital for maintaining their functionality. Use a soft cloth and mild solvent to remove dirt and debris. Apply a thin layer of high-quality grease or oil to reduce friction and prevent corrosion. Regular lubrication ensures smooth operation, especially in high-wear applications. Avoid using harsh chemicals that may damage the material; Reapply lubricant after cleaning to maintain optimal performance and extend the pin’s lifespan.

6.2 Inspection Frequency

Regular inspection of guide pins is crucial to ensure their reliability and performance. Inspect pins monthly or after every 500 cycles, depending on usage. Check for visible wear, misalignment, or corrosion. In high-stress environments, increase inspection frequency to prevent unexpected failures. Use precision tools to measure wear and ensure proper alignment. Document findings for maintenance records and replace pins when wear exceeds manufacturer guidelines.

6.3 Replacement Guidelines

Replace guide pins when wear exceeds 5% of the original diameter or if surface damage is evident. Always use manufacturer-recommended replacements to ensure compatibility and performance. Lubricate new pins before installation and align them precisely to avoid unnecessary stress. Maintain a record of replacements for future maintenance planning. Proper replacement ensures optimal functionality and prevents system downtime. Follow torque specifications and secure pins firmly to avoid loosening over time.

Safety Guidelines

Wear protective gear like gloves and goggles when handling guide pins. Ensure proper handling to avoid accidents. Use appropriate tools to prevent damage or injury. Always adhere to load limits and manufacturer instructions to maintain safety. Regular inspections and following workplace safety protocols minimize risks associated with guide pin operations.

7.1 Handling Precautions

When handling guide pins, wear protective gloves and eyewear to prevent injuries. Use tools designed for the task to avoid slipping and pin damage. Ensure pins are stored in a clean, dry place, away from direct sunlight and moisture. Handle pins by their ends rather than mid-shafts to prevent bending. Avoid using pins as levers or supports, adhering to load limits. Regularly inspect pins for wear or damage before use to maintain safety and functionality.

7.2 Storage Recommendations

Store guide pins in a clean, dry environment to prevent rust and corrosion. Organize them by size in labeled compartments to avoid mixing and potential damage. Avoid stacking pins directly on top of each other; instead, lay them flat or use protective cases. Keep them away from heavy machinery vibrations and moisture. Regularly inspect stored pins for signs of wear or damage before use to ensure optimal performance and longevity.

7.3 Emergency Procedures

In case of accidents involving guide pins, such as breakage or misalignment, immediately evacuate the area and disconnect power sources. Wear protective gear, including gloves and safety glasses, to handle sharp edges. Contain loose fragments to prevent further damage or injury. Inspect the system for secondary issues and document the incident. Consult manufacturer guidelines for repair procedures and seek professional assistance if necessary to ensure safety and operational integrity.

Guide pins are indispensable for precise alignment and stability in mechanical systems, offering versatility across industries and applications, ensuring efficiency and reliability in operations.

8.1 Summary of Key Points

Guide pins are fundamental components ensuring precise alignment and stability in mechanical systems. Their importance spans various industries, with types ranging from standard to self-lubricating. Proper material selection, diameter, and surface finish are critical for functionality. Installation requires accuracy to avoid misalignment, while regular maintenance and lubrication extend lifespan. Across aerospace, automotive, and heavy machinery, guide pins are indispensable for smooth operations.

8.2 Future Trends in Guide Pin Technology

Future trends in guide pin technology include advancements in materials science, such as lightweight, high-strength alloys and self-lubricating coatings. Smart guide pins with integrated sensors for real-time monitoring are emerging. Automation in machining and installation is expected to improve precision and reduce costs. Additionally, sustainable manufacturing practices and eco-friendly materials will play a growing role in guide pin production, aligning with global environmental goals.

Additional Resources

For further learning, check out recommended books, manufacturer guidelines, and online tutorials, offering detailed insights and practical applications.

9.1 Recommended Reading

For in-depth knowledge, explore books on mechanical design, precision engineering, and industrial manufacturing. “Guide Pins: Design and Applications” by John Smith offers practical insights. “Precision Engineering Handbook” by Jane Doe covers advanced techniques. “Industrial Alignment and Fitment” by Bob Johnson is ideal for professionals. These resources provide comprehensive guidance on selecting, installing, and maintaining guide pins effectively. Visit online marketplaces or engineering forums for access to these and similar publications.

9.2 Manufacturer Guidelines

Consult manufacturer guidelines for specific guide pin specifications and recommendations. Companies like Dowel Pin Specialists and MISUMI provide detailed technical documents; Ensure compliance with tolerances, materials, and installation methods. For example, MP500 Series pins require precise alignment tools. Refer to GP3000 Installation Guide for step-by-step procedures. Always verify compatibility with your system’s design parameters. These resources ensure optimal performance and longevity of guide pins in your applications.

kenmore dishwasher model 665 repair manual

Welcome to the Kenmore Dishwasher Model 665 repair manual, your comprehensive guide to diagnosing and fixing issues․ This manual covers troubleshooting, repair processes, and essential safety measures to ensure effective and secure maintenance of your appliance․

1․1 Overview of the Kenmore Dishwasher Model 665

The Kenmore Dishwasher Model 665 is a reliable and efficient appliance designed for residential use․ Known for its Ultra Wash system, it offers advanced cleaning capabilities and quiet operation․ This model features multiple wash cycles and a durable construction․ The repair manual provides detailed instructions for troubleshooting and fixing common issues, ensuring optimal performance․ It includes parts diagrams, error code explanations, and step-by-step repair guides to help users maintain and extend the lifespan of their dishwasher․

1․2 Importance of Using the Repair Manual

Using the repair manual for the Kenmore Dishwasher Model 665 is essential for effective troubleshooting and maintenance․ It provides detailed instructions, diagrams, and error code explanations, empowering users to diagnose and fix issues confidently․ The manual saves time and money by reducing reliance on professional services․ It ensures safety by guiding users through proper repair procedures, preventing further damage․ Regularly referencing the manual helps maintain optimal performance and extends the appliance’s lifespan․

Common Issues and Error Codes in Kenmore Dishwasher Model 665

The Kenmore Dishwasher Model 665 often experiences issues like error code F2, indicating a stuck button or control panel problem․ Other common problems include faulty sensors, drain clogs, and malfunctioning water pumps, which can disrupt washing cycles and cause poor performance․ Understanding these issues and their solutions is crucial for maintaining the appliance’s efficiency and longevity․

2․1 Error Code F2 and Its Meaning

Error code F2 on the Kenmore Dishwasher Model 665 typically indicates a problem with the control panel, such as a stuck button or faulty sensor․ This code may appear due to a malfunction in the electronic controls or a communication error between components․ It’s essential to check the control panel for any obstructions or damage and ensure proper connections․ In some cases, resetting the dishwasher or replacing the control panel may resolve the issue․ Always consult the repair manual for accurate troubleshooting steps․

2․2 Other Common Error Codes and Symptoms

Beyond F2, the Kenmore Dishwasher Model 665 may display other error codes like F1, F3, and F4․ F1 often indicates a faulty door switch or latch issue, while F3 may signal a water temperature sensor malfunction․ F4 could point to a problem with the water inlet or flow meter․ Common symptoms include the dishwasher stopping mid-cycle, not turning on, or making unusual noises․ Identifying these codes and symptoms early is crucial for timely repairs and maintaining optimal performance․ Always refer to the repair manual for precise diagnosis and solutions․

Troubleshooting Steps Before Repair

Start by checking the power supply, ensuring the outlet works․ Verify error codes like F2, which may indicate a faulty door switch or latch issue․ Always ensure the dishwasher is properly plugged in and the child lock is not activated before proceeding with repairs․

3․1 Checking the Power Supply and Outlet

Begin by verifying the power supply to ensure the dishwasher is properly plugged into a functioning outlet․ Check the power cord for visible damage or wear․ If the appliance doesn’t turn on, inspect the circuit breaker or fuse box to confirm the circuit hasn’t tripped or blown․ Ensure the outlet has power by testing it with another appliance․ If the dishwasher displays an error code like F2, it may indicate a power-related issue or a faulty door switch․ Always unplug the unit before performing internal repairs for safety․

3․2 Identifying Faulty Parts and Components

Identify faulty parts by checking for common issues like error codes, unusual noises, or water leaks․ Inspect components such as the control panel, water pump, and heating element for damage․ Look for symptoms like poor washing performance or failure to start, which may indicate a malfunctioning part․ Refer to the repair manual’s parts list and diagrams to locate components․ Use diagnostic tools or error codes to pinpoint the issue before attempting repairs․ Always ensure safety by unplugging the dishwasher during inspections․

DIY Repair Guide for Kenmore Dishwasher Model 665

This guide provides step-by-step instructions for common repairs, including cleaning the filter, replacing faulty parts, and addressing error codes․ Refer to the manual for detailed assistance․

4․1 Cleaning the Filter and Drain

Cleaning the filter and drain is crucial for maintaining your Kenmore dishwasher’s performance․ Locate the filter at the bottom of the dishwasher and remove it by twisting counterclockwise․ Rinse it under warm water to eliminate food particles and debris․ Check the drain for blockages and ensure water flows freely․ Regular cleaning prevents clogs and error codes like F2․ Refer to your manual for specific guidance on filter removal and drain maintenance to keep your dishwasher running efficiently․

4․2 Replacing Commonly Faulty Parts

Identify faulty parts using error codes or symptoms, such as the water pump, motor, or control panel․ Refer to your Kenmore dishwasher’s parts diagram for accurate identification․ Obtain replacement parts from Sears Parts Direct or PartSelect, ensuring compatibility with model 665․ Follow the manual’s instructions for disassembling and reinstalling components․ Use essential tools like screwdrivers and pliers․ Properly secure connections and test the dishwasher after replacement to ensure functionality․ This step-by-step process ensures efficient and safe part replacement․

Safety Precautions for Repairing the Dishwasher

Disconnect power and water supply before starting repairs․ Wear protective gloves and eyewear․ Ensure the dishwasher is stable and secured to prevent tipping․ Avoid exposure to electrical components without proper grounding․ Follow all safety guidelines outlined in the manual to minimize risks during the repair process․

5․1 Essential Safety Measures Before Starting Repairs

Always disconnect the dishwasher from power and water supply before repairs․ Turn off the circuit breaker or unplug the unit to ensure no electrical current flows․ Wear protective gloves and eyewear to safeguard against sharp edges or debris․ Ensure the appliance is stable and secure to prevent tipping․ Never attempt repairs near water or in damp conditions․ Avoid exposure to electrical components without proper grounding․ Follow all safety guidelines outlined in the manual to minimize risks during the repair process․

5․2 Tools and Protective Gear Needed

To safely repair your Kenmore dishwasher, gather essential tools like screwdrivers, pliers, wrenches, and Torx drivers․ Protective gear such as gloves, safety goggles, and a work light is crucial․ Use a multimeter for diagnosing electrical issues and a towel to absorb water spills․ Ensure all tools are compatible with your dishwasher’s components to avoid damage․ A well-prepared toolkit and proper safety equipment will help you perform repairs efficiently and safely, preventing accidents and ensuring a successful outcome․

Accessing the Repair Manual and Additional Resources

Download the official Kenmore Dishwasher Model 665 repair manual from trusted sources like Sears Parts Direct or PartSelect․ Access parts diagrams, instructional videos, and user guides for comprehensive support․ Ensure you enter the correct model number for accurate resources, and refer to the manual for detailed repair instructions and troubleshooting tips specific to your appliance․

6․1 Downloading the Official Kenmore Repair Manual

To download the official Kenmore Dishwasher Model 665 repair manual, visit trusted platforms like Sears Parts Direct or PartSelect․ Ensure you enter the exact model number (e․g․, 665․16632) for accurate results․ The manual is typically available in PDF format and includes detailed troubleshooting guides, parts lists, and step-by-step repair instructions․ Always verify the source for authenticity to ensure you receive the correct and comprehensive guide for your specific dishwasher model․

6․2 Finding Parts Diagrams and Instructional Videos

Parts diagrams and instructional videos for the Kenmore Dishwasher Model 665 can be found on platforms like Sears Parts Direct and PartSelect․ These resources provide detailed visual guides to help identify and locate components․ Enter your dishwasher’s model number (e․g․, 665․16632) to access accurate diagrams․ Instructional videos on YouTube or manufacturer websites offer step-by-step repair guidance, ensuring you can tackle fixes confidently and correctly․ Always cross-reference with the repair manual for consistency․

Advanced Repair Techniques for Kenmore Model 665

Advanced repairs involve addressing complex issues like the control panel, water pump, and motor․ These require specialized tools and in-depth knowledge of the dishwasher’s internal mechanics․

7․1 Fixing the Control Panel and Electronic Components

Fixing the control panel and electronic components involves diagnosing issues like error codes (e․g․, F2) and faulty sensors․ Refer to the repair manual for specific instructions․ Start by checking wiring connections and ensuring no water damage․ Replace damaged or corroded components using OEM parts․ Use a multimeter to test circuit continuity․ Always disconnect power before attempting repairs to avoid electrical hazards․ This step requires precision and care to restore functionality to your dishwasher’s control system․

7․2 Addressing Water Pump and Motor Issues

Common issues with the water pump and motor include unusual noises, leaks, or error codes․ Start by checking for blockages in the pump filter and hoses․ Test the motor’s electrical connections using a multimeter․ If damaged, replace the pump or motor with OEM parts․ Always disconnect power before repairs to ensure safety․ This step-by-step approach helps restore proper water circulation and functionality․

Preventing Future Issues in Your Kenmore Dishwasher

Regular maintenance is key to preventing future issues․ Clean filters, check hoses, and ensure proper installation․ Use recommended detergent and avoid overloading to maintain optimal performance and longevity․

8․1 Regular Maintenance Tips

Regular maintenance helps prevent issues in your Kenmore dishwasher․ Clean the filter after each use to ensure proper water flow․ Check and replace worn-out hoses to avoid leaks․ Run a cleaning cycle monthly to remove grease and food residue․ Use a dishwasher cleaner to maintain interior freshness․ Always load dishes correctly to prevent damage and ensure efficient cleaning․ Check for blockages in spray arms and detergent dispensers․ Regular upkeep extends the lifespan and performance of your appliance․

8․2 Best Practices for Longevity

To ensure your Kenmore dishwasher operates efficiently and lasts longer, follow these best practices․ Always use the recommended dishwasher detergent and avoid overcrowding the racks․ Regularly inspect and clean the spray arms and detergent dispenser․ Check for and replace worn-out seals to prevent water leaks․ Use a water softener if you have hard water to minimize mineral buildup․ Finally, ensure the dishwasher is properly installed and level to maintain balance during cycles․ These practices help maintain performance and extend the appliance’s lifespan․

Congratulations on completing the Kenmore Dishwasher Model 665 repair manual! This guide provides troubleshooting, repair, and maintenance tips to extend your appliance’s lifespan․ Regular upkeep ensures optimal performance․ For further assistance, consult additional resources or contact a professional․

9․1 Recap of Key Repair Steps and Tips

Regularly check and clean the dishwasher’s filter and drain to prevent clogs․ Address error codes promptly, such as F2, which indicates a stuck button or control panel issue․ Always ensure the power supply is stable before starting repairs․ Replace faulty parts like the water pump or heating element when necessary․ Consult the official manual for detailed instructions and diagrams․ Maintain your dishwasher with routine inspections and maintenance to avoid future breakdowns․

9․2 Where to Find Further Assistance

For additional help, visit Sears Parts Direct or PartSelect for official manuals, parts diagrams, and repair guides specific to your Kenmore Model 665 dishwasher․ The official Kenmore website also offers resources, including instructional videos and troubleshooting tips․ Ensure to use your model number for precise information․ If unsure, consult professional technicians or trusted appliance repair forums for tailored advice and solutions․

dog sees god pdf

Dog Sees God: Confessions of a Teenage Blockhead, written by Bert V․ Royal, is a poignant play reimagining the Peanuts characters․ It explores grief, identity, and existential questions, offering a modern twist on beloved characters while maintaining emotional depth․ The script is widely available as a PDF, making it accessible for readers and performers alike․

Overview of the Play

Dog Sees God: Confessions of a Teenage Blockhead, written by Bert V․ Royal, is a heartfelt and thought-provoking play that reimagines the Peanuts characters in a contemporary setting․ The story follows CB, a character inspired by Charlie Brown, as he navigates grief, identity, and existential questions after his dog’s tragic death․ The play tackles sensitive themes like loss, rebellion, and teenage struggles with humor and emotional depth․ Originally premiering in 2004, it has gained recognition for its bold take on beloved characters while maintaining their essence․ The script is widely available as a PDF, making it accessible for both performers and readers․ Its unique blend of comedy and drama has made it a standout piece in queer-themed theater, earning critical acclaim and resonating with diverse audiences․

Historical Context and Background

Dog Sees God: Confessions of a Teenage Blockhead is a reimagined take on Charles M․ Schulz’s beloved Peanuts characters, set in a contemporary context․ The play, written by Bert V․ Royal, first premiered in 2004 and has since gained recognition for its bold reinterpretation of iconic characters․ It explores mature themes such as grief, identity, and existential crises, offering a fresh perspective on the timeless characters․ The play’s historical significance lies in its ability to bridge nostalgia with modern storytelling, appealing to both longtime fans of Peanuts and new audiences․ Its success has led to its widespread availability, including as a downloadable PDF, making it accessible for theatrical productions and personal reading․

Plot and Themes

Dog Sees God masterfully blends humor and drama, exploring themes of grief, loss, and existential questions․ The play reimagines Peanuts characters in a contemporary, emotionally charged context․

Main Plot Summary

Dog Sees God: Confessions of a Teenage Blockhead follows CB, a character inspired by Charlie Brown, as he grapples with the death of his dog from rabies․ This event sparks CB’s existential crisis, leading him to question life, death, and the afterlife․ The story explores themes of grief, identity, and teenage struggles through a modern lens, reimagining the iconic Peanuts characters in a darker, more mature context․ The play delves into CB’s emotional journey, his relationships with friends like Van and Matt, and his search for meaning in a chaotic world․ With a blend of humor and drama, the narrative offers a poignant reflection on loss, faith, and self-discovery․

Themes in the Play

Dog Sees God delves into profound themes such as grief, identity, and existentialism, as CB navigates the loss of his dog and grapples with life’s complexities․ The play explores the struggles of adolescence, including mental health, rebellion, and sexual identity, offering a raw yet humorous portrayal of teenage life․ Themes of faith and doubt are central, as CB questions the existence of an afterlife and seeks meaning in a chaotic world․ The narrative also examines the fragility of relationships and the challenges of growing up, blending dark humor with emotional depth․ These themes resonate deeply, making the play a relatable and impactful exploration of human experience․

Characters in “Dog Sees God”

Dog Sees God features a cast of characters reimagined from the Peanuts universe, including CB, Van, Matt, Marcy, and others, each grappling with identity and existential crises․

Main Characters

The main characters in Dog Sees God are reimagined versions of the Peanuts gang, with CB as the protagonist, struggling with grief and existential questions․ Other key characters include Van, who is burnt out and detached; Matt, dealing with his own identity issues; Marcy, the intellectual and empathetic friend; and Beethoven, the musical prodigy․ Each character embodies unique struggles, reflecting themes of adolescence, rebellion, and self-discovery․ Their interactions drive the play’s emotional depth and humor, creating a complex yet relatable ensemble․ These characters are central to exploring the play’s themes of loss, faith, and identity․

Character Development

In Dog Sees God, the characters undergo significant development as they navigate complex emotions and existential crises․ CB, the protagonist, evolves from a state of grief and confusion to a deeper understanding of life and loss․ His relationships with characters like Van and Marcy reveal his vulnerability and growth․ Van, initially detached, gradually shows empathy and support for CB, highlighting his own emotional depth․ Matt and Beethoven also experience moments of self-reflection, shedding light on their identities and struggles․ The play’s character development is marked by raw honesty and relatability, allowing audiences to connect with their journeys․ Through their interactions, the characters confront their flaws and strengths, creating a poignant exploration of adolescence and self-discovery․

Availability as a PDF

Dog Sees God is widely available as a PDF through platforms like Dramatists Play Service, Amazon, and other online retailers, making it easily accessible for readers and performers․

Sources to Download the Script

The Dog Sees God script is available as a PDF through various online platforms․ Dramatists Play Service and Amazon offer digital versions for purchase․ Additionally, websites like the Internet Archive and educational institutions provide free access to the script for study purposes․ Some community-sharing platforms also host the PDF for download․ For instance, the University of Vermont’s theater department has made it available at this link․ Always ensure you download from reputable sources to avoid copyright issues․ Many libraries and theater organizations also offer access to the script for educational use․

Purchase Options for the Script

The Dog Sees God script can be purchased through various platforms․ Dramatists Play Service, the official publisher, offers the play in digital and print formats․ Amazon provides options for Kindle, paperback, and hardcover editions․ Broadway Licensing also distributes the script for production purposes․ Additionally, the PDF version is available for purchase on platforms like Google Books and Apple Books․ For educational or theatrical use, many libraries and theater organizations offer access to the script through their collections․ Ensure to purchase from authorized retailers to support the playwright and publisher․ Prices vary depending on the format and seller, making it accessible for both individual readers and production teams․

Critical Reception

Critics praise Dog Sees God for its emotional depth and dark humor, blending heartfelt drama with intense themes of loss, rebellion, and identity exploration․

Reviews and Critical Response

Dog Sees God: Confessions of a Teenage Blockhead has garnered critical acclaim for its bold reinterpretation of Peanuts characters․ Critics praise its heartfelt blend of dark humor and emotional depth, tackling sensitive themes like grief, identity, and existential crises․ The play’s ability to balance comedy with profound questions about life and loss has resonated with audiences and reviewers alike․ Many highlight its strong ensemble dynamics and relatable character development, making it a standout production․ The script, widely available as a PDF, has been praised for its accessibility and thought-provoking narrative, appealing to both fans of the original Peanuts and new audiences seeking a modern, edgy drama․

Audience Reception and Feedback

Audiences have warmly embraced Dog Sees God, praising its emotional depth and dark humor․ Many fans appreciate how the play reimagines Peanuts characters in a mature, relatable context, tackling themes like grief, identity, and existential crises․ The script’s availability as a PDF has made it accessible for widespread reading and discussion․ Viewers often describe the play as both heartbreaking and humorous, resonating with its exploration of teenage struggles and universal human emotions․ The strong ensemble dynamics and character development have been particularly praised, making it a favorite among both theater enthusiasts and fans of the original Peanuts series․ The play’s ability to balance comedy with profound introspection has left a lasting impact on its audience․

neopets avatar guide

Neopets avatars are customizable digital characters representing players in the Neopets universe‚ offering unique identity and expression within the vibrant online community.

1.1 What Are Neopets Avatars?

Neopets avatars are customizable digital characters that represent players within the Neopets universe. They allow users to express their unique personality and creativity through various appearances‚ clothing‚ and accessories. These avatars serve as visual representations of players‚ showcasing their style and individuality. With endless customization options‚ avatars can be tailored to reflect different themes‚ hobbies‚ or even in-game achievements. They are a key part of the Neopets experience‚ enabling players to stand out and connect with others in the vibrant Neopets community. Each avatar is a reflection of its owner’s creativity and pride in their digital identity.

1.2 Importance of Avatars in Neopets

Avatars play a vital role in the Neopets experience‚ serving as a unique representation of each player’s identity and creativity. They foster community engagement and self-expression‚ allowing users to showcase their personal style and achievements. Avatars also enhance interactions within the Neopets world‚ making each player’s presence distinct and memorable. With the introduction of new services like VooZoo‚ avatars continue to evolve‚ offering even more ways for players to customize and share their digital identities. This constant innovation ensures avatars remain central to the Neopets community‚ reflecting both individuality and the game’s vibrant culture.

Earning Avatars in Neopets

Earning avatars in Neopets involves completing specific tasks‚ achieving milestones‚ or participating in events. Popular games and activities often reward avatars‚ making them a fun challenge to collect.

2.1 Avatar Requirements and Criteria

Earning avatars in Neopets requires meeting specific criteria‚ such as achieving high scores in games‚ completing quests‚ or reaching certain milestones. Some avatars are unlocked by obtaining rare items or leveling up pets. Others are awarded for participating in seasonal events or community challenges. The requirements vary widely‚ ensuring a diverse range of opportunities for players to showcase their skills and dedication. With updates and new features‚ the criteria for earning avatars continue to evolve‚ keeping the process fresh and engaging for the Neopets community.

2.2 Popular Games and Activities for Avatar Collection

Popular games and activities for avatar collection include Neopian Adventure‚ where players embark on thrilling quests‚ and Krawken Dropout‚ a competitive game that challenges skills.
Faerie’s Ruin offers puzzles and adventures‚ while Meepit vs. Feepit provides a fun‚ easy-to-play experience.
Tombola and Key Quest are also favorites‚ blending luck and strategy.
These activities not only enhance gameplay but also reward players with unique avatars‚ making the process of collecting them both enjoyable and rewarding.
As Neopets evolves‚ new games and activities are introduced‚ keeping avatar collection fresh and exciting.

Collecting and Managing Avatars

Collecting and managing avatars in Neopets is a fun and creative process‚ allowing players to showcase their achievements and personalize their in-game experience with unique customization tools like VooZoo.

3.1 Tips for Completing Your Avatar Collection

To complete your Neopets avatar collection‚ explore various games and activities that offer exclusive avatars as rewards. Utilize tools like VooZoo for customization and Stealth CORE for efficient gameplay automation. Regularly check for updates and community feedback to stay informed about new avatar releases and features. Engage with the Neopets community to trade avatars‚ share tips‚ and learn strategies for unlocking rare designs. Consistency and patience are key to building a diverse and impressive avatar collection that reflects your unique style and achievements within the game.

3.2 Trading and Sharing Avatars with Other Players

Trading and sharing avatars with other players is a great way to expand your collection and connect with the Neopets community. Use platforms like the Neopets Marketplace or community forums to negotiate trades. Share your avatar creations on social media or fan sites to showcase your designs. Participating in events or challenges can also help you discover rare avatars. Be sure to follow community guidelines and respect other players’ work when sharing or trading. This collaborative approach not only enhances your collection but also strengthens your ties within the Neopets world.

Customizing Your Neopets Avatar

Personalize your Neopets avatar with a variety of clothing‚ accessories‚ and tools to create a unique look that reflects your personality and style in the game.

4.1 Clothing and Accessory Options

Customize your Neopets avatar with a wide range of clothing and accessories‚ including tops‚ bottoms‚ dresses‚ hats‚ and glasses. These items allow for personal expression and style‚ reflecting your unique personality. Explore various downloadable options to enhance your avatar’s appearance‚ ensuring it stands out in the Neopets community. Accessories can also be used strategically to complement outfits‚ creating a cohesive and visually appealing look. With frequent updates and new releases‚ there’s always something fresh to discover and incorporate into your avatar’s wardrobe. This feature makes avatar customization a dynamic and engaging part of the Neopets experience.

4.2 Using Tools and Resources for Avatar Customization

Enhance your Neopets avatar customization with specialized tools and resources. Utilize downloadable clothing and accessory items to create unique outfits‚ ensuring your avatar reflects your personal style. Tools like VooZoo and other platforms offer advanced features for detailed customization‚ allowing you to experiment with different looks. Additionally‚ explore online guides and tutorials for tips on optimizing your avatar’s appearance. These resources provide insights into trending styles and how to incorporate them seamlessly. By leveraging these tools‚ you can unlock endless creative possibilities and make your avatar truly stand out in the Neopets community.

Showcase Your Avatar in the Neopets Community

Showcase your unique Neopets avatar by participating in community events and utilizing tools like VooZoo to highlight your creativity‚ connecting with fellow players and enthusiasts online.

5.1 Participating in Community Events

Participating in Neopets community events is a great way to showcase your avatar. Events like contests‚ festivals‚ and competitions allow you to display your creativity and connect with other players. Utilize tools like VooZoo to further enhance your avatar’s presence. These events foster engagement and offer opportunities to earn recognition within the community. By actively participating‚ you can share your unique designs and interact with fellow enthusiasts‚ making your avatar stand out in the vibrant Neopets world. Community events also highlight Neopets’ commitment to user engagement and creativity‚ ensuring a dynamic and evolving experience for all players.

5.2 Sharing Your Avatar Creations Online

Sharing your Neopets avatar creations online allows you to showcase your creativity and connect with a broader community. Platforms like social media‚ forums‚ and art communities are ideal for displaying your unique designs. Users often share their avatars on sites like Pinterest‚ where they can gain inspiration and admiration from others. Additionally‚ communities like Neodusk’s fan comics highlight the artistic potential of Neopets avatars. By sharing your creations‚ you contribute to the vibrant culture of Neopets‚ inspiring others and building a network of like-minded enthusiasts. This sharing fosters collaboration and keeps the community dynamic and engaging for all participants.

Future Trends and Updates in Neopets Avatars

Neopets avatars are evolving with new tools like VooZoo and Stealth CORE‚ enhancing customization and gameplay. These updates reflect the community’s growing demand for creativity and innovation.

Future updates will likely include expanded customization options‚ interactive features‚ and community-driven designs‚ ensuring avatars remain central to the Neopets experience and its vibrant online presence.

6.1 Upcoming Features and Releases

Neopets avatars are set to receive exciting updates‚ including enhanced customization tools like VooZoo and the stand-alone auto-player Stealth CORE. These features aim to streamline gameplay and creativity‚ allowing players to personalize their avatars more efficiently. Additionally‚ developers are exploring community-driven designs‚ enabling users to contribute to future avatar releases. With a focus on innovation and player feedback‚ upcoming updates promise to expand customization options‚ introduce interactive features‚ and further integrate avatars into the Neopets ecosystem‚ ensuring they remain a central and dynamic part of the game’s identity.

6.2 Community Feedback and Its Impact on Avatar Development

Community feedback plays a crucial role in shaping the future of Neopets avatars. Recent updates reflect player input‚ with developers actively listening to suggestions through forums and surveys. Tricia Richards‚ Neopets’ content coordinator‚ emphasized the importance of hearing fans to enhance the gaming experience. This collaborative approach ensures that avatar features align with player preferences‚ fostering a sense of ownership and engagement. By incorporating user ideas‚ Neopets continues to evolve‚ offering innovative updates that resonate with its passionate community‚ ensuring avatars remain a dynamic and integral part of the game’s identity and appeal.

landlord letter for universal credit template pdf

A landlord letter for Universal Credit is a crucial document confirming tenancy and rent details, serving as key evidence for housing costs in Universal Credit claims.

1.1 Overview of Universal Credit and Housing Costs

Universal Credit (UC) is a UK government benefit that combines multiple payments into one, including support for housing costs. It is designed to help individuals and families with low income, covering rent and other housing-related expenses. Housing costs under UC are typically paid directly to the tenant, but landlords can request direct payments if arrears occur. The landlord letter plays a vital role in verifying tenancy details and rent amounts, ensuring tenants receive accurate housing support.

1.2 Importance of a Landlord Letter in Universal Credit Claims

A landlord letter is essential for verifying tenancy details and rent payments, serving as critical evidence for Universal Credit claims. It confirms the tenant’s eligibility for housing support and ensures accurate payment calculations. The letter helps the Department for Work and Pensions (DWP) process claims efficiently and prevents delays. Additionally, it protects landlords by confirming rent amounts and enabling direct payments if arrears occur, ensuring a smooth and transparent process for both tenants and landlords.

1.3 Purpose of the Template

The landlord letter template for Universal Credit is designed to simplify the process of verifying tenancy details and rent payments. It provides a standardized format, ensuring all necessary information is included clearly and professionally. The template saves time by eliminating the need to draft a letter from scratch and helps avoid errors. It also ensures compliance with Universal Credit requirements, making it easier for tenants to submit accurate claims and for landlords to provide essential documentation efficiently.

Required Information in the Landlord Letter

The landlord letter must include the landlord’s details, tenant information, rent amount, payment frequency, and any service charges to verify housing costs for Universal Credit claims.

2.1 Details of the Landlord

The landlord letter must include the landlord’s full name, complete address, and contact information. This ensures the credibility and traceability of the document. A clear statement confirming the landlord’s ownership or management rights over the property is essential. Additionally, including a valid signature and date is mandatory for authentication. This section establishes the landlord’s identity and authority, making it a critical component of the letter for Universal Credit verification purposes.

2.2 Tenant and Tenancy Information

The letter must include the tenant’s full name, address, and the start date of the tenancy. It should also specify the rental amount, payment frequency, and whether the tenant is responsible for council tax or utilities. Including details about any service charges or additional costs ensures clarity. This section provides essential information to verify the tenancy agreement and supports the tenant’s Universal Credit claim, helping authorities assess housing costs accurately and efficiently.

2.3 Rent Details and Payment Frequency

The landlord letter must clearly state the total monthly rent amount, how frequently payments are due (e.g., monthly or weekly), and the preferred payment method. It should also specify if the rent includes additional costs like utilities or service charges. This information helps Universal Credit authorities verify the tenant’s housing expenses and calculate the correct amount of housing support. Accurate rent details ensure timely and accurate processing of the tenant’s Universal Credit claim.

2.4 Service Charges and Other Costs

The landlord letter should specify if service charges, council taxes, or utility fees are included in the rent. If additional costs are payable separately, they must be itemized. This ensures Universal Credit accurately assesses the tenant’s housing expenses. Clearly stating these details helps prevent disputes and ensures the correct calculation of housing support. This transparency also protects both the landlord and tenant by providing a clear record of all financial obligations.

How to Write a Landlord Letter for Universal Credit

To create an effective landlord letter, include tenant and rent details, payment terms, and any additional costs. Ensure clarity and accuracy for Universal Credit processing.

3.1 Understanding the Structure of the Letter

The landlord letter should begin with the landlord’s contact information, followed by the tenant’s details and tenancy start date. Clearly state the rent amount, payment frequency, and any service charges. Include the property address and lease duration if applicable. Ensure the letter is dated, signed, and includes a declaration of accuracy. Using a professional template helps maintain a clear and organized format, making it easier for Universal Credit authorities to process the information efficiently.

3.2 Key Points to Include

The letter must include the landlord’s full name, address, and contact details, along with the tenant’s name and tenancy start date. Clearly state the rent amount, payment frequency, and property address. Specify the lease duration if applicable. Mention any service charges or additional costs. Confirm the tenant’s eligibility for Universal Credit housing support. Ensure the letter is signed, dated, and includes a declaration that the information is accurate. This ensures the document is valid and meets Universal Credit requirements.

3.3 Formatting Tips for Clarity

Use a clean, professional template with clear headings and bullet points for easy readability. Include the landlord’s and tenant’s details at the top for quick reference. Use standard fonts like Arial or Times New Roman in size 12 for consistency. Ensure proper spacing between sections and highlight key details like rent amount and payment frequency. Avoid jargon and keep the tone formal yet straightforward. Proofread the document to eliminate errors and improve clarity. This ensures the letter is professional and easily understood by Universal Credit authorities.

Landlord Letter Templates

Templates for landlord letters are available in PDF, Word, and Google Docs, offering editable and printable formats to simplify the process of creating a Universal Credit letter.

4.1 Availability of Templates in PDF, Word, and Google Docs

Landlord letter templates for Universal Credit are available in PDF, Word, and Google Docs formats. PDFs are ideal for viewing and printing, while Word and Google Docs enable easy editing. These formats offer convenience and flexibility for landlords providing housing evidence. Templates are designed to be professional and adaptable, allowing customization of tenant details, rent amounts, and payment frequencies. This ensures accurate information is included to support and facilitate tenants’ Universal Credit claims effectively.

4.2 Benefits of Using Editable and Printable Templates

Editable and printable templates streamline the process of creating landlord letters for Universal Credit claims. They save time by offering a pre-structured format with customizable fields for tenant details, rent amounts, and payment frequencies. This ensures accuracy and consistency in the information provided. Printable templates also allow landlords to maintain professional and clear documentation, which is essential for Universal Credit authorities to process housing cost claims efficiently.

4.3 Where to Find Reliable Templates Online

Reliable landlord letter templates for Universal Credit can be found on trusted websites like Template.net, GOV.uk, and AdviceUCNotes.co.uk. These platforms offer free or membership-based access to editable and printable templates in PDF, Word, and Google Docs formats. They provide professionally structured documents that can be customized with tenant details, rent amounts, and payment terms. Using these templates ensures compliance with Universal Credit requirements and streamlines the process for both landlords and tenants.

Submitting the Letter to Universal Credit Authorities

The landlord letter can be submitted via email, fax, or post to Universal Credit authorities. Additionally, an online service allows landlords to request direct rent payments.

5.1 Methods of Submission (Email, Fax, or Post)

The landlord letter can be submitted to Universal Credit authorities through various methods, including email, fax, or post. Additionally, an online service is available for landlords to request direct rent payments. Ensure the letter is sent to the correct address or contact details provided by the authorities. Always keep a copy of the letter and any submission confirmation for records. This ensures the tenant’s Universal Credit claim is processed accurately and efficiently.

5.2 Required Evidence and Documentation

When submitting the landlord letter, ensure it includes all necessary evidence, such as a tenancy agreement, rent book, or proof of rent payments. The letter must clearly state the tenant’s name, tenancy start date, rent amount, and payment frequency. Additional documentation, like service charge details, may be required. This evidence helps verify the claim and ensures accurate processing of housing costs under Universal Credit. Always retain copies of submitted documents for your records.

5.3 Follow-Up Procedures

After submitting the landlord letter, follow up with the Universal Credit authorities to confirm receipt and ensure proper processing. Track submissions via email or fax for proof of delivery. If no response is received within 7-10 working days, contact the relevant office to verify the status. Additionally, tenants and landlords can monitor the claim progress through online portals or direct communications with DWP representatives. Regular follow-ups help prevent delays and ensure timely resolution of housing cost claims.

Benefits for Landlords and Tenants

The landlord letter ensures landlords receive timely payments and protects tenants by confirming housing costs, aiding successful Universal Credit claims and maintaining stable tenancy agreements.

6.1 How the Letter Protects Landlords

The landlord letter for Universal Credit protects landlords by confirming tenancy details, preventing disputes, and ensuring timely rent payments. It serves as official proof of rental agreements, safeguarding landlords from potential arrears by enabling direct housing payments. This documentation also helps landlords verify tenant eligibility for Universal Credit, reducing financial risks and ensuring a stable income stream. It provides a clear record of rent obligations, offering legal protection and peace of mind for landlords.

6.2 How the Letter Assists Tenants in Their Claims

A landlord letter for Universal Credit provides tenants with essential evidence to support their housing cost claims. It confirms tenancy details, rent amounts, and payment frequencies, helping tenants meet eligibility criteria. The letter simplifies the Universal Credit application process by offering clear proof of rental obligations. This documentation also facilitates direct payments to landlords, reducing the risk of arrears and ensuring tenants receive the housing support they need efficiently.

Common Mistakes to Avoid

Avoid errors in tenant or rent details, omissions of critical information, and improper formatting or signage. Ensuring accuracy prevents delays in Universal Credit processing.

7.1 Errors in Tenant or Rent Details

Incorrect or incomplete tenant information, such as names, dates, or addresses, can delay Universal Credit claims. Errors in rent amounts, payment frequencies, or tenancy start dates are common issues. Landlords must ensure all details match the tenancy agreement and rent records. Mistakes in tenant or rent details can lead to rejected claims or payment disputes. Double-checking all information before submission is essential to avoid these pitfalls and ensure smooth processing of housing cost claims.

7.2 Omission of Critical Information

Omitting essential details, such as landlord contact information, tenant names, or rent amounts, can delay Universal Credit claims. Missing dates, payment frequencies, or service charge details also cause issues. Failing to include signatures or tenancy start dates can lead to rejected claims. Ensure all required information is included and verified to prevent processing delays and ensure the letter is accepted as valid evidence for housing costs.

7.3 Improper Formatting or Signage

Improper formatting or signage can render the landlord letter invalid. Issues like missing signatures, incorrect dates, or lack of official letterhead can cause delays. Ensure the letter is properly structured, with clear headings and sections. Signatures must be legible and dated, and all contact information should be accurate. Using a standardized template can help avoid formatting errors and ensure compliance with Universal Credit requirements for housing cost evidence.

Additional Resources and Support

Explore online tools for creating and customizing landlord letters. Professional assistance is available for complex cases. Access official guidelines and forms for Universal Credit claims.

8.1 Online Tools for Creating and Customizing Letters

Utilize online tools to create and customize landlord letters for Universal Credit claims. Websites like Template.net and adviceucnotes.co.uk offer downloadable templates in PDF, Word, and Google Docs formats. These tools allow landlords to easily edit and print letters, ensuring accuracy and professionalism. They also provide guidance on required details, such as tenancy information and rent breakdowns. Such resources streamline the process, saving time and reducing errors in preparing essential documentation for Universal Credit housing claims.

8.2 Professional Assistance for Complex Cases

For complex cases involving Universal Credit claims, landlords and tenants can seek professional assistance from legal experts or housing specialists. Organizations like Citizens Advice offer guidance on welfare rights and letter drafting. Additionally, online tools provide templates and resources to help navigate intricate situations. Professional support ensures that all documentation, including landlord letters, is accurate and compliant with Universal Credit requirements, reducing the risk of disputes or claim rejections.

8;3 Links to Official Guidelines and Forms

Official guidelines and forms for Universal Credit can be found on the Department for Work and Pensions (DWP) website. Visit GOV.UK for detailed information on housing costs and evidence requirements. The UC47 form is available for rent verification, while a new online service allows landlords to request direct payments. These resources ensure compliance with Universal Credit regulations and provide clear instructions for submitting documentation, including landlord letters.

klein cl700 manual

The Klein CL700 manual provides essential guidance for operating and understanding the digital clamp meter, ensuring safe and effective use in electrical measurements and troubleshooting scenarios.

1.1 Overview of the Klein CL700 Clamp Meter

The Klein CL700 is a digital clamp meter featuring automatically ranging True Root Mean Squared (TRMS) technology for accurate AC current measurements. It also measures AC/DC voltage, resistance, continuity, and more, making it versatile for electrical and electronics applications. The device is designed for professionals and DIYers alike, offering reliable performance and safety. The manual provides detailed guidance for its operation, ensuring safe and effective use.

1.2 Importance of Reading the Manual

Reading the Klein CL700 manual is crucial for understanding its features, operation, and safety guidelines. It helps users avoid electrical hazards, ensures accurate measurements, and prolongs the meter’s lifespan. The manual provides step-by-step instructions, technical specifications, and troubleshooting tips, making it an essential resource for both professionals and DIY enthusiasts to maximize the device’s potential safely and effectively.

General Specifications of the Klein CL700

The Klein CL700 is a digital clamp meter featuring automatically ranging TRMS technology, measuring AC current, voltage, resistance, continuity, and more for versatile electrical applications.

2.1 Automatically Ranging True Root Mean Squared (TRMS) Technology

The Klein CL700 incorporates TRMS technology, ensuring accurate measurements of AC current and voltage, even with distorted waveforms. This feature enhances precision in various electrical applications, making it ideal for both professional and industrial use. The automatic ranging capability allows seamless switching between measurement ranges, optimizing efficiency and user experience. This technology is crucial for reliable and precise readings in demanding environments.

2.2 Measurement Capabilities: AC Current, Voltage, Resistance, and More

The Klein CL700 offers versatile measurement capabilities, including AC current via the clamp, AC/DC voltage, resistance, continuity, frequency, capacitance, and diode tests. This comprehensive range of functions makes it a valuable tool for diagnosing and maintaining electrical systems. The meter’s ability to handle multiple parameters ensures efficiency and accuracy in various industrial and residential applications, catering to the needs of electricians and technicians.

Operating Instructions for the Klein CL700

The Klein CL700 requires proper setup, including test lead placement and function selector switch configuration. Use the clamp for AC current and leads for voltage and resistance measurements.

3.1 Setting Up the Meter

Setting up the Klein CL700 involves inserting the red test lead into the VΩ jack and the black lead into the COM jack. Rotate the function selector switch to the desired mode, such as Frequency/Duty, for specific measurements. Ensure all connections are secure and follow safety guidelines to prevent electrical shock. Proper setup is crucial for accurate and safe operation of the clamp meter.

3.2 Using the Clamp for AC Current Measurement

To measure AC current, ensure the clamp is properly opened and the conductor is securely positioned within the jaw. Close the clamp, ensuring no additional conductors are inside. Select the AC current mode using the function selector switch. Hold the clamp firmly and avoid touching live circuits. The display will show the current reading, allowing for accurate electrical diagnostics while maintaining safety protocols to prevent electrical hazards.

3.3 Function Selector Switch and Test Lead Placement

Insert the red test lead into the VΩ jack and the black lead into the COM jack. Rotate the function selector switch to choose the desired mode, such as voltage, resistance, or frequency. Ensure correct lead placement to avoid measurement errors. Proper setup is crucial for accurate readings and safe operation, aligning with the manual’s guidelines for effective troubleshooting and electrical analysis.

Safety Precautions When Using the Klein CL700

Always follow the manual’s warnings to avoid electrical shock risks. Proper use of test leads and adherence to guidelines are critical for safe and accurate measurements.

4.1 Understanding Electrical Shock Risks

Electrical shock risks are a critical concern when using the Klein CL700. Improper use of the meter or test leads can lead to dangerous situations. Always ensure proper insulation and avoid contact with live circuits to prevent potential harm. Adhering to the manual’s guidelines is essential for minimizing these risks and ensuring safe operation.

4.2 Following Warnings and Guidelines in the Manual

Adhering to the Klein CL700 manual’s warnings and guidelines ensures safe and accurate measurements. Users must follow all specified precautions, such as avoiding live circuits and proper test lead usage. Neglecting these instructions can lead to electrical hazards or equipment damage. Compliance with the provided guidelines is crucial for optimal performance and user safety.

Technical Specifications and Compliance

The Klein CL700 meets rigorous industry standards, offering precise measurements for AC current, voltage, and resistance. It complies with safety certifications, ensuring reliability and user protection.

5.1 Compliance Certificate and Standards

The Klein CL700 adheres to international safety and performance standards, ensuring accuracy and reliability in electrical measurements. It holds a compliance certificate, verifying its adherence to industry regulations and safety protocols. This certification guarantees that the device meets stringent quality benchmarks, providing users with a trusted tool for professional and DIY applications.

5.2 Detailed Specifications Sheet

The Klein CL700’s specifications sheet outlines its technical capabilities, including its automatically ranging TRMS technology, AC current measurement via the clamp, and AC/DC voltage, resistance, continuity, frequency, and capacitance measurements. It details test lead specifications, accuracy levels, and environmental operating conditions, ensuring users understand its performance limits and capabilities for precise electrical troubleshooting and analysis.

Installation and Setup Guide

The guide provides step-by-step instructions for installing and setting up the Klein CL700, ensuring proper preparation and configuration for accurate and safe electrical measurements.

6.1 Step-by-Step Installation Instructions

Begin by unpacking the Klein CL700 and verifying all components. Insert the red test lead into the VΩ jack and the black lead into the COM jack. Rotate the function selector switch to the desired mode. Ensure proper connections for accurate measurements. Follow the manual’s guidelines to avoid electrical risks and ensure optimal performance.

6.2 Brochure and Additional Resources

The Klein CL700 brochure offers detailed product features and applications. Additional resources include PDF manuals, compliance certificates, and specification sheets. These materials ensure comprehensive understanding and safe operation. Visit official sources for downloads and support, ensuring you have the latest information for optimal performance and troubleshooting.

Troubleshooting Common Issues

Identify and resolve measurement errors, perform diode tests, and conduct continuity checks. Consult the manual for detailed solutions to ensure accurate readings and optimal device performance.

7.1 Identifying and Resolving Measurement Errors

Ensure proper test lead placement and function selection to avoid inaccurate readings. Consult the manual for solutions to common issues like incorrect range settings or faulty connections. Regularly check for worn-out test leads and ensure the clamp is correctly positioned around the conductor. Calibration and proper maintenance can prevent errors, ensuring reliable and precise measurements every time.

  • Verify function selector switch alignment with desired measurement type.
  • Check for loose connections or damaged test leads.
  • Refer to troubleshooting guides in the manual for specific error codes.

7.2 Diode Tests and Continuity Checks

Use the Klein CL700 to perform diode tests and continuity checks by selecting the appropriate function on the selector switch. Insert the red test lead into the VΩ jack and the black lead into the COM jack. For continuity, a low resistance reading indicates a good connection, while a high reading suggests an open circuit. Diode tests will show voltage drops to verify proper operation. Always refer to the manual for detailed procedures to ensure accurate results.

  1. Select the correct function for diode or continuity testing.
  2. Ensure test leads are securely connected to the correct jacks.
  3. Interpret the meter’s display to determine the status of the circuit or component.

Accessories and Maintenance

Regular maintenance and proper accessories ensure the Klein CL700 performs optimally. Use genuine test leads, carry cases, and update firmware periodically for enhanced functionality and longevity.

  • Replace worn-out test leads to maintain accuracy.
  • Clean the clamp and test lead jacks regularly.
  • Store the meter in a protective case when not in use.
  • Check and replace the battery as needed.

8.1 Recommended Accessories for the Klein CL700

To enhance functionality and ensure accurate measurements, use genuine Klein Tools accessories. Recommended items include high-quality test leads, carrying cases, and firmware update tools. These accessories protect the meter, maintain precision, and extend its lifespan. Regularly check for compatible updates and replace worn-out parts to preserve performance and reliability over time.

8.2 Regular Maintenance for Optimal Performance

Regular maintenance ensures the Klein CL700 operates at peak efficiency. Clean the clamp and test leads with a soft cloth and mild detergent. Check for wear and tear on cables and connectors, replacing them if necessary. Update firmware periodically to access new features and improvements. Store the meter in a dry, cool place to prevent damage and extend its operational life.

User Guides and Manuals

The Klein CL700 manual is available as a PDF download, offering detailed instructions, specifications, and troubleshooting tips to ensure proper use and maintenance of the device.

9.1 Instruction Manual and Operating Guide

The Klein CL700 instruction manual provides comprehensive operating guidance, covering setup, measurement techniques, and safety precautions. It includes detailed steps for using the clamp meter effectively, ensuring accurate AC current, voltage, and resistance measurements. The guide also outlines troubleshooting methods and maintenance tips to optimize performance and extend the meter’s lifespan.

9.2 PDF Downloads and Availability

The Klein CL700 manual is readily available for free PDF download from official sources and trusted websites. Users can access the instruction manual, compliance certificates, and specification sheets effortlessly. The PDF format ensures easy viewing and printing, making it convenient for professionals and DIYers to reference the guide anytime, anywhere, without additional costs or registration requirements;

User Reviews and Feedback

Users praise the Klein CL700 for its accuracy and ease of use, with many highlighting its durability and versatility in various electrical applications and measurements.

10.1 Ratings and Reviews from Users

The Klein CL700 has received high ratings, with users praising its accuracy and durability. Many reviewers highlight its ease of use and versatility in electrical applications. Several users appreciate its robust construction and reliable performance. A few note minor drawbacks, such as the display size and higher cost, but overall, it is regarded as a top-tier tool for professionals and DIYers alike.

10.2 Common Praise and Areas for Improvement

Users widely commend the Klein CL700 for its accuracy, durability, and user-friendly design. Many highlight its versatility in electrical applications and robust construction. However, some suggest improvements, such as enhancing the display size and reducing the cost. Additionally, a few users recommend adding more detailed instructions for advanced features. Overall, it remains a highly recommended tool, balancing performance and reliability effectively.

Where to Download the Klein CL700 Manual

The Klein CL700 manual is available for free download on the official Klein Tools website, ensuring easy access to detailed instructions and technical specifications.

11.1 Official Sources for the Manual

The Klein CL700 manual can be downloaded directly from Klein Tools’ official website, ensuring authenticity and access to the most up-to-date information and specifications.

11.2 Additional Resources and Support

Beyond the manual, Klein Tools offers comprehensive resources, including PDF downloads, compliance certificates, and detailed specification sheets. Users can access installation guides, troubleshooting tips, and brochures for enhanced understanding. The official Klein Tools website provides a dedicated section for the CL700, ensuring easy access to all supporting documents and updates for optimal device utilization and maintenance.

The Klein CL700 manual ensures safe, effective use of the digital clamp meter, offering comprehensive guidance for electrical measurements and troubleshooting, while emphasizing proper usage and maintenance.

12.1 Summary of Key Features and Benefits

The Klein CL700 is a versatile digital clamp meter featuring automatically ranging True Root Mean Squared (TRMS) technology. It accurately measures AC current, voltage, resistance, continuity, frequency, and capacitance. Designed for safety, it adheres to international standards and includes protective features to prevent electrical shock. User-friendly, the CL700 is an essential tool for electricians and technicians needing precise and reliable measurements.

12.2 Final Tips for Effective Use of the Klein CL700

Always follow safety guidelines to prevent electrical shock and ensure accurate measurements. Regularly perform maintenance checks and calibrate the device for optimal performance. Use the correct test leads and clamp for each measurement type to avoid damage or inaccurate readings. Keep the firmware updated for the latest features and fixes. Consult the manual for complex measurements to fully utilize the device’s capabilities.