Manual transmissions, also known as stick shifts, engage the driver directly with the vehicle, offering precise control over speed and gear changes.
What is a Manual Transmission?
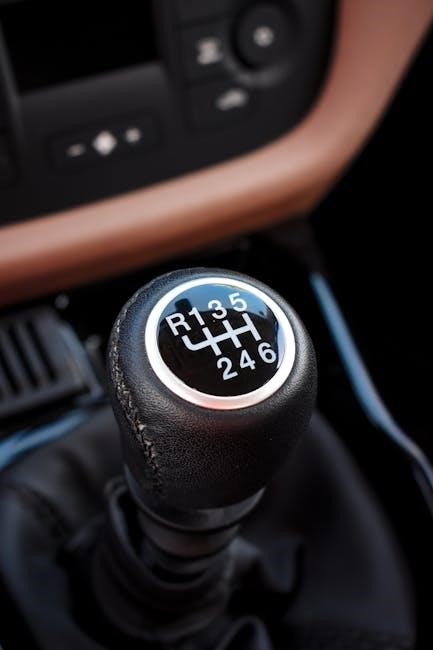
A manual transmission, commonly known as a stick shift, is a type of gearbox that requires the driver to manually change gears using a clutch pedal and a gearshift. This system allows the driver to control the connection between the engine and the wheels, enabling precise control over speed and torque. By pressing the clutch pedal, the engine is disconnected from the transmission, allowing the driver to select the appropriate gear for the vehicle’s speed and driving conditions. Manual transmissions are known for their fuel efficiency, lower ownership costs, and enhanced driving engagement, making them a preferred choice for many driving enthusiasts.
Benefits of Manual Transmissions
Manual transmissions offer several advantages, including improved fuel efficiency, lower maintenance costs, and enhanced driver engagement. They provide better control over the vehicle, allowing drivers to optimize speed and torque for various driving conditions. Additionally, manual transmissions are typically lighter and more durable than automatics, contributing to overall vehicle performance. The direct connection between the engine and wheels fosters a more immersive driving experience, making it a favorite among enthusiasts. With proper driving techniques, manual transmissions can also improve safety by allowing drivers to maintain control during challenging situations, such as steep inclines or sudden stops.
Understanding the Issue: Transmission Kicking Out of Gear
Transmission kicking out of gear is a frustrating issue that can occur due to worn components or improper shifting techniques, often signaling underlying mechanical problems.
Common Symptoms
When a manual transmission kicks out of gear, drivers may experience sudden loss of control over speed, jerking movements, or difficulty staying in gear. Grinding noises during shifts and hesitation when accelerating are also common indicators. Additionally, the gearshift may feel loose or slip unintentionally, especially when driving uphill or under load. These symptoms often worsen over time if left unaddressed, leading to potential safety hazards on the road. Identifying these signs early is crucial to prevent further damage to the transmission system.
When to Seek Professional Help
If your manual transmission frequently kicks out of gear, especially during acceleration or uphill driving, it’s critical to seek professional help. Persistent symptoms like grinding noises, difficulty shifting, or a loose gearshift indicate potential damage. Continuing to drive in such conditions risks further harm to the transmission and related components. A professional mechanic can diagnose issues like worn synchronizers or clutch malfunctions and perform necessary repairs. Don’t delay, as ignoring the problem can lead to costly replacements or even complete transmission failure, compromising both safety and performance.
Common Causes of the Problem
The manual transmission kicking out of gear is often due to worn or damaged synchronizers, a malfunctioning clutch system, or insufficient transmission fluid levels.
Worn or Damaged Synchronizers
Worn or damaged synchronizers are a common cause of manual transmissions kicking out of gear. Synchronizers are critical components that ensure smooth gear transitions by equalizing the speed of the gear and shaft. Over time, these parts can wear out due to excessive friction, high mileage, or aggressive driving habits. When synchronizers fail, the gear may not engage properly, leading to the transmission disengaging unexpectedly, especially during shifting. This issue often manifests as grinding noises or difficulty shifting into higher gears. If left unaddressed, worn synchronizers can cause further damage to the transmission system, requiring costly repairs. Regular maintenance and prompt replacement of worn parts are essential to prevent such issues.
Clutch System Malfunction
A faulty clutch system can directly contribute to a manual transmission kicking out of gear. The clutch is essential for disconnecting engine power during gear shifts. If the clutch fails to disengage properly, gears may not engage smoothly, causing the transmission to slip out of gear unexpectedly. Common issues include a worn clutch plate, malfunctioning clutch master or slave cylinder, or incorrect clutch pedal adjustment. Drivers may notice symptoms such as the clutch pedal feeling spongy, difficulty shifting gears, or the transmission disengaging while driving. Addressing clutch issues promptly is crucial to prevent further damage to the transmission and ensure safe vehicle operation.
Low Transmission Fluid Level
A low transmission fluid level is a common cause of manual transmissions kicking out of gear. Transmission fluid lubricates gears and synchronizers, ensuring smooth shifting. When fluid levels drop, friction increases, leading to improper gear engagement. Symptoms include difficulty shifting, grinding noises, or the transmission disengaging while driving. Drivers may also notice hesitation or lack of response when accelerating. Regularly checking and maintaining the correct fluid level is essential to prevent this issue. If ignored, it can lead to more severe damage, such as worn synchronizers or gear teeth. Always refer to the vehicle’s manual for the recommended fluid type and level to ensure optimal transmission performance and longevity.
Troubleshooting the Problem
Start by checking the transmission fluid level and inspecting for worn or damaged components. Test the clutch operation and ensure proper engagement.
Basic Diagnostic Steps
Begin by assessing the transmission fluid level and condition, as low or degraded fluid can cause gears to slip. Next, inspect the clutch for proper engagement and wear.
Check the gearshift linkage for loose connections or damage. Test drive the vehicle to reproduce the issue, noting when and how it occurs. Listen for unusual noises and feel for vibrations. These steps help identify if the problem lies in the transmission, clutch, or linkage components, guiding further detailed inspection or professional evaluation. Early detection of worn synchronizers or faulty sensors can prevent more severe damage. Regular maintenance is key to avoiding such issues.
Advanced Diagnostic Techniques
For persistent issues, advanced diagnostics are necessary. Use a multimeter to test electrical components like sensors and solenoids. Inspect internal transmission parts by partially disassembling the unit to check for worn gears, bearings, or synchros. Pressure testing the hydraulic system can reveal clutch or pressure plate issues. End play measurement ensures proper shaft and bearing alignment. These specialized procedures require mechanical expertise and tools, often necessitating professional consultation. Advanced techniques help pinpoint root causes, whether mechanical or hydraulic, ensuring accurate repairs. Regular maintenance can prevent such complexities, but when problems arise, thorough diagnostics are essential for effective solutions. Early intervention prevents further damage, extending the transmission’s lifespan.
Preventive Maintenance Tips
Regular fluid changes, proper shifting techniques, and inspecting the clutch system can prevent issues like the transmission kicking out of gear, ensuring smooth operation and longevity.
Proper Shifting Techniques
Mastering smooth gear shifts is essential to prevent transmission issues. Press the clutch fully before shifting to avoid grinding gears. Use the correct gear for speed to maintain control. Accelerate gradually when releasing the clutch to prevent abrupt wear. Avoid “riding” the clutch, as this can overheat and damage components. Ensure the vehicle is fully stopped before reversing to prevent transmission strain. Smooth, deliberate movements reduce wear and tear, promoting a longer lifespan for your manual transmission. Consistent practice enhances coordination between the clutch and accelerator, making driving more enjoyable and reducing the risk of mechanical failure.
Regular Maintenance Schedule
A well-maintained manual transmission ensures smooth operation and prevents unexpected issues. Check the transmission fluid level monthly and top it off if necessary. Replace the fluid every 30,000 to 60,000 miles to remove contaminants. Inspect the clutch and pressure plate for wear during brake pad replacements. Lubricate the gearshift linkage annually to maintain smooth shifting. Schedule a professional inspection every 50,000 miles to identify potential problems early. Regular servicing helps extend the lifespan of your transmission and prevents costly repairs. Stay proactive to keep your manual transmission running like new.
Repairs and Replacements
Repairs or replacements depend on the severity of damage. Minor issues like worn synchronizers can be fixed, while major damage may require a full transmission rebuild or replacement.
When to Repair vs. Replace
Deciding whether to repair or replace a faulty manual transmission depends on the extent of the damage. If issues like worn synchronizers or low fluid levels are identified early, repairs can often resolve the problem cost-effectively. However, if the transmission has significant internal damage, such as broken gears or a failed bearings, replacement becomes the more viable option. Age and overall condition of the transmission also play a role; older units may not be worth extensive repairs. Consulting a professional mechanic is crucial to determine the best course of action and avoid further complications down the road.
Cost Estimates and Considerations
Repairing a manual transmission that kicks out of gear can range from $500 to $2,000, depending on the issue. Replacing damaged synchronizers or the clutch system may cost around $1,000 to $1,500. However, if the problem stems from severe internal damage, a full transmission replacement could be necessary, costing between $2,000 and $4,000. Factors like labor rates, parts quality, and vehicle make/model influence the final cost. DIY repairs are possible but risky without proper expertise. Regular maintenance, such as fluid checks and timely repairs, can help prevent costly issues. Consulting a professional ensures accurate diagnostics and avoids unnecessary expenses.