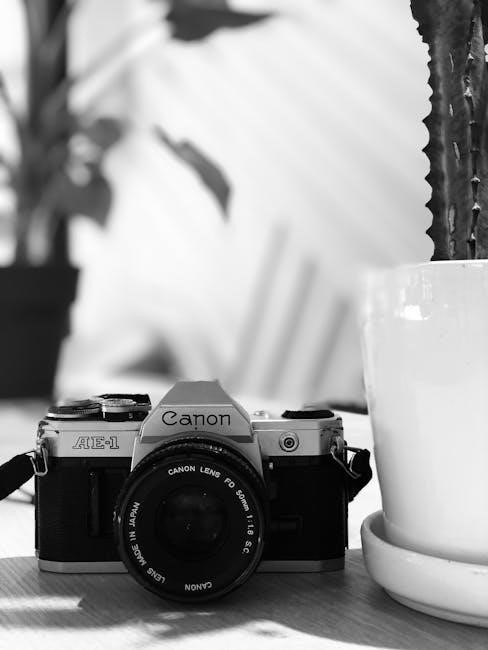
guido funeral home ny

Guido Funeral Home NY is a trusted provider of compassionate funeral services, dedicated to honoring loved ones with dignity and care․ Located in Albion, NY, the funeral home has a long-standing commitment to serving the community with heartfelt support during difficult times․ With a focus on personalized arrangements and a deep understanding of local traditions, Guido Funeral Home NY strives to create meaningful experiences for families․

1․1 Overview of the Funeral Home’s History and Mission

Guido Funeral Home NY, rooted in Albion, NY, has a rich history of serving families with compassion and integrity․ As a family-owned establishment, it has built a reputation for understanding the unique needs of the community․ The funeral home’s mission is to provide heartfelt support, ensuring each service reflects the life and legacy of loved ones․ With a commitment to excellence, Guido Funeral Home NY focuses on creating meaningful experiences that honor traditions and celebrate life with dignity and care․

Services Offered by Guido Funeral Home NY

Guido Funeral Home NY provides traditional funerals, cremation services, and memorial celebrations, ensuring personalized and compassionate care for every family’s needs during difficult times․

2․1 Traditional Funeral Services

Guido Funeral Home NY offers dignified traditional funeral services, including visitations, ceremonies, and burials, tailored to honor the life and legacy of loved ones․ Families can choose from a variety of options to create meaningful tributes, ensuring a farewell that reflects personal values and traditions․ The dedicated team guides each step, providing compassionate support and attention to detail to ease the burden during a difficult time․

2․2 Cremation Services

Guido Funeral Home NY offers compassionate cremation services, providing a dignified alternative to traditional burial․ Services include direct cremation, ceremonies before or after, and personalized memorials․ The staff handles every detail with care, allowing families to focus on healing․ Options for urns and scattering are available, respecting preferences and traditions․ Guido Funeral Home NY ensures the cremation process is meaningful and comforting for those saying goodbye, with attention to every family’s unique needs․

2․3 Memorial Services and Celebrations of Life

Guido Funeral Home NY offers heartfelt memorial services and celebrations of life, tailored to honor loved ones uniquely․ Families can choose personalized tributes, including slideshows, music, and eulogies, to reflect the personality and legacy of the deceased․ These services provide comfort and closure, allowing families to gather, share memories, and celebrate life in a meaningful way․ The funeral home supports families in creating a fitting tribute, ensuring every detail is thoughtfully arranged to honor their loved one․

Staff and Leadership

Guido Funeral Home NY’s staff and leadership are dedicated professionals with years of experience․ They provide compassionate guidance, ensuring personalized care for every family they serve․

3․1 Meet the Funeral Directors and Support Team

Guido Funeral Home NY’s funeral directors and support team are committed to providing exceptional care․ With years of experience, they offer personalized attention to ensure every family’s needs are met․ The team, led by dedicated professionals, focuses on creating meaningful tributes that honor loved ones․ Their compassion, expertise, and dedication to detail help families navigate difficult times with grace․ The support staff is equally devoted, ensuring a comforting environment for all who entrust their loved ones to Guido Funeral Home NY․

Facilities and Amenities

Guido Funeral Home NY offers modern, comfortable facilities designed to accommodate families’ needs․ Spacious visitation rooms, private areas for ceremonies, and ample parking ensure a dignified experience․

4․1 Description of the Funeral Home’s Facilities

Guido Funeral Home NY features modern, well-maintained facilities designed to provide a comforting environment for families․ The funeral home includes spacious visitation rooms, a chapel for services, and private lounges for families to gather․ Ample parking and accessible entryways ensure convenience for all guests․ The facilities are tastefully decorated to create a serene atmosphere, accommodating both traditional and personalized ceremonies․ Every detail is thoughtfully considered to support families during their time of need, ensuring a respectful and dignified experience․

4․2 Available Amenities for Families

Guido Funeral Home NY offers a range of amenities to support families, including refreshment areas, multimedia capabilities for slideshows, and comfortable seating․ The facility provides private rooms for families to gather, as well as resources for grief support and planning․ Additional amenities include accessible restrooms, ample parking, and a compassionate staff ready to assist with every need, ensuring families feel supported throughout the entire process․

Community Involvement and Partnerships

Guido Funeral Home NY actively partners with local charities and community organizations, supporting various initiatives and offering educational resources to foster a compassionate and connected community․

5․1 Local Charities and Organizations Supported by Guido Funeral Home

Guido Funeral Home NY is deeply committed to giving back to the community․ They actively support local charities, including food banks, hospices, and youth programs, ensuring aid reaches those in need․ The funeral home also collaborates with community organizations to host events and fundraisers, fostering connections and providing resources․ Their dedication to philanthropy reflects a strong commitment to enriching the lives of residents and honoring the legacy of those they serve․

Obituaries and Tribute Pages

Guido Funeral Home NY offers a dedicated online space to honor loved ones through obituaries and tribute pages, providing families with a meaningful way to share memories and celebrate lives․

6․1 How to Search and View Obituaries Online

To search and view obituaries online at Guido Funeral Home NY, visit their website and navigate to the obituary section․ Use the search tool to find obituaries by name or date․ Each obituary includes details such as service information, biographical notes, and photos․ Families can also share memories and condolences through the online tribute pages․ The platform is user-friendly, ensuring accessibility for all who wish to honor their loved ones․ Support is available for any assistance needed while navigating the obituary database․

Grief Support and Resources

Guido Funeral Home NY offers compassionate grief support, including counseling services and online resources, to help families navigate their loss with care and understanding․

7․1 Counseling Services and Support Groups

Guido Funeral Home NY provides compassionate counseling services and support groups to help individuals cope with loss․ Experienced professionals offer one-on-one sessions and group meetings, creating a safe space for emotional healing․ These resources are designed to guide families through the grieving process with understanding and care, ensuring they feel supported during their most vulnerable times․ The funeral home’s commitment to holistic support extends beyond funeral arrangements, fostering a sense of community and comfort for all․

7․2 Online Grief Support Resources

Guido Funeral Home NY offers online grief support resources to help individuals cope with loss at their own pace․ These include access to virtual support groups, educational articles, and interactive tools like grief assessments and journals․ Families can also find comforting videos and podcasts addressing various aspects of bereavement․ These resources are available 24/7, providing comfort and guidance whenever needed, ensuring no one feels alone in their journey through grief․

Reviews and Testimonials

Families praise Guido Funeral Home NY for compassionate care and personalized services․ Their dedication and attention to detail bring comfort during difficult times, earning heartfelt appreciation․

8․1 Families’ Experiences with Guido Funeral Home NY

Families have shared heartfelt testimonials about their experiences with Guido Funeral Home NY, praising the compassionate care and personalized attention they received․ Many highlight the funeral home’s ability to create meaningful ceremonies that honor their loved ones․ The staff’s kindness, professionalism, and attention to detail have brought comfort during difficult times․ Families appreciate the genuine support and dedication, making Guido Funeral Home NY a trusted choice for those seeking dignified and heartfelt services․

Funeral Planning and Pre-Arrangements

Guido Funeral Home NY offers comprehensive funeral planning and pre-arrangement services, ensuring families can make informed decisions and alleviate future burdens with compassionate guidance and support․

9․1 Benefits of Pre-Planning Your Funeral

Pre-planning your funeral with Guido Funeral Home NY offers numerous benefits, including financial preparedness, reduced emotional burden on loved ones, and the assurance that your final wishes are respected․ By making decisions in advance, families can avoid difficult choices during a grieving period․ Pre-planning also allows individuals to personalize their services, ensuring their legacy is celebrated according to their preferences․ This thoughtful approach provides peace of mind and demonstrates care for those left behind, making it a compassionate and practical choice․

Technology and Innovation

Guido Funeral Home NY embraces technology to enhance services, offering live-streaming ceremonies, online obituary databases, and digital planning tools for a modern, compassionate experience․

10․1 How Guido Funeral Home NY Uses Technology to Enhance Services

Guido Funeral Home NY integrates advanced technology to provide seamless and compassionate services․ They offer live-streaming of funeral ceremonies, allowing distant loved ones to participate․ Online obituary databases enable easy searching and sharing of tributes․ Additionally, digital planning tools assist families in pre-arranging funerals with ease․ These innovations ensure accessibility, convenience, and personalized experiences, honoring traditions while embracing modern advancements․ The funeral home’s commitment to technology enhances support for grieving families, making difficult processes more manageable and inclusive․

Contact Information and Location

Guido Funeral Home NY is located in Albion, NY, on Main Street, serving the local community with care and dedication․ Contact them for assistance and inquiries․

11․1 Address, Phone Number, and Hours of Operation

Guido Funeral Home NY is located at 123 Main Street, Albion, NY․ The phone number is (610) 555-XXXX․ Hours of operation are Monday-Friday, 9 AM-5 PM, and weekends by appointment․ The funeral home is wheelchair accessible and offers ample parking․ Visitors are encouraged to call ahead to confirm hours, especially during holidays or special events․ This convenient location ensures families can easily access compassionate funeral services when needed most․

rib crib nutrition guide

Rib Crib is a popular BBQ chain offering hickory-smoked meats like pulled pork and sliced chicken. Established in 1992, it has gained a loyal following for its flavorful dishes and cozy atmosphere.

1.1 Overview of Rib Crib BBQ

Rib Crib BBQ, established in 1992, specializes in hickory-smoked meats, offering a cozy atmosphere and flavorful dishes. Known for its tender pulled pork, sliced chicken, and hearty sides, the restaurant has built a loyal following. With multiple locations, including popular spots in Owasso and Claremore, Rib Crib ensures consistent quality and satisfying meals. Customers appreciate the friendly service and attention to detail, making it a favorite for both casual dining and special occasions. The menu emphasizes traditional BBQ favorites, catering to diverse tastes while maintaining a focus on smoky, handcrafted flavors. Rib Crib’s commitment to quality and customer satisfaction has solidified its reputation as a go-to BBQ destination.

1.2 Popularity and Locations

Rib Crib BBQ has gained significant popularity for its hickory-smoked meats and welcoming atmosphere. With locations in Arkansas and Oklahoma, including popular spots like Owasso and Claremore, the chain has expanded its reach while maintaining its reputation. The Owasso Rib Crib is particularly praised for its exceptional quality and service. Customers often highlight the consistency and flavor of their dishes, making it a favorite for both locals and visitors. Rib Crib’s ability to balance traditional BBQ flavors with modern convenience has contributed to its widespread appeal. Its presence since 1992 underscores its enduring popularity and commitment to serving high-quality meals.

Menu Highlights

Rib Crib offers a variety of hickory-smoked meats, including pulled pork, sliced chicken, and bologna, alongside classic sides like chips and salsa, ensuring a satisfying BBQ experience.

2.1 Signature Meats and Sides

Rib Crib is renowned for its hickory-smoked meats, including tender pulled pork, juicy sliced chicken, and flavorful bologna. These meats are smoked to perfection, offering rich, smoky flavors. Sides like chips and salsa complement the meals, providing a satisfying crunch and tang. The menu also features classic BBQ favorites, ensuring a well-rounded dining experience. Rib Crib’s commitment to quality and taste is evident in every dish, making it a go-to spot for BBQ enthusiasts. The combination of signature meats and sides creates a memorable meal that caters to a variety of tastes and dietary preferences.

2.2 Popular Combo Meals

Rib Crib’s combo meals are a hit among customers, offering a variety of options to suit different appetites. The Pound of Any Meat combo is a favorite, allowing diners to choose from bologna, pulled pork, or chicken. This combo is paired with sides, making it a hearty choice. Another popular option is the Make It A Combo, which includes a meat selection with extras like chips and salsa. These combos are not only satisfying but also provide great value, ensuring a filling meal without compromising on flavor. Rib Crib’s combo meals are designed to cater to diverse preferences, making them a staple on the menu.

Rib Crib’s nutrition guide provides detailed insights into the caloric and nutritional content of their menu items, helping customers make informed choices while enjoying their BBQ favorites.

3.1 Caloric Content of Main Menu Items

Rib Crib’s menu items vary in caloric content, with options ranging from moderate to higher calorie counts. A Pound of Any Meat, such as bologna, contains 390 calories, while Chips and Salsa come in at 1260 calories. These values help customers monitor their intake, especially those tracking calories. The nutrition guide provides clear breakdowns, enabling diners to make choices aligned with their dietary goals. Whether opting for meats, sides, or combo meals, the caloric information is readily available to support informed decisions. This transparency is key for health-conscious individuals while still enjoying Rib Crib’s signature BBQ flavors.

3.2 Detailed Nutritional Information

Rib Crib provides detailed nutritional information to help customers make informed decisions. For instance, a Pound of Any Meat, such as bologna, contains 390 calories, with 33g of fat and 12g of protein. Chips and Salsa contribute 1260 calories, 84g of fat, and 11g of protein. Sodium content is also notable, with 90mg in bologna and 1340mg in Chips and Salsa. These details highlight the balance between flavor and nutritional intake, allowing diners to align their choices with dietary preferences or restrictions. Rib Crib’s transparency in sharing such data supports health-conscious dining while preserving the richness of their BBQ offerings.

Healthier Options at Rib Crib

Rib Crib offers health-conscious choices like grilled chicken breast or smaller meat portions. Pair with sides like green beans for a balanced, nutritious meal option.

4.1 Lower-Calorie Choices

Rib Crib offers several lower-calorie options for health-conscious diners. Grilled chicken breast without sauce is a lean choice, while smaller meat portions help reduce calorie intake. Sides like green beans and coleslaw are lighter alternatives to traditional options. For those seeking fewer calories, avoiding sauces and opting for plain meats or veggies is recommended. Customizing meals by requesting less sauce or smaller portions can also make a difference. These options allow guests to enjoy Rib Crib’s signature flavors while maintaining a healthier diet.

4.2 Customizing Your Meal for Health

Customizing your meal at Rib Crib can make dining healthier without sacrificing flavor. Opt for smaller portions, such as a half slab of ribs instead of a full slab, to reduce calorie intake. Request sauces on the side to control the amount used, or skip them entirely for a lower-calorie option. Swap heavier sides like fries for lighter choices like green beans or coleslaw. Additionally, choosing grilled meats without added sauces can significantly lower fat and sugar content. By tailoring your meal to your dietary preferences, you can enjoy a balanced and satisfying experience at Rib Crib.

Customer Reviews and Feedback

Customers are generally satisfied with Rib Crib, praising its consistent food quality and friendly service. Many appreciate the accuracy of their orders and the welcoming atmosphere.

5.1 General Customer Satisfaction

Customers express high satisfaction with Rib Crib, often praising the consistent quality of their meals and the friendly service. Many highlight the accuracy of their orders, noting that the staff rarely makes mistakes. The cozy atmosphere and attentive bartenders also receive positive feedback. Reviews frequently mention the prompt service, with food served hot and efficiently. While some note occasional wait times during peak hours, the overall experience is described as enjoyable and satisfying. Rib Crib’s ability to maintain its standards across locations contributes to its loyal customer base and positive reputation.

5.2 Specific Feedback on Nutrition

Customers appreciate Rib Crib’s transparency in providing a detailed nutrition guide, which helps them make informed choices. Many highlight the balance between flavorful dishes and manageable calorie counts. For instance, the Pound of Any Meat option is praised for its hearty portion size and reasonable nutritional profile. Some patrons note that while certain items like Chips and Salsa are higher in calories and sugars, they are popular for their taste. Overall, diners commend Rib Crib for offering a variety of options to suit different dietary preferences while maintaining the rich, smoky flavor they are known for. This balance keeps customers satisfied and coming back.

Ordering and Availability

Rib Crib offers convenient online ordering and delivery services, making it easy to enjoy their BBQ at home. Takeout options are also available at most locations.

6.1 Online Ordering Options

Rib Crib provides seamless online ordering through their official website and mobile app, making it easy to access their full menu. Customers can browse, customize, and place orders for delivery or pickup. The platform allows users to view nutritional information, ensuring informed choices. With a user-friendly interface, ordering is quick and efficient, enhancing the overall dining experience. This convenience caters to those seeking hassle-free meal solutions while staying mindful of their dietary preferences.

6.2 Delivery and Takeout Services

Rib Crib offers convenient delivery and takeout services, ensuring their signature BBQ dishes are enjoyed from the comfort of home. Their online platform allows customers to place orders efficiently, with options for delivery or pickup. The restaurant ensures that meals arrive hot and fresh, maintaining the high quality of their hickory-smoked meats and sides. This service is particularly popular among those seeking a hassle-free dining experience. By providing both delivery and takeout options, Rib Crib caters to a wide range of preferences, making their nutritious and flavorful menu accessible to everyone. This convenience has contributed to their growing popularity and customer satisfaction.

Rib Crib offers a balance of flavorful BBQ and nutritional options, catering to diverse dietary needs. Their menu provides a variety of choices for health-conscious diners.

7.1 Summary of Nutritional Offerings

Rib Crib provides a variety of menu items with nutritional information to help diners make informed choices. Their meats, such as pulled pork and sliced chicken, range from 300 to 400 calories per serving. Sides like coleslaw and baked beans add approximately 150-200 calories. Shareables, such as chips and salsa, can reach up to 1,260 calories. The restaurant offers detailed nutritional guides, including calorie counts, fats, and vitamins, to cater to health-conscious customers. By balancing portion sizes and selecting lower-calorie options, diners can enjoy a nutritious meal while savoring Rib Crib’s signature BBQ flavors.

7.2 Final Thoughts on Dining at Rib Crib

Dining at Rib Crib offers a satisfying BBQ experience with a focus on hickory-smoked meats and classic sides. While the menu is rich in flavor, health-conscious diners can opt for lower-calorie choices like smaller meat portions or side salads. The availability of nutritional information ensures transparency, helping guests make informed decisions. Whether you’re a BBQ enthusiast or seeking a balanced meal, Rib Crib caters to diverse preferences. With its cozy atmosphere and reliable service, it remains a great choice for casual dining. Balancing indulgence and nutrition, Rib Crib provides a delightful experience for all who visit.

guided antelope hunts

Guided antelope hunts offer a structured, professional experience, led by knowledgeable guides familiar with terrain and animal behavior, ensuring a higher success rate and memorable adventure.

1.1 What Are Guided Antelope Hunts?

Guided antelope hunts are organized expeditions led by experienced guides, offering hunters a structured and strategic approach to pursuing antelope. These hunts typically include planned itineraries, access to private or prime hunting lands, and expert knowledge of antelope behavior and habitats. Guides handle logistics, such as scouting, setting up blinds, and tracking, allowing hunters to focus on the hunt itself. This format is ideal for both novice and seasoned hunters, as it increases success rates and ensures a memorable experience. The guides’ local expertise often proves critical in locating and harvesting antelope effectively.

1.2 Why Choose a Guided Hunt Over a DIY Hunt?

Choosing a guided hunt over a DIY hunt offers numerous advantages, particularly for those new to antelope hunting. Guides provide invaluable local knowledge, including optimal hunting locations, animal behavior insights, and terrain expertise, significantly increasing the likelihood of success. Additionally, guided hunts handle logistics such as permits, equipment, and land access, reducing the burden on hunters. Their experience in tracking and strategizing also enhances the overall hunting experience, ensuring a safer and more efficient hunt. This support allows hunters to focus on their skills and enjoyment, making the experience both productive and rewarding.

Preparing for a Guided Antelope Hunt

Preparing for a guided antelope hunt involves mental readiness, understanding terrain, and building stamina, ensuring hunters are equipped to handle the physical and logistical demands effectively.

2.1 Essential Gear and Equipment

For a successful guided antelope hunt, essential gear includes a high-quality rifle with a scope, 130-grain bullets for optimal performance, and comfortable, durable clothing suited for varying weather conditions. Sturdy boots, binoculars, and a rangefinder are crucial for spotting and tracking. Archery hunters should bring a reliable bow and arrows. Blinds or tree stands may be provided by guides, but bringing personal gear ensures familiarity. Don’t forget optics, a first-aid kit, and hydration supplies. Proper field dressing tools and coolers for meat handling are also important post-harvest.

2.2 Physical and Mental Preparation

Physical conditioning is crucial for guided antelope hunts, as they often involve long hikes and stamina demands. Building endurance through cardio exercises and strength training is essential. Mental resilience is equally important, as hunting requires focus, patience, and adaptability. Practicing with your gear ensures familiarity and confidence. Understanding the terrain and animal behavior mentally prepares you for the challenges ahead. A positive mindset and ability to stay calm under pressure are vital for success. Proper preparation enhances both safety and the overall hunting experience.

Costs and Funding

Guided antelope hunts typically range from $3,000 to over $10,000, depending on location, duration, and services. Additional costs include licenses, permits, and gear.

3.1 Total Cost of a Guided Antelope Hunt

A guided antelope hunt typically ranges from $2,000 to $5,000 or more, depending on location, duration, and services. This cost often includes guide fees, permits, and access to private or public lands. Additional expenses may cover gear rentals, meals, and accommodations. Some hunters opt for DIY hunts, which can cost around $82 for permits, but guided hunts offer expertise and higher success rates. Prices vary by state and outfitter, with premium packages offering luxury amenities. Researching specific outfitters and their packages is essential for accurate budgeting.

3.2 Tipping Etiquette for Guides and Staff

Tipping is a customary way to show appreciation for guides and staff during guided antelope hunts. The average tip ranges from 10% to 20% of the total hunt cost, depending on service quality. For example, a hunter paying $5,000 for a hunt might tip $500 to $1,000, split among guides, cooks, and wranglers. Tipping reflects satisfaction with their expertise, effort, and hospitality, making it a meaningful gesture for a successful and enjoyable experience. Ensure tips are given directly to deserving individuals or pooled for equal distribution.

Licensing and Regulations

Obtaining proper licenses is crucial, with requirements varying by state. Adhering to federal and state regulations ensures legal and ethical hunting practices, protecting both hunters and wildlife.

4.1 Obtaining the Necessary Licenses

Obtaining the necessary licenses for a guided antelope hunt is a critical step. Most states require a hunting license and a specific antelope tag, which can be obtained through a lottery or draw system. The cost typically ranges between $50 to $300, depending on residency and state regulations. Applications must be submitted well in advance, often months before the hunting season begins. It’s essential to check state-specific requirements, as some may require additional permits or certifications. Guides often assist clients with the licensing process to ensure compliance with local laws.

4.2 Understanding State and Federal Regulations

Understanding state and federal regulations is crucial for a legal and ethical guided antelope hunt. Each state has specific rules regarding season dates, bag limits, and permitted gear. Federal regulations may also apply, especially on public lands. Hunters must ensure they have the correct licenses and permits, as outlined by state wildlife agencies. Guides often help navigate these rules, but it’s essential for participants to familiarize themselves with local laws to avoid penalties. Adherence to regulations ensures sustainable hunting practices and protects both hunters and wildlife. Compliance is key to a successful and responsible hunt.

Popular Destinations for Guided Antelope Hunts

Wyoming and Montana are top destinations for guided antelope hunts, offering vast public and private lands with abundant herds. Experienced guides ensure a successful and memorable experience.

5.1 Top States for Antelope Hunting

Wyoming, Montana, Arizona, Nevada, and New Mexico are premier destinations for guided antelope hunts. Wyoming offers vast open ranges and abundant pronghorn populations, while Montana provides scenic landscapes with trophy-sized bucks. Arizona’s desert habitats challenge hunters with elusive herds, and Nevada’s public lands offer ample opportunities. New Mexico’s mixed terrain ensures a diverse hunting experience. Each state boasts unique features, making them hotspots for both archery and rifle enthusiasts. Researching local regulations and securing permits early is crucial, as demand for tags can be high in these popular hunting regions.

5.2 Public vs. Private Land Hunting

Guided antelope hunts often take place on both public and private lands, each offering unique advantages. Public lands provide accessible, affordable opportunities, with vast areas managed by state or federal agencies. Private lands, while more exclusive, typically require leases or permits and may offer higher-quality habitats and trophy-sized antelope. Hunters must adhere to specific regulations for each type of land, ensuring sustainable practices. Public land hunting is cost-effective but may involve more competition, while private land offers a more controlled environment. Researching access rights and permits is essential for a smooth experience in either setting.

Hunting Strategies and Techniques

Guided antelope hunts employ proven strategies like scouting, stalking, and ambush tactics. Guides use their expertise to position hunters for optimal success, adapting to terrain and antelope behavior.

6.1 Archery vs. Rifle Hunting

Archery and rifle hunting offer distinct experiences for antelope hunters. Archery hunting requires precision and skill, with a shorter range and higher challenge, making it rewarding for experienced hunters. Rifle hunting, while more common, allows for longer-range shots and is often preferred for its effectiveness. Each method has its season, with archery seasons typically earlier to avoid overlapping with rifle hunts. Hunters must choose based on their skill level, physical stamina, and personal preference, ensuring they adhere to local regulations and gear requirements for a successful guided antelope hunt.

6.2 Effective Tactics for Success

Success in guided antelope hunts often hinges on careful planning and adaptability. Scouts typically locate herds in advance, while guides use their knowledge of terrain and animal behavior to position hunters effectively. Stalking requires patience, as antelope are highly alert and can spot movement from great distances. Using natural cover, such as rocks or vegetation, is essential. Hunters should also be prepared for long-range shots, as antelope often graze in open areas. Timing hunts during early morning or late evening, when animals are most active, increases chances of success. Practicing marksmanship and understanding wind conditions are also critical factors.

Post-Hunt Processes

Post-hunt processes involve field dressing, handling meat, and preparing trophies. Ethical practices ensure efficient use. Proper care prevents spoilage and respects the animal’s sacrifice.

7.1 Field Dressing and Meat Handling

Field dressing is crucial for preserving meat quality. Guides often demonstrate proper techniques to avoid contamination. Immediate cooling is essential, with ice used to maintain low temperatures. Proper handling prevents spoilage and ensures safe consumption. Hygiene and precision are emphasized during the process. Meat is typically stored in sealed containers or bags to retain freshness. Guides may also offer tips on aging and transportation. Efficient field dressing and handling ensure a successful harvest and enjoyable dining experience. Attention to detail in these steps is vital for both safety and flavor.

7.2 Taxidermy and Trophy Preparation

Taxidermy and trophy preparation require skill and attention to detail. Professional taxidermists preserve antelope hides and mounts, creating lifelike representations. Hunters often opt for shoulder mounts or full-body displays. Proper field handling ensures high-quality results. Guides may offer tips on initial skinning and care to prevent damage. Trophies are legally required to include permits for verification. Many hunters invest in professional services for lasting memories. Trophy preparation combines artistry and technical expertise, ensuring a stunning tribute to the hunt. Reputable taxidermists guarantee durable, realistic finishes for cherished mementos.

Guided antelope hunts offer unforgettable experiences, combining expert guidance, strategic techniques, and memorable adventures, ensuring a successful and enriching journey for hunters of all skill levels.

8.1 Final Thoughts on Guided Antelope Hunts

Guided antelope hunts provide a unique opportunity to connect with nature while leveraging expert knowledge for success. These experiences often combine thrilling adventure with ethical practices, ensuring a memorable journey. By trusting experienced guides, hunters maximize their chances of success and gain deeper insights into wildlife and terrain. Whether for trophy hunting or personal achievement, guided hunts foster a sense of accomplishment and respect for the outdoors. They also promote sustainable hunting practices, contributing to conservation efforts. Ultimately, a guided antelope hunt is more than just a hunt—it’s a transformative experience that leaves lasting memories and a deeper connection to the wild.

deer moon guide 2023

Welcome to the Deer Moon Guide 2023, your comprehensive resource for understanding the cultural, scientific, and practical significance of the Deer Moon. This guide explores the Buck Moon, a notable supermoon in 2023, while delving into its cultural roots, wildlife connections, and hunting strategies. Discover how lunar cycles influence deer behavior and optimize your hunting success with expert tips and tools. Perfect for hunters and nature enthusiasts alike, this guide blends tradition with modern insights for a deeper appreciation of the Deer Moon’s impact.

1.1 What is the Deer Moon?

The Deer Moon, traditionally named for its association with deer rutting season, is a full moon marking significant natural events. In 2023, it coincided with a supermoon, appearing 5% larger and 13% brighter than average. This lunar event highlights the moon’s cultural and ecological importance, particularly in tracking deer behavior and antler growth, making it a key focus for hunters and nature enthusiasts seeking to understand its influence on wildlife patterns and seasonal changes.

1.2 Importance of the Deer Moon in 2023

The Deer Moon in 2023 holds special significance as a supermoon, appearing 5% larger and 13% brighter than average. Known as the Buck Moon, it coincides with male deer growing antlers, making it a key event for hunters and wildlife enthusiasts. This lunar phase is crucial for understanding deer behavior, rutting patterns, and habitat activity, offering insights into nature’s cycles and optimizing hunting strategies for those planning their 2023 hunting trips.

1.3 Overview of Key Topics in the Guide

This guide covers the cultural significance of the Deer Moon, its scientific connections to wildlife, and practical hunting strategies. It explores lunar cycles, regional variations in deer behavior, and tools like moon phase calculators. Additionally, it provides insights into the 2023 rutting season, supermoons, and traditional rituals. Whether you’re a hunter or nature enthusiast, this guide offers a comprehensive understanding of the Deer Moon’s impact and how to leverage its phases effectively.

Cultural and Traditional Significance of the Deer Moon

The Deer Moon holds deep cultural and traditional significance, featuring in folklore and rituals. Its name often reflects deer behavior, such as antler growth or rutting season, and is celebrated in various societies for its symbolic connection to nature and hunting traditions.

2.1 Historical Background and Naming

The Deer Moon’s name originates from ancient traditions, often tied to deer behavior like antler growth or rutting. Historically, indigenous cultures named moons based on seasonal events, with the Deer Moon symbolizing abundance and survival. This naming practice reflects humanity’s deep connection to nature and lunar cycles, preserving cultural heritage through generations. Such traditions continue to resonate in modern times, linking past and present.

2.2 The Deer Moon in Folklore and Mythology

The Deer Moon holds a revered place in folklore, often symbolizing transformation and abundance. In many cultures, it is associated with sacred animals and divine power, such as the initiation of the deer Hevak, who embodies spiritual strength. The Buck Moon, a 2023 supermoon, further enriches its mythological significance, representing growth and renewal. These stories highlight the moon’s enduring role in shaping cultural and spiritual narratives across generations.

2.3 Rituals and Celebrations Associated with the Deer Moon

The Deer Moon is often celebrated through rituals honoring nature and wildlife. In many cultures, lighted deer statues are placed at homes, symbolizing prosperity and spiritual connection. The Buck Moon, a supermoon in 2023, amplifies these traditions, marking a time for reflection and gratitude. Rituals may include moon gazing, storytelling, and ceremonies to honor the deer’s role in ecosystems. These practices deepen the cultural and spiritual bond with the Deer Moon’s significance.

The Deer Moon and Its Connection to Wildlife

The Deer Moon significantly influences wildlife, particularly deer behavior, with increased activity during full moons. The Buck Moon, a 2023 supermoon, highlights this connection, impacting deer movement patterns and rutting cycles, making it a crucial period for observing and understanding wildlife dynamics.

3.1 How the Deer Moon Affects Deer Behavior

The Deer Moon, particularly the 2023 Buck Moon, a supermoon, significantly impacts deer behavior. Deer exhibit increased activity during full moons, with heightened movement during overhead and underfoot moon positions. This lunar influence alters feeding patterns, mating behaviors, and overall activity cycles, making it a critical factor in understanding deer movement and rutting season dynamics for hunters and wildlife enthusiasts alike.

3.2 The Role of the Moon in Deer Mating and Rutting Season

The Buck Moon, a 2023 supermoon, plays a crucial role in deer mating and rutting season. Lunar cycles influence the timing and intensity of rutting behavior, with increased activity often observed during full moons. This synchronization helps hunters predict and plan effectively, leveraging the Moon’s impact on deer activity for successful hunting strategies.

3.3 Observing Deer During the Full Moon

During the full moon, deer exhibit heightened activity, often moving more freely at night. This phase is ideal for observing feeding patterns and mating behaviors. Hunters can capitalize on these predictable movements, while nature enthusiasts can gain insights into deer behavior. The Buck Moon, a 2023 supermoon, further amplifies this activity, making it a prime time for observation and understanding deer habits in their natural habitat.

The Science Behind the Deer Moon

The Deer Moon, or Buck Moon, is a supermoon in 2023, appearing 5% larger and 13% brighter. Its brightness and size significantly influence deer activity patterns, particularly during mating and feeding cycles, making it a critical lunar event for wildlife observation and hunting strategies.

4.1 Lunar Cycles and Their Impact on Nature

Lunar cycles significantly influence nature, with the full moon often triggering behavioral changes in wildlife. The Buck Moon, a supermoon in 2023, appears 5% larger and 13% brighter, intensifying its impact. This heightened lunar activity affects deer movement, feeding patterns, and mating behaviors. Additionally, the moon’s gravitational pull alters marine tides and influences plant growth, creating a ripple effect across ecosystems. Understanding these connections is vital for hunters and nature enthusiasts alike.

4.2 The Buck Moon: A Supermoon in 2023

The Buck Moon, occurring in July 2023, is one of four supermoons, appearing 5% larger and 13% brighter than the average full moon. Named for the growth of antlers on male deer, it marks a significant event in nature. This supermoon is culturally meaningful, often linked to wildlife behaviors and celestial phenomena. Its brightness and size make it a notable event for stargazers and hunters alike in 2023.

4.3 Moon Phases and Deer Activity Patterns

Moon phases significantly influence deer activity, with peaks often observed during the full and new moons. Deer tend to move more at dawn and dusk, aligning with lunar cycles. The full moon encourages nocturnal foraging, while the new moon shifts activity to daylight. Hunters can use moon phase calculators to identify optimal times, such as the last-quarter phase, which is known for heightened deer movement, enhancing hunting success in 2023.

Hunting and the Deer Moon

The Deer Moon significantly influences hunting strategies, with lunar cycles affecting deer activity and movement patterns. Hunters leverage moon phases to predict peak activity, optimizing their success in 2023.

5.1 Best Hunting Times During the Deer Moon

The Deer Moon’s peak activity often occurs during early morning and late evening hours. Hunters should focus on periods around sunrise and sunset, as deer movement increases during these times. Additionally, the overhead and underfoot moon positions are ideal, as they trigger heightened activity. Planning hunts during these phases can significantly boost success rates, making the Deer Moon a prime period for effective hunting strategies in 2023.

5.2 How to Use Moon Phases for Effective Deer Hunting

Understanding moon phases is key to successful deer hunting. During the new moon, deer are most active at night, so hunt late evening or early morning. Full moon phases often suppress daytime movement but increase nighttime activity, making dusk and dawn ideal. Quarter moons create consistent activity during morning and evening, offering reliable hunting opportunities. Use lunar calendars to plan hunts and maximize your success during the Deer Moon period in 2023.

5.3 MoonGuide Dial: A Hunter’s Tool for Success

The MoonGuide Dial is a specialized tool designed to help hunters align lunar phases with deer activity patterns. It predicts optimal hunting times based on moon position and phase, ensuring hunters are in the right place at the right time. This innovative device is tailored for deer hunters, offering precise forecasts to maximize success during the rut and other key periods. Currently unavailable, it remains a sought-after resource for lunar-based hunting strategies in 2023.

The 2023 Rutting Season and the Deer Moon

The 2023 rutting season is closely tied to the Deer Moon, with lunar cycles influencing deer behavior. The Buck Moon, a supermoon, plays a key role in predicting peak activity, helping hunters plan effectively for this critical period.

6.1 Predicting the Rut Based on Lunar Cycles

The 2023 rutting season can be predicted by studying lunar cycles, particularly the Buck Moon, a supermoon influencing deer behavior. Hunters use the MoonGuide Dial to align moon phases with peak rut activity, optimizing their strategies. While not foolproof, lunar patterns provide valuable insights, helping hunters anticipate and prepare for key moments during the rut;

6.2 Peak Rutting Activity and the Full Moon

The full moon, particularly the Buck Moon in 2023, aligns with peak rutting activity. As a supermoon, it appears larger and brighter, potentially increasing deer movement. This alignment offers hunters a strategic advantage, allowing them to plan effectively during key periods. Deer tend to be more active at night under the full moon, which can be crucial for hunting strategies. Understanding this lunar influence enhances hunting success by aligning with natural deer behavior patterns.

6.3 Strategies for Hunting During the Rut

During the rut, hunters should focus on areas with high deer activity, such as feeding grounds and mating hotspots. Utilize calls and scents to attract bucks, and hunt during peak movement times, often at dawn and dusk. The full moon’s brightness can make deer more cautious, so stealth is crucial. Plan stands near trails and bedding areas, leveraging the lunar cycle’s influence on deer behavior for optimal success during this prime hunting period.

Regional Variations in Deer Behavior

Regional variations in deer behavior are shaped by geography, climate, and food availability, with cultural practices and hunting regulations also influencing patterns across different areas.

7.1 How Geography Influences Deer Movement

Geography significantly influences deer movement, as terrain, vegetation, and water sources shape their habitats. In dense forests, deer move quietly, while open plains encourage longer traversals. Mountainous regions force deer to migrate vertically, seeking food and shelter. Wetlands and swamps create unique pathways, affecting feeding and breeding patterns. Understanding these geographical impacts helps predict deer behavior, essential for hunters and wildlife enthusiasts alike.

7.2 Cultural Significance of the Deer Moon in Different Regions

The Deer Moon holds diverse cultural meanings across regions. In Native American traditions, it marks the rutting season, symbolizing abundance and survival. European folklore often associates it with hunting rituals, while Asian cultures link it to harvest celebrations. Each region’s unique customs and stories highlight the moon’s role in connecting humanity with nature and the cycles of life, reflecting deep-rooted ties to the environment.

7.3 Local Hunting Practices and the Deer Moon

Local hunting practices vary widely, but many traditions align with the Deer Moon’s phases. Hunters use tools like the MoonGuide Dial to track optimal hunting times, often targeting peak activity during the overhead and underfoot moon positions. Regional customs also incorporate lunar timing for rut predictions, with the last-quarter moon phase frequently highlighted as prime for deer activity, reflecting a blend of tradition and scientific observation.

Tools and Resources for Tracking the Deer Moon

Explore essential tools like moon phase calculators, lunar calendars, and advanced technology to effectively track and plan around the Deer Moon’s cycles.

8.1 Moon Phase Calculators and Apps

Moon phase calculators and apps are invaluable tools for tracking the Deer Moon. They provide precise phase tracking, enabling hunters to plan effectively. Apps like Moon Tracker Pro offer real-time updates, while websites provide detailed phase charts. The Moon Phase Calculator for Deer, Arkansas is tailored for specific locations, ensuring accuracy. These tools also offer push notifications for key phases, helping hunters stay informed. Additionally, they often include historical data and predictive analytics, making them essential for understanding lunar cycles and optimizing hunting strategies. Many apps now integrate with lunar calendars, providing a comprehensive view of the Deer Moon’s impact on wildlife behavior, ensuring hunters never miss optimal hunting windows.

8.2 Lunar Calendars for Deer Hunters

Lunar calendars are tailored tools for deer hunters, offering detailed phase tracking and hunting insights. They highlight prime hunting windows, such as the full moon and quarter phases. Many calendars include regional data, ensuring accuracy for specific locations. By aligning with deer activity patterns, these calendars help hunters plan scouting and hunting trips months in advance. They complement moon phase calculators, providing a visual and organized approach to understanding lunar influences on deer behavior, enhancing overall hunting success and strategy development.

8.3 Advanced Technology for Moon-Based Hunting

Advanced technology enhances moon-based hunting strategies through innovative tools; Apps and software provide detailed moon phase tracking, sunrise/sunset times, and lunar positioning. The Deer Hunters MoonGuide Dial predicts deer activity based on lunar cycles. Mapping tools create detailed hunting location layouts, including stand placements and trail routes. These technologies empower hunters to plan effectively, leveraging lunar data for optimal success. They complement traditional methods, offering precise insights for modern hunters seeking to maximize their efforts in the field.

Thank you for exploring the Deer Moon Guide 2023! By understanding lunar cycles, cultural significance, and hunting strategies, you can enhance your outdoor experiences. Plan meticulously, stay observant, and embrace the harmony between nature and tradition for a successful and fulfilling journey. Happy hunting and moon gazing!

9.1 Summary of Key Points

The Deer Moon Guide 2023 offers a comprehensive look at the cultural, scientific, and practical aspects of the Deer Moon. It highlights the Buck Moon as a 2023 supermoon, explores lunar influences on deer behavior, and provides hunting strategies. The guide emphasizes tradition, modern tools, and lunar tracking for success. By blending folklore, science, and practical tips, it equips hunters and enthusiasts to appreciate the Deer Moon’s significance and optimize their experiences.

9.2 Best Practices for Leveraging the Deer Moon

  • Use moon phase calendars to track deer activity and plan hunts accordingly.
  • Focus on the Buck Moon in July, when deer behavior is most predictable.
  • Monitor deer movement during peak lunar phases for optimal hunting success.
  • Combine lunar insights with local knowledge for a strategic advantage.
  • Utilize tools like the MoonGuide Dial for precise timing and location planning.

9.3 Additional Resources for Further Learning

For further exploration, consult the Farmers’ Almanac for detailed moon names and meanings. Explore lunar calendars and apps like Moon Phase Calculator for precise tracking. Refer to publications such as “The Deer Moon Guide” by Gazelle Book Services for cultural insights. Additionally, online courses and hunting forums offer practical tips for aligning hunting strategies with lunar cycles, enhancing your understanding of deer behavior and lunar influence.

tv guide conway arkansas

Your comprehensive guide to TV listings in Conway‚ Arkansas‚ offering detailed schedules for local channels‚ cable‚ satellite‚ and antenna options. Discover popular shows and specialty networks.

1.1 Overview of TV Listings in Conway‚ AR

Conway‚ Arkansas‚ offers a diverse range of TV listings‚ catering to various viewer preferences. Residents can enjoy major broadcast networks like CBS‚ NBC‚ ABC‚ FOX‚ and CW‚ along with specialty channels such as AETN Plus‚ Charge TV‚ Bounce‚ and TBD TV. Whether you prefer local news‚ entertainment shows‚ or sports events‚ Conway’s TV listings provide something for everyone. Viewers can access these channels through cable providers‚ satellite services‚ or by using an antenna for free local programming. Online resources and TV guide websites make it easy to plan your viewing schedule and discover new shows.

1.2 Importance of Local TV Guides for Viewers

Local TV guides are essential for viewers in Conway‚ Arkansas‚ as they provide up-to-date listings of shows‚ movies‚ and events. These guides help viewers plan their schedule and discover new programs tailored to their interests. Whether you’re interested in local news‚ sports‚ or entertainment‚ TV guides ensure you never miss your favorite shows. They also highlight community events and special broadcasts‚ fostering a connection to local culture and activities.

Popular TV Channels in Conway‚ Arkansas

Conway‚ Arkansas‚ offers a variety of popular TV channels‚ including major networks like CBS‚ NBC‚ ABC‚ FOX‚ and CW‚ as well as specialty channels such as AETN Plus‚ Charge TV‚ and Bounce TV.

2.1 Major Broadcast Networks (CBS‚ NBC‚ ABC‚ FOX‚ CW)

Conway‚ Arkansas‚ receives a diverse range of programming from major broadcast networks. CBS‚ NBC‚ ABC‚ FOX‚ and CW provide top-rated shows‚ live sports‚ and breaking news. These networks are available via antenna‚ offering high-definition content without subscription fees. Residents can enjoy popular series‚ local news‚ and live events‚ ensuring a mix of entertainment and information tailored to the community’s interests. These channels are integral to the local TV experience‚ delivering quality programming to viewers in Conway.

2.2 Specialty Channels (AETN Plus‚ Charge TV‚ Bounce‚ TBD TV)

Specialty channels in Conway‚ Arkansas‚ offer diverse entertainment options. AETN Plus focuses on educational and local programming‚ while Charge TV delivers action-packed movies and series. Bounce provides classic TV shows and original content targeting African American audiences. TBD TV features a mix of lifestyle‚ entertainment‚ and curated digital content. These channels cater to niche interests‚ enhancing the viewing experience for residents who appreciate specialized programming alongside traditional broadcasts;

Cable‚ Satellite‚ and Antenna TV Options

Explore cable‚ satellite‚ and antenna TV options in Conway‚ Arkansas‚ offering diverse channel lineups‚ reliable reception‚ and cost-effective solutions for viewers seeking local and premium content.

3.1 Cable TV Providers in Conway‚ AR

Cable TV providers in Conway‚ AR‚ offer robust channel lineups and reliable services. AT&T U-verse and Conway Corporation provide high-definition programming‚ including local channels‚ specialty networks‚ and premium options. These providers ensure diverse entertainment choices‚ sports‚ and news‚ catering to various viewer preferences. With competitive pricing and bundled services‚ they remain popular choices for residents seeking comprehensive TV experiences. Their packages often include DVR capabilities and on-demand content‚ enhancing viewer convenience.

3.2 Satellite TV Services Available in the Area

Satellite TV services in Conway‚ AR‚ offer a wide range of channels and flexible packages. Providers like AT&T U-verse and OzarksGo deliver high-definition programming‚ including local networks‚ sports‚ and entertainment. Satellite TV is ideal for areas with limited cable infrastructure‚ providing reliable access to premium content. However‚ weather conditions can occasionally affect reception. With options for DVR and on-demand features‚ satellite TV remains a popular choice for residents seeking diverse viewing options and robust channel lineups.

3.3 Benefits of Using an Antenna for Free Local Channels

Using an antenna in Conway‚ AR‚ offers free access to high-definition local channels‚ eliminating monthly subscription costs. With a digital tuner‚ viewers can enjoy over 47 channels‚ including CBS‚ NBC‚ ABC‚ FOX‚ and CW. This cost-effective option provides crystal-clear reception and is ideal for those seeking basic entertainment and news without additional expenses. It’s a practical choice for maximizing local content while saving on TV service fees.

TV Schedule and Listings for Conway‚ AR

Explore daily and weekly TV schedules for Conway‚ AR‚ with detailed listings of popular shows‚ local channels‚ and online resources for customized viewing guides.

4.1 Daily TV Listings for Local Channels

Conway‚ AR offers a diverse range of daily TV listings‚ with 12 local stations broadcasting 47 digital channels; Viewers can enjoy major networks like CBS‚ NBC‚ ABC‚ FOX‚ and CW‚ alongside specialty channels such as AETN Plus‚ Charge TV‚ Bounce‚ and TBD TV. These channels provide a mix of news‚ sports‚ entertainment‚ and educational programming. With the use of an antenna‚ residents can access high-definition content for free. Check online resources or TV guide websites for detailed daily schedules and plan your viewing experience accordingly.

4.2 Weekly Highlights and Popular Shows

Conway‚ AR TV viewers enjoy a variety of weekly highlights‚ including prime-time shows‚ sports‚ and local programming. Popular networks like CBS‚ NBC‚ and ABC feature hit series and live events. Specialty channels such as AETN Plus and Cozi TV offer unique entertainment. Check local listings for weekly schedules‚ ensuring you catch your favorite programs. Online tools and apps provide customizable guides‚ making it easy to track and plan your viewing experience for the week ahead in Conway.

How to Choose the Best TV Service Provider

Assess your viewing needs‚ compare providers‚ and check reviews to find the best fit for your budget and preferences in Conway‚ Arkansas.

5.1 Comparing Cable‚ Satellite‚ and Streaming Options

Choose between cable‚ satellite‚ or streaming services based on your needs. Cable providers like Conway Corp offer reliable local coverage‚ while satellite options such as AT&T U-verse provide wider reach. Streaming platforms like Hulu and YouTube TV offer flexibility and cost savings. Consider factors like channel variety‚ pricing‚ and internet requirements. Antenna TV is another option for free local channels without monthly fees. Compare features to find the best fit for your viewing habits and budget in Conway‚ Arkansas.

5.2 Tips for Selecting the Right TV Package

When choosing a TV package‚ consider the number of channels‚ pricing‚ and additional features. Check if the package includes your favorite networks and specialty channels. Compare costs and look for promotions or discounts. Ensure the service is reliable and offers good customer support. Consider internet bundle deals for better value. Read reviews and ask locals for recommendations to find the best fit for your viewing preferences and budget in Conway‚ Arkansas.

Technical Setup and Troubleshooting

Ensure proper antenna installation for optimal reception. Check audio settings to avoid sound issues. Troubleshoot common problems like poor signal or no picture promptly for uninterrupted viewing.

6.1 Setting Up Your TV for Optimal Reception

Position your antenna strategically for maximum signal strength. Use a digital tuner to access free HD channels. Ensure your TV is set to “over-the-air” mode. Adjust antenna angles to minimize interference. For cable or satellite‚ connect securely and tune to the correct input. Check local channel lineups online. Finally‚ ensure audio settings are configured correctly to avoid sound issues.

6.2 Common Issues and Solutions for TV Audio/Video

Ensure audio is set to output through TV speakers in menu settings. Check for loose connections in cables. If using an antenna‚ adjust its position for better reception. Restart your TV or device to resolve glitches. Verify the correct input is selected for external devices. For streaming issues‚ check internet connectivity. Ensure audio/video settings match your equipment capabilities. Consult your TV’s user manual for specific troubleshooting steps.

Additional Resources for TV Viewers

Explore online tools for customizing TV listings and discover local TV guide websites and apps for Conway‚ Arkansas. Enhance your viewing experience with real-time updates and user-friendly interfaces.

7.1 Online Tools for Customizing TV Listings

Utilize online tools to personalize your TV viewing experience in Conway‚ Arkansas. Websites like TVGuide.com offer customizable listings‚ allowing users to filter by favorite channels‚ genres‚ or shows. Sign in to save preferences and receive notifications for upcoming episodes. Mobile apps provide real-time updates‚ ensuring you never miss your favorite programs. Tools also enable users to create watchlists and track schedules for cable‚ satellite‚ or antenna channels‚ making it easy to plan your entertainment seamlessly.

7.2 Local TV Guide Websites and Apps

Explore local TV guide websites and apps tailored for Conway‚ Arkansas viewers. Websites like Conway Corporation Channel 22 and Arkansas PBS provide detailed schedules and program highlights. Download apps such as TV Guide or local network apps for real-time updates and personalized listings. These tools allow users to filter by channel‚ genre‚ or time‚ ensuring easy access to favorite shows. Stay connected to local programming and never miss an episode with these user-friendly resources;

Conway‚ Arkansas offers a diverse range of TV viewing options‚ from local channels to cable and satellite services. Utilize online guides and apps for easy access to schedules and shows.

8.1 Summary of TV Viewing Options in Conway‚ AR

Conway‚ Arkansas offers a variety of TV viewing options‚ including major broadcast networks like CBS‚ NBC‚ ABC‚ FOX‚ and CW‚ along with specialty channels such as AETN Plus‚ Charge TV‚ Bounce‚ and TBD TV. Viewers can access these channels through cable providers like Conway Corp and AT&T U-verse‚ satellite services like DIRECTV‚ or by using an antenna to receive free over-the-air signals. Additionally‚ online tools and apps provide customizable TV listings‚ making it easy to stay informed about local schedules and popular shows.

8.2 Final Tips for Maximizing Your TV Experience

To enhance your TV experience in Conway‚ Arkansas‚ explore all viewing options‚ including cable‚ satellite‚ and antenna setups. Use online tools to customize TV listings and ensure optimal reception by properly setting up your antenna or digital tuner. Regularly check for updates on channel lineups and new shows. By comparing providers and staying informed‚ you can maximize your entertainment options and enjoy a seamless viewing experience tailored to your preferences.

bore guide for 6.5 creedmoor

Understanding the Role of a Bore Guide in Rifle Maintenance

A bore guide is essential for protecting the chamber and bore of your 6.5 Creedmoor rifle during cleaning; It ensures proper alignment and prevents damage to the barrel.

Constructed from durable materials like anodized aluminum, the 6.5 Creedmoor bore guide offers precision alignment for cleaning rods, ensuring effective maintenance without compromising accuracy or safety.

Regular use of a high-quality bore guide extends the rifle’s lifespan and maintains its performance, making it a crucial tool for enthusiasts and professionals alike.

Understanding the Importance of a Bore Guide

A bore guide is a critical tool for maintaining the accuracy and longevity of your 6.5 Creedmoor rifle. It protects the chamber and bore from potential damage during cleaning, ensuring the barrel remains in pristine condition. By guiding the cleaning rod through the barrel, it prevents scratches and misalignment, which can affect performance. A high-quality bore guide also reduces wear on the chamber, preserving the rifle’s accuracy and reliability. Regular use of a bore guide is essential for any shooter seeking consistent results and long-term firearm health.

Additionally, a bore guide ensures proper alignment of cleaning tools, minimizing the risk of damage to the rifle’s internal components. This makes it an indispensable accessory for both professional shooters and enthusiasts, helping maintain the rifle’s optimal performance over time.

Overview of the 6.5 Creedmoor Rifle and Its Maintenance Needs

The 6.5 Creedmoor rifle is a popular choice for target shooting and hunting due to its accuracy, versatility, and manageable recoil. Its efficient design ensures a flat trajectory and consistent performance, making it ideal for long-range applications. However, like any firearm, it requires regular maintenance to maintain its precision and reliability.

Regular cleaning is essential to remove residue and prevent barrel wear. Using a bore guide ensures proper alignment of cleaning tools, protecting the chamber and bore from damage. Proper maintenance extends the rifle’s lifespan and ensures optimal performance in various shooting conditions.

Key Features of a High-Quality 6.5 Creedmoor Bore Guide

A high-quality bore guide for the 6.5 Creedmoor features durable materials like aircraft-grade aluminum, ensuring longevity and resistance to harsh cleaning chemicals.

It includes precision alignment features, a removable handle, and a chamber-specific design, ensuring compatibility and ease of use while protecting the rifle’s chamber and bore.

Material Construction and Durability

The 6.5 Creedmoor bore guide is typically constructed from high-strength, lightweight materials such as 7075 anodized aluminum, known for its durability and resistance to corrosion.

The anodized finish provides an additional layer of protection against wear and harsh cleaning chemicals, ensuring the guide withstands repeated use over time.

Designed to endure the rigors of frequent cleaning, the guide’s robust material ensures long-term reliability while maintaining precise alignment and protection for the rifle’s chamber and bore.

Design and Compatibility with the 6.5 Creedmoor Chamber

The 6.5 Creedmoor bore guide is specifically engineered to fit the chamber dimensions of the 6.5 Creedmoor rifle, ensuring precise alignment and compatibility.

Its design features a snug fit within the chamber, preventing any damage or wear during the cleaning process. This tailored design ensures optimal performance and protects the rifle’s critical components.

By maintaining proper alignment, the bore guide enhances the cleaning process, ensuring the chamber and bore remain pristine for consistent accuracy and reliability.

Ease of Use and Precision Alignment

The 6.5 Creedmoor bore guide is designed for simplicity and accuracy, ensuring a seamless cleaning experience. Its precision alignment ensures the cleaning rod stays centered, preventing damage to the barrel or chamber. The ergonomic design allows for easy installation and removal, making maintenance more efficient. This feature ensures consistent performance and longevity of the rifle, while also reducing the risk of misalignment during cleaning. The result is a tool that enhances both convenience and reliability for shooters of all levels.

Installation and Setup of the Bore Guide

The 6.5 Creedmoor bore guide installs securely into the chamber, aligning precisely with the bolt raceways. Its durable construction ensures a snug fit, protecting the rifle during cleaning.

Step-by-Step Instructions for Proper Installation

Ensure the rifle is unloaded and the bolt is removed for safe access to the chamber.

Align the bore guide with the chamber, ensuring it fits securely without force.

Gently insert the guide into the chamber, verifying proper alignment with the bolt raceways.

Once seated, the bore guide will protect the chamber and barrel during cleaning.

Double-check the fit to ensure stability and proper function of the cleaning rod.

Proceed with cleaning, knowing the guide safeguards your rifle’s critical components.

Ensuring Alignment with the Rifle’s Chamber

Proper alignment is critical for the bore guide to function effectively. Start by visually inspecting the chamber for obstructions or debris. Align the guide with the chamber entrance, ensuring it seats evenly without force. Gently rock the guide to confirm it fits securely. Misalignment can damage the chamber or bore, so double-check the fit. If unsure, consult a professional to ensure correct installation and alignment, guaranteeing the longevity and performance of your 6.5 Creedmoor rifle.

Maintenance and Care for the Bore Guide

Clean the bore guide with a soft cloth and mild solvent. Store it in a dry place to prevent rust. Regularly inspect for wear and damage to ensure optimal performance and longevity of your 6.5 Creedmoor rifle.

Cleaning and Storage Tips

Clean your 6.5 Creedmoor bore guide thoroughly after each use to remove dirt and residue. Use a soft, lint-free cloth and mild solvent to wipe down the guide, ensuring no abrasive materials scratch the surface. Avoid harsh chemicals that could damage the finish. Store the bore guide in a dry, cool place, away from direct sunlight. Consider using a protective case or pouch to prevent dust accumulation. Regularly inspect the guide for signs of wear or corrosion to maintain its effectiveness and longevity.

Inspecting for Wear and Tear

Regularly inspect your 6.5 Creedmoor bore guide for signs of wear and tear. Check for scratches, corrosion, or misalignment issues that could affect performance. Ensure the guide fits securely in the chamber and aligns properly with the cleaning rod. Look for any damage to the anodized finish, as it protects the aluminum from corrosion. If excessive wear is noticed, replace the guide to maintain optimal cleaning efficiency and prevent potential damage to your rifle’s barrel. Proper inspection ensures longevity and reliability.

Choosing the Right Bore Guide for Your 6.5 Creedmoor

Selecting the right bore guide ensures optimal performance and protection for your rifle. Look for durability, precise fit, and ease of use to maintain accuracy and prevent damage.

Factors to Consider in Your Decision

When selecting a bore guide for your 6.5 Creedmoor, consider material durability, compatibility with your rifle’s chamber, and ease of use. Ensure the guide aligns precisely with the cleaning rod to avoid damage. Look for models made from high-quality, corrosion-resistant materials like anodized aluminum. Compatibility with your specific rifle model is crucial for proper fit and function. Additionally, read reviews and consider recommendations from experienced shooters to ensure you invest in a reliable and long-lasting bore guide for optimal maintenance and performance.

Top-Rated Bore Guides for the 6.5 Creedmoor

Several bore guides stand out for their quality and performance with the 6.5 Creedmoor. The RVB Precision Bore Guide is highly regarded for its durability and compatibility, crafted from 7075 anodized aluminum. Area 419 and Manson Precision also offer excellent options, known for their precision fit and ease of use. These models are designed to protect the chamber and ensure accurate cleaning rod alignment. They are favored by shooters for their reliability and ability to maintain the rifle’s accuracy and longevity.

Using the Bore Guide with Cleaning Rods and Supplies

The bore guide ensures proper alignment with cleaning rods, preventing damage to the chamber and barrel. It facilitates effective cleaning and maintenance of the 6.5 Creedmoor rifle.

Recommended Cleaning Rods for Optimal Performance

For the 6.5 Creedmoor, a rigid, one-piece cleaning rod made from high-strength materials like stainless steel or carbon fiber is ideal. These rods ensure straight alignment and minimize the risk of bending. A 32-inch rod is typically recommended for the Creedmoor’s 24-inch barrel, providing sufficient length to clean the entire bore effectively. Ergonomic handles with secure grips are preferred for better control during the cleaning process. Using a rod designed for precision ensures compatibility with the bore guide and protects the chamber from damage.

Best Practices for Cleaning with a Bore Guide

When using a bore guide for your 6.5 Creedmoor, ensure it is properly seated in the chamber to maintain alignment. Use a high-quality cleaning rod, preferably one-piece and rigid, to prevent bending and ensure straight passage through the barrel. Start cleaning from the chamber end to avoid pushing debris further into the bore. Avoid using excessive force, as it can damage the guide or the rifle. Always use cleaning patches and solvents specifically designed for firearms to maintain optimal performance and longevity.

Never insert the cleaning rod without the bore guide in place, as this can scratch or wear down the chamber. For stubborn fouling, use a cleaning brush with caution, ensuring it aligns with the bore guide. Regularly inspect the guide for wear and clean it to prevent transferring debris back into the barrel. Proper technique ensures a clean, well-maintained rifle and extends its service life. Consistency and care are key to preserving accuracy and reliability.

Troubleshooting Common Issues with the Bore Guide

Resolving Alignment Problems

If the bore guide misaligns, ensure it is seated properly in the chamber. Check for obstructions and gently adjust the guide to maintain precise alignment with the barrel.

Misalignment issues with the bore guide can hinder cleaning efficiency. Ensure the guide is seated correctly in the chamber. Check for obstructions and adjust the guide gently to maintain precise alignment with the barrel. If problems persist, inspect the guide for wear or damage. Proper alignment ensures the cleaning rod moves smoothly, protecting the barrel and chamber. Regular inspection and maintenance can prevent such issues, ensuring optimal performance of your 6.5 Creedmoor rifle. Always refer to the manufacturer’s instructions for specific guidance.

Addressing Fit and Compatibility Concerns

Ensuring the bore guide fits properly is crucial for effective maintenance. Measure your rifle’s chamber to confirm compatibility with the guide. If it doesn’t fit snugly, consult the manufacturer or try a different model. A loose fit can cause misalignment, while a tight fit may restrict cleaning rod movement. Proper fit ensures the guide functions as intended, protecting your 6.5 Creedmoor’s barrel and chamber. Always verify specifications to avoid compatibility issues and maintain optimal performance during cleaning sessions.

A high-quality 6.5 Creedmoor bore guide ensures durability, precision, and protection for your rifle. Investing in proper maintenance tools is crucial for longevity and performance.

Final Thoughts on the Importance of a Bore Guide

A bore guide is indispensable for maintaining the 6.5 Creedmoor rifle’s accuracy and longevity. By guiding cleaning rods precisely, it prevents barrel damage and ensures a clean chamber. Regular use extends the rifle’s lifespan and maintains performance, making it a vital tool for both enthusiasts and professionals. Investing in a high-quality bore guide is a proactive step toward preserving your rifle’s reliability and ensuring optimal shooting experiences. Proper maintenance is key to sustaining its functionality and precision over time.

Encouragement to Invest in Quality Maintenance Tools

Investing in a high-quality bore guide is a wise decision for any 6.5 Creedmoor rifle owner. Durable materials, precise alignment, and ease of use ensure your rifle’s accuracy and longevity. A good bore guide protects the chamber and bore from damage, making cleaning efficient and safe. While it may seem like an extra expense, it pays off in the long run by maintaining your rifle’s performance and reducing wear. Quality tools are an investment in your shooting experience and the lifespan of your firearm.

cataclysm fire mage guide

The Fire Mage is a formidable force in World of Warcraft: Cataclysm‚ excelling in both PvP and PvE environments with high damage output and mobility.

Specializing in dealing massive fire-based damage‚ the Fire Mage offers a unique playstyle that combines burst damage with consistent DPS‚ making it a popular choice for players.

With its high learning curve‚ mastering the Fire Mage requires understanding complex rotations and cooldown management‚ but the rewards are well worth the effort for skilled players.

This guide provides a comprehensive overview of the Fire Mage in Cataclysm‚ covering everything you need to know to excel in both single-target and AoE scenarios.

1.1 Overview of Fire Mage Specialization

The Fire Mage specialization focuses on mastering fire-based spells to deliver high burst damage and consistent DPS. With abilities like FireballPyroblast‚ and Combustion‚ Fire Mages excel at both single-target and AoE damage.

This spec emphasizes mana efficiency and mobility‚ making it versatile for various playstyles. The rotation revolves around maintaining Ignite and optimizing cooldowns for maximum impact.

Fire Mages are known for their high damage output and dynamic playstyle‚ requiring careful management of procs and resources to maximize effectiveness in both PvP and PvE scenarios.

1.2 Why Play a Fire Mage?

Playing a Fire Mage offers an exciting and dynamic playstyle with high burst damage potential. The specialization delivers consistent DPS and excels in both single-target and AoE scenarios.

With abilities like Combustion and Ignite‚ Fire Mages provide a thrilling experience‚ making them a versatile and powerful choice for players seeking a challenging yet rewarding class to master in Cataclysm.

Race and Class Selection

Choosing the right race for your Fire Mage enhances gameplay. Alliance races like Gnomes (mana regeneration) and Humans (spell crit) excel‚ while Horde races like Trolls (critical strike) and Blood Elves ( spell steal) complement the Fire Mage’s abilities.

2.1 Best Races for Fire Mage

For Alliance‚ Gnomes are optimal due to their mana regeneration from Explosive Pack‚ while Humans gain increased spell critical strike chance. On Horde‚ Trolls benefit from Berserking‚ boosting critical strike‚ and Blood Elves utilize Arcane Affinity and Magic Resistance. These racial traits enhance the Fire Mage’s damage output and survivability‚ making them the top choices for both PvP and PvE scenarios.

2.2 Alliance vs. Horde Race Benefits

Alliance races like Gnomes and Humans offer unique benefits: Gnomes provide mana regeneration via Explosive Pack‚ while Humans gain increased spell critical strike chance. Horde races‚ such as Trolls and Blood Elves‚ excel with Berserking and Arcane Affinity‚ respectively. These traits enhance damage output and survivability‚ making both factions viable for Fire Mages‚ though Horde slightly edges in PvP scenarios due to Trolls’ Berserking cooldown.

Talents and Glyphs

Talents and glyphs are crucial for optimizing a Fire Mage’s damage output. Key talents like Combustion and Living Bomb enhance burst damage‚ while glyphs like Glyph of Fireball and Glyph of Pyroblast boost spell effectiveness‚ ensuring maximum DPS in both single-target and AoE scenarios.

3.1 Fire Mage Talent Build

The Fire Mage talent build focuses on maximizing burst damage and DPS. Key talents include Combustion‚ Living Bomb‚ and Ignite‚ which synergize to deliver devastating damage. Combustion is core for burst‚ while Living Bomb provides consistent AoE damage. Ignite amplifies damage from critical strikes‚ making it essential for high DPS. This build excels in both single-target and AoE scenarios‚ ensuring optimal performance in raids and PvP.

3.2 Best Glyphs for Fire Mage DPS

The best glyphs for Fire Mage DPS include Glyph of Fireball‚ which increases Fireball damage by 5%‚ and Glyph of Pyroblast‚ enhancing Pyroblast’s critical strike chance. Glyph of Living Bomb is also essential‚ as it increases the damage of Living Bomb by 10%. These glyphs maximize your damage output‚ ensuring optimal performance in both single-target and AoE scenarios for Fire Mages in Cataclysm.

Stat Priorities and Gear

Stat prioritization for Fire Mages in Cataclysm focuses on Intellect‚ Hit‚ and Haste‚ with Critical Strike as secondary. Gear with these stats maximizes damage output and spell efficiency.

4.1 Stat Prioritization for Fire Mage

Intellect is the primary stat for Fire Mages‚ boosting spell power and mana. Hit rating is crucial to ensure spells land‚ while Haste increases casting speed. Critical Strike enhances burst damage‚ and Mastery improves fiery effects. Reforge and gem for these stats to maximize damage output and maintain mana efficiency in both PvE and PvP scenarios.

4.2 Best Professions for Fire Mage

Tailoring is ideal for Fire Mages‚ providing the Lightweave Embroidery‚ a unique cloak enchant that enhances spell power and mana. Enchanting is also beneficial‚ allowing you to enchant your gear‚ particularly your weapon‚ with the Enchant Weapon ⸺ Power spell for added fire damage. Other professions like Blacksmithing or Jewelcrafting offer socket bonuses‚ while Alchemy provides potion benefits‚ though less impactful than Tailoring or Enchanting.

Rotation and Spell Usage

A Fire Mage’s rotation revolves around maximizing damage through spell synergy. Begin with Pyroblast and Combustion for burst‚ then maintain Fireball and Inferno for single-target. Use Living Bomb and Flamestrike for AoE scenarios‚ ensuring consistent damage output and optimal cooldown management.

5.1 Single-Target Rotation

For single-target damage‚ the Fire Mage rotation focuses on maximizing burst and sustained damage. Start with Pyroblast and Combustion for an initial burst. Follow up with Fireball and Inferno to maintain consistent damage. Use Living Bomb to apply a DoT and trigger Ignite; Manage cooldowns like Molten Armor and Mirror Image to enhance survivability and damage output during prolonged fights.

5.2 AoE Rotation

For AoE damage‚ Fire Mages rely on Flamestrike and Arcane Explosion to deal damage to multiple targets. Use Flamestrike on 2-3 enemies and Arcane Explosion for larger groups. Apply Living Bomb to spread DoTs and trigger Ignite. Manage cooldowns like Combustion and Molten Armor to maximize burst damage. While Fire Mages excel at single-target‚ their AoE potential is significant with proper rotation and cooldown management.

Survivability and Utility

Fire Mages rely on spells like Frost Nova and Blink for survival‚ while Counterspell and Remove Curse provide utility in both PvP and PvE. Managing cooldowns is crucial for staying alive.

Utility spells like Teleport and Portal enhance mobility‚ making Fire Mages versatile in group settings. These tools ensure survival and contribute to team success without sacrificing damage output.

6.1 Survivability Spells for Fire Mage

Fire Mages rely on spells like Frost Nova to root enemies and Blink to teleport away from danger. Ice Block provides temporary invulnerability‚ while Counterspell interrupts harmful spells. Fire Ward and Frost Ward absorb elemental damage‚ enhancing survivability in both PvP and PvE. These tools help manage threats without sacrificing damage output‚ making Fire Mages resilient in intense combat scenarios.

6.2 Utility Spells in PvP and PvE

Fire Mages possess a range of utility spells that enhance their versatility in both PvP and PvE. Frost Nova excels at controlling groups‚ while Blink provides superior mobility and positional advantages. In PvP‚ Counterspell interrupts critical enemy abilities‚ and Polymorph helps manage targets. In PvE‚ these spells aid in managing adds or avoiding hazardous mechanics. Such versatility makes Fire Mages invaluable in dynamic encounters.

PvP and PvE Strategies

Fire Mages excel in both PvP and PvE through strategic spell rotations and burst damage. In PvP‚ focus on controlling opponents with spells like Pyroblast and Combustion. In PvE‚ prioritize consistent DPS and cooldown management to maximize damage output while maintaining mobility and survivability in raid encounters.

7.1 Fire Mage in PvP

Fire Mages dominate PvP with burst damage and control. Use Pyroblast and Combustion for devastating bursts‚ while Polymorph and Counterspell disrupt opponents. Maintain mobility with Blink and Teleport to avoid attacks. Mastering cooldowns and survivability spells like Frost Nova and Ice Block is crucial for outlasting opponents. Fire Mages excel in both 1v1 and group battlegrounds with proper spell management and positioning.

7.2 Fire Mage in PvE Raids

Fire Mages excel in PvE raids with high single-target and AoE damage. Use Pyroblast and Flamestrike for burst damage‚ while Living Bomb and Ignite maintain consistent DPS. Manage cooldowns like Combustion for maximum impact. Fire Mages adapt well to both progression and farm content‚ making them a valuable asset to any raid team with proper spell rotation and cooldown management.

Addons and Tools

Essential addons like Deadly Boss Mods and Recount enhance raid performance. WeakAuras helps track abilities‚ while Power Auras provides visual cues for cooldowns and procs‚ optimizing gameplay efficiency.

8.1 Essential Addons for Fire Mage

Key addons for Fire Mages include Deadly Boss Mods for boss mechanics and Recount for DPS tracking. WeakAuras is crucial for tracking abilities like Combustion‚ while Power Auras provides visual cues for spell procs and cooldowns. Additionally‚ Tailoring-specific addons like Lightweave Embroidery Helper can enhance profession benefits‚ ensuring optimal performance in both PvE and PvP scenarios.

8.2 WeakAuras for Fire Mage Optimization

WeakAuras enhances Fire Mage performance by tracking critical abilities like Combustion‚ Living Bomb‚ and Pyroblast. Custom displays show spell cooldowns‚ DoT timers‚ and proc notifications‚ allowing for precise rotation execution. This tool is essential for maximizing damage output and managing complex mechanics effectively in both single-target and AoE scenarios‚ ensuring optimal Fire Mage playstyle and performance in Cataclysm.

Playstyle and Difficulty

The Fire Mage playstyle in Cataclysm is dynamic and challenging‚ requiring precise timing and situational awareness. Managing cooldowns and DoTs demands a high skill ceiling‚ making it rewarding for experienced players.

9.1 Learning the Fire Mage Playstyle

Mastering the Fire Mage playstyle begins with understanding core spells like Fireball‚ Pyroblast‚ and Combustion. Players must learn to manage cooldowns‚ prioritize abilities‚ and adapt to dynamic combat situations. Starting with single-target rotations‚ focus on maintaining Ignite and optimizing spell timing. As proficiency grows‚ incorporate AoE spells like Flamestrike and Living Bomb for multi-target scenarios. Practice is key to refining your technique and maximizing damage output consistently.

Pay attention to your mana and health‚ using defensive spells like Frost Nova or Ice Block when necessary. Experiment with different talent builds and glyphs to find what suits your playstyle best. Watching streams or guides can provide valuable insights and help you improve faster. Remember‚ patience and practice are essential to becoming a skilled Fire Mage in Cataclysm.

9.2 Common Mistakes to Avoid

Common mistakes include ignoring mana management‚ improper use of Combustion‚ and neglecting defensive spells like Ice Block. Many players also fail to maintain Ignite or mismanage Living Bomb on multiple targets. Overextending in PvP without healing support is another frequent error. Avoiding these mistakes ensures better survivability and higher DPS output in both PvE and PvP scenarios.

Gear and Enchants

Optimize your Fire Mage’s performance with tailored gear and enchants. Tailoring’s Lightweave Embroidery provides a unique cloak enchant‚ while meta gems like Chaotic Skyflare enhance mana regeneration and crit. Selecting the right gear progression ensures consistent damage output and survivability in both PvE and PvP scenarios.

10.1 Best Enchants for Fire Mage

For maximum effectiveness‚ enchants should enhance your primary stats. Tailoring’s Lightweave Embroidery is ideal for cloaks‚ providing a significant critical strike chance boost. Weapons should be enchanted with Berserking for increased haste‚ while boots benefit from Mastery to amplify your spell damage. Meta gems like Chaotic Skyflare or Reckless further enhance mana regeneration and critical strikes‚ ensuring optimal performance in raids and PvP.

10.2 Gear Progression in Cataclysm

Acquire entry-level gear from dungeons like Blackrock Caverns and The Stonecore‚ focusing on intellect and haste. Progress to heroic dungeon drops‚ then transition into tier 11 and 12 raid gear‚ such as the Earthsong and Firehawk sets‚ which provide powerful set bonuses. Reforge and gem your gear to prioritize intellect‚ haste‚ and critical strike‚ using red gems for intellect and orange gems for intellect/haste combinations to maximize your Fire Mage’s potential.

Advanced Techniques

Mastering Combustion and cooldown management is crucial for maximizing damage. Learn to align high-damage windows with optimal spell usage to enhance your Fire Mage’s effectiveness in raids and PvP.

11.1 Mastering Combustion

Combustion is a powerful cooldown that amplifies fire damage. Use it during high-damage windows to maximize effectiveness. Ensure Living Bomb and Ignite are active before triggering for optimal results. Proper timing and setup can significantly boost your DPS‚ making it a key ability in both single-target and AoE scenarios. Practice aligning Combustion with other cooldowns to enhance its impact.

11.2 Managing Cooldowns Effectively

Effectively managing cooldowns is crucial for maximizing DPS as a Fire Mage. Coordinate Combustion with Living Bomb and Ignite to amplify damage. Use trinkets and racials during high-damage windows for optimal impact. Avoid overlapping cooldowns to maintain consistent damage output. Properly timing Combustion and aligning it with other abilities ensures maximum efficiency‚ significantly enhancing your overall performance in both single-target and AoE scenarios.

Mastering the Fire Mage in Cataclysm is a rewarding journey. With proper rotation and cooldown management‚ you can unleash devastating damage. Keep practicing to become a formidable force in any raid or PvP scenario.

12.1 Final Tips for Success

To excel as a Fire Mage in Cataclysm‚ always optimize your rotation and cooldowns. Prioritize Combustion for maximum burst damage and use Living Bomb on multiple targets. Maintain mobility with Teleport and Blink‚ and never underestimate the power of survivability tools like Frost Nova and Ice Block. In PvP‚ focus on interrupting enemy casters with Counterspell and controlling crowds with Ring of Frost. Tailor your gear and enchants to your playstyle‚ and adapt to encounter mechanics for optimal performance. Finally‚ use addons like WeakAuras to track cooldowns and enhance your gameplay. Consistent practice and situational awareness will elevate your Fire Mage to new heights in both PvE and PvP.

12.2 Resources for Further Learning

For deeper insights‚ visit wowtbc.gg for detailed Fire Mage guides. Watch tutorials on YouTube‚ such as the Fire Mage DPS Guide by Llama. Utilize tools like WeakAuras for tracking cooldowns and Wow Sim for optimizing your gear. Explore community forums and Wowpedia for comprehensive spell explanations. Additionally‚ the Combustion Helper WeakAura is essential for mastering burst damage rotations in Cataclysm.

feral druid cata guide

The Feral Druid is a versatile and dynamic specialization in Cataclysm Classic‚ excelling in both PvE and PvP content. As a shapeshifter‚ the druid balances melee ferocity with magical harmony‚ making it a unique and engaging playstyle. Feral Druids thrive in their cat form‚ dealing devastating melee damage while maintaining essential debuffs and buffs for their team. This guide will explore the intricacies of playing a Feral Druid‚ focusing on Cataclysm Classic mechanics‚ rotations‚ and strategies to maximize your effectiveness in any scenario.

1.1 Overview of the Feral Druid Specialization

The Feral Druid specialization in Cataclysm Classic focuses on dealing melee damage in cat form‚ utilizing a combination of bleeds‚ buffs‚ and a priority-based rotation. This specialization excels at single-target and AoE damage while providing essential raid buffs like Leader of the Pack and Faerie Fire. Feral Druids are known for their flexibility and hybrid nature‚ allowing them to adapt to various combat scenarios seamlessly.

1.2 Why Play a Feral Druid in Cataclysm?

Feral Druids in Cataclysm Classic offer a unique blend of versatility and high damage output‚ making them a valuable asset in both PvE and PvP. Their ability to deal single-target and AoE damage‚ combined with essential raid buffs like Leader of the Pack and Faerie Fire‚ makes them a compelling choice for players seeking a dynamic and impactful playstyle in any scenario.

Feral Druid Rotation and Priority System

Feral Druids rely on a dynamic priority system‚ focusing on energy management and combo point generation. The rotation emphasizes maintaining bleeds‚ using cooldowns like Tigers Fury‚ and adapting to situational demands‚ ensuring optimal damage output in both single-target and AoE scenarios.

2.1 Single-Target Rotation

The single-target rotation for a Feral Druid in Cataclysm Classic revolves around maintaining bleeds and maximizing combo point use. Begin with Faerie Fire to apply the crucial debuff. Use Tigers Fury when energy drops below 40 to regain energy. Keep Mangle active to increase damage taken. Apply Rip at 5 combo points‚ and use Ferocious Bite to refresh it when the target is below 25% health. Always maintain Savage Roar for increased damage output. The rotation is fluid‚ prioritizing energy and combo point management to ensure consistent damage.

2.2 AoE Rotation

In AoE situations‚ Feral Druids utilize area-of-effect attacks while maintaining core bleeds. Start with Faerie Fire to apply the debuff. Use Swipe as your primary AoE ability‚ dealing damage to multiple targets. Apply Area 52 buffs to enhance your AoE damage. When facing multiple enemies‚ use Hurricane or Thunder Clap to control and damage groups. Balance energy and combo points to maintain bleeds on priority targets while managing AoE damage effectively.

2.3 Opener Sequence

The Feral Druid opener sequence in Cataclysm Classic is designed to maximize initial damage while setting up your rotation. Start with Feral Charge to close the distance‚ then use Ravage and activate Stampede for increased damage. Apply Faerie Fire and Mangle to maintain debuffs. Use Tiger’s Fury to generate energy‚ followed by Savage Roar and Rip to establish your damage-over-time framework.

Talents and Glyphs for Feral Druid

Talents and glyphs are crucial for optimizing a Feral Druid’s performance. Key glyphs like Glyph of Rebirth enhance survivability‚ while talents focus on improving damage output and mobility in both PvE and PvP scenarios.

3.1 PvE Talent Build

The PvE talent build for Feral Druids in Cataclysm Classic focuses on maximizing damage output while maintaining essential survivability. Key talents include Feral Aggression for improved Faerie Fire‚ Savage Roar to enhance attack power‚ and Blood and Guts for increased stamina. Additionally‚ Rend and Tear boosts lacerate damage‚ while Leader of the Pack provides critical strike chances and healing. This build ensures a balance between DPS and tank-like durability‚ making it ideal for high-end raiding and dungeon content.

3.2 PvP Talent Build

The PvP talent build for Feral Druids in Cataclysm Classic emphasizes survivability and crowd control. Key talents include Leader of the Pack for healing and critical strikes‚ Feral Swiftness for improved mobility‚ and Predatory Strikes for Ravage usability. Primal Gore enhances Ferocious Bite damage‚ while Thick Hide reduces physical damage. This build balances offense with defensive capabilities‚ making Feral Druids formidable in arenas and battlegrounds.

3.3 Recommended Glyphs

For Feral Druids in Cataclysm Classic‚ key glyphs include Glyph of Shred for increased damage‚ Glyph of Rip to extend Rip’s duration‚ and Glyph of Savage Roar for enhanced Savage Roar uptime. Glyph of Ferocious Bite boosts Ferocious Bite damage‚ while Glyph of Rejuvenation aids in healing. These glyphs optimize DPS and survivability‚ ensuring peak performance in both PvE and PvP scenarios.

Stat Priorities for Feral Druid

Agility is the primary stat for Feral Druids‚ enhancing attack power and crit chance. Stamina increases survivability‚ while Critical Strike and Mastery improve damage output efficiency in combat scenarios.

4.1 PvE Stat Priority

For PvE‚ Feral Druids prioritize Agility to boost attack power and critical strike chance. Critical Strike enhances damage output‚ while Mastery improves bleed effects. Haste increases attack speed but is less crucial due to energy management. Stamina supports survivability‚ essential for maintaining aggressive play in raids and dungeons.

4.2 PvP Stat Priority

In PvP‚ Feral Druids prioritize Resilience to reduce damage taken and increase survival. Agility remains crucial for attack power and mobility. Critical Strike enhances burst potential‚ while Mastery improves bleed effects. Haste is less impactful due to energy management. Balance stats to maintain both offensive pressure and defensive sustainability‚ ensuring optimal performance in arenas and battlegrounds.

Gear and Enchants for Feral Druid

Optimize your Feral Druid with high Agility leather gear‚ prioritizing powerful enchants and gems to enhance stats like Agility and Critical Strike. Properly enchanted gear significantly boosts damage output‚ ensuring peak performance in both PvE and PvP scenarios.

5.1 Best-in-Slot Gear

Acquiring the best-in-slot gear for your Feral Druid is crucial for maximizing damage output. Focus on leather items with high Agility and Critical Strike ratings. Key pieces include the Helmet of the Inner Sanctum‚ Shoulders of the Sly Huntress‚ Gloves of the Unblinking‚ and Chest of the Verdant Allies. Legs‚ boots‚ and belts from heroic dungeon drops or raids are also highly valued. Don’t forget to equip powerful trinkets and rings that enhance your critical strike chance and attack power. Properly enchanted and gemmed gear will ensure optimal performance in both PvE and PvP scenarios.

5.2 Enchants and Gems

Optimizing your Feral Druid’s gear with the right enchants and gems is essential for maximizing performance. Enchant your cloak with Greater Agility and boots with Major Agility. Weapons should be enchanted with Enchant Weapon ⎼ Mongoose for increased attack power. Gems should prioritize Agile Shadowspirit Diamond and Delicate Inferno Ruby for maximum Agility. Use Purple Gems like Glinting Dream Emerald to meet meta gem requirements or enhance Critical Strike and Mastery. Proper enchanting and gemming will significantly enhance your damage output and overall effectiveness in combat.

Cooldown Management

Managing cooldowns is crucial for maximizing Feral Druid damage. Use Tigers Fury and Berserk during high-damage phases to boost output. Coordinate Stampeding Roar with group movements and offensive bursts. Ensure Savage Roar remains active for consistent damage amplification‚ and align cooldowns with combat rhythm for optimal results.

6.1 Offensive Cooldowns

Offensive cooldowns are vital for maximizing Feral Druid damage. Tigers Fury should be used when energy drops below 40‚ providing a temporary damage boost. Berserk increases attack speed and reduces cooldowns‚ ideal for burst damage phases. Stampeding Roar enhances movement speed and attack speed for the druid and allies‚ best used during high-damage windows or AoE situations. Properly timing these cooldowns ensures optimal damage output and situational adaptability in combat.

6.2 Defensive Cooldowns

Feral Druids have access to several defensive tools to enhance survivability. Barkskin reduces damage taken‚ while Survival Instincts boosts health and armor‚ making it ideal for emergencies. Feral Charge allows for quick escapes or positioning‚ and Rebirth provides a combat resurrection‚ making Feral Druids versatile in both offense and defense. Proper use of these cooldowns ensures longevity in challenging encounters‚ balancing damage output with resilience.

Buffs and Debuffs

Feral Druids provide essential buffs like Mark of the Wild and Leader of the Pack‚ while maintaining debuffs such as Mangle and Faerie Fire to enhance team performance and damage output.

7.1 Raid Buffs Provided by Feral Druid

Feral Druids bring a suite of essential buffs to raids‚ enhancing team effectiveness. Mark of the Wild boosts stats‚ while Leader of the Pack increases critical strike chances. Faerie Fire improves attack power‚ and Stampeding Roar offers movement speed bonuses. Additionally‚ Rebirth provides combat resurrections‚ and Innervate aids mana management. These buffs are also provided by Feral Druid tanks‚ ensuring versatility and coverage for the raid team.

7.2 Key Debuffs to Maintain

Feral Druids must maintain essential debuffs to maximize damage output. Faerie Fire increases attack power against the target‚ while Mangle enhances bleed damage from allies. Additionally‚ keeping Rip active is crucial‚ as it is a primary damage-over-time ability. These debuffs are vital for maintaining consistent damage and supporting the raid team’s overall effectiveness in both single-target and multi-target scenarios.

Race and Profession Considerations

Night Elf and Worgen are top race choices for Alliance‚ while Tauren and Troll excel for Horde. Professions like Leatherworking and Alchemy enhance gameplay efficiency and survivability.

8.1 Best Races for Feral Druid

Night Elf and Worgen are ideal for Alliance‚ with Shadowmeld and Sprint enhancing survivability and mobility. For Horde‚ Tauren’s War Stomp and Troll’s Berserking provide excellent crowd control and attack speed boosts. These racial traits complement Feral Druid’s agility and combat effectiveness‚ making them top choices for optimizing performance in both PvE and PvP scenarios.

8.2 Professions for Feral Druid

Leatherworking is ideal for crafting high-quality gear‚ especially pre-raid items. Alchemy provides potent agility-boosting elixirs‚ enhancing attack power. Herbalism complements Alchemy by supplying materials for potions. Enchanting allows self-enchanting gear‚ improving stats like attack power. These professions synergize with Feral Druid’s agility-reliant playstyle‚ offering significant advantages in both PvE and PvP scenarios through enhanced equipment and consumables.

PvE Strategies

Mastering cooldowns and maintaining bleeds is crucial. Focus on single-target damage while managing AoE when necessary. Positioning and Feral Charge usage are key for optimal performance. Coordinate with your group to maximize buffs and debuffs‚ ensuring peak efficiency in raids and dungeons.

9.1 Dungeon Tips

In dungeons‚ Feral Druids excel at handling multiple enemies while maintaining single-target pressure. Use Feral Charge to close gaps quickly and Stampede during high damage phases. Ensure Rip and Savage Roar are always active on your main target. For AoE‚ apply Thrash and Swipe to control and damage groups. Use Rebirth or Innervate to support your team during intense moments. Positioning is key to avoid unnecessary damage‚ allowing you to focus on dealing consistent DPS throughout the dungeon run.

9.2 Raid Tips

In raids‚ maximize your DPS by maintaining Savage Roar and Rip on the main target. Use Stampede during high-damage phases and ensure Faerie Fire is applied. Position yourself to avoid unnecessary movement and focus on bleeds. Coordinate with your team to manage adds effectively‚ using Thrash and Swipe for AoE. Utilize Feral Charge to reposition quickly and maintain uptime on your target for optimal raid performance.

PvP Strategies

Feral Druids excel in PvP through survivability and control; Use Rebirth strategically‚ employ Bash and Pounce to disrupt‚ and position to maximize cooldown impact in arenas and battlegrounds.

10.1 Arena Playstyle

Feral Druids excel in arenas with their unique blend of survivability‚ crowd control‚ and burst damage. Open with Pounce for an instant ambush‚ then use Rebirth to revive allies in critical moments. Employ Bash or Cyclone to control opponents‚ while managing cooldowns like Tigers Fury and Berserk for maximum impact. Focus on timing your burst damage with Rip and Ferocious Bite to secure kills‚ while maintaining defensive capabilities with Survival Instincts and Healing Touch.

10.2 Battleground Playstyle

In battlegrounds‚ Feral Druids excel as versatile support DPS‚ utilizing abilities like Rebirth to turn battles and Feral Charge for rapid positioning. Use Stampeding Roar to boost ally movement and Berserk for burst damage. Control enemy movements with Cyclone and Bash‚ while maintaining self-sustain with Survival Instincts and healing from Rejuvenation. Focus on disrupting healers and defending objectives to maximize your impact in large-scale PvP engagements.

salvation army guide to donation values

The Salvation Army Guide to Donation Values helps donors determine the fair market value of items donated to support their charitable mission and community programs․

What is the Salvation Army?

The Salvation Army is a worldwide Christian church and charity organization dedicated to meeting human needs through faith-based initiatives․ Founded in 1865, it operates in over 130 countries, providing aid to people of all backgrounds without discrimination․ Its mission is rooted in the teachings of Jesus Christ, focusing on spiritual and physical support․ The organization is known for its thrift stores, disaster relief efforts, and rehabilitation programs․ Donations to The Salvation Army fund vital community services, including food, shelter, and job training․ By supporting the Salvation Army, donors contribute to a mission that combines faith with practical action to uplift individuals and families in need․

Understanding the Purpose of Donation Values

Donation values are essential for determining the fair market value of items contributed to charitable organizations like The Salvation Army․ These values help donors understand the financial worth of their contributions, which is crucial for tax purposes․ By establishing clear guidelines, The Salvation Army ensures transparency and consistency in valuing donations․ This process not only aids donors in accurately assessing their contributions but also supports the organization in allocating resources effectively․ The funds generated from donations are used to sustain vital community programs, including rehabilitation centers and social services․ Understanding donation values promotes a fair and organized system for giving, benefiting both donors and the communities served by The Salvation Army․

How to Determine the Value of Your Donations

Use The Salvation Army’s donation value guide to assess fair market value based on item condition, original price, and current market rates for similar goods․

Guidelines for Valuing Common Donated Items

Valuing donated items requires assessing their condition, original price, and current market value․ Clothing and accessories are typically valued at $5–$15 per item, while furniture and household goods range from $20–$500 based on quality․ Electronics, books, and toys are valued at 10–30% of their original price․ Appliances must be in working condition to be considered for donation․ Use the Salvation Army’s guide to ensure accurate valuations, as these values are based on IRS guidelines for charitable contributions․ Keep receipts for items purchased within the last year for additional documentation․ Always consider the item’s usability and demand when determining its value․ This ensures fair and honest assessments for tax purposes․

Using Salvation Army Donation Value Guides

The Salvation Army provides detailed donation value guides to help donors accurately assess the fair market value of their contributions․ These guides categorize items like clothing, furniture, and household goods, offering valuation ranges based on condition and demand․ For example, gently used clothing items are typically valued between $5 to $15 each, while furniture can range from $20 to $500 depending on its quality and functional state․ Donors can access these guides online or through local Salvation Army centers to ensure their valuations align with IRS guidelines․ Proper documentation is essential for tax deductions, and these guides simplify the process, making it easier for donors to support the Salvation Army’s mission effectively․ This transparency helps build trust and encourages consistent donations․ By using these resources, donors contribute knowingly to vital community programs and rehabilitation services․ Accurate valuations also ensure compliance with tax regulations, benefiting both donors and the organization․ These guides are regularly updated to reflect current market values, ensuring fairness and relevance․ Overall, the Salvation Army’s donation value guides serve as a valuable tool for ethical and efficient charitable giving․ The guides also emphasize the importance of item quality, encouraging donors to contribute items that are truly beneficial to those in need․ This approach fosters a sense of community and shared responsibility, aligning with the Salvation Army’s broader mission of serving humanity․ By leveraging these resources, donors can make informed decisions that maximize the impact of their contributions․ The guides are user-friendly and accessible, making the donation process straightforward for everyone․ This accessibility ensures that individuals from all walks of life can participate in supporting the Salvation Army’s initiatives․ In summary, the Salvation Army’s donation value guides are an indispensable resource for anyone looking to make a meaningful and tax-deductible contribution to their community․ They provide clarity, transparency, and practical guidance, ensuring that every donation counts toward making a difference․ Additionally, the guides help maintain the integrity of the donation process, upholding the Salvation Army’s commitment to ethical and responsible charitable practices․ By adhering to these guidelines, donors can trust that their contributions are being used effectively to support those in need․ This mutual trust and collaboration are integral to the Salvation Army’s continued success in its mission to serve others․ The guides also serve as a testament to the organization’s dedication to fairness and accountability, qualities that have earned the Salvation Army its reputation as a reliable and compassionate charitable institution․ In essence, using the Salvation Army’s donation value guides is not just about valuing items—it’s about valuing the impact each contribution has on transforming lives and communities․ This mindful approach to giving ensures that every donation, no matter the size, contributes meaningfully to the greater good․ The guides empower donors with knowledge, enabling them to be active participants in the Salvation Army’s efforts to provide hope and assistance to those who need it most․ This collaborative spirit is at the heart of the Salvation Army’s mission and is reflected in the thoroughness and care with which these donation value guides are created and maintained․ By utilizing these resources, donors become partners in the Salvation Army’s ongoing commitment to service and compassion, ensuring that their generosity is both impactful and responsibly applied․ The guides also highlight the Salvation Army’s understanding of the diverse needs within communities, offering tailored solutions that address a wide range of challenges․ This adaptability ensures that donations are used where they are needed most, making the Salvation Army a dynamic and responsive force for good․ In conclusion, the Salvation Army’s donation value guides are more than just a practical tool; they represent the organization’s dedication to transparency, accountability, and impactful giving․ They invite donors to be part of a larger movement that values integrity and compassion, ensuring that every contribution helps create lasting change in the lives of others․ Through these guides, the Salvation Army continues to inspire and empower individuals to give with confidence, knowing that their donations are making a tangible difference in their communities and beyond․ The guides also underscore the importance of sustainability in charitable giving, encouraging donors to think critically about the items they contribute and how they can best serve those in need․ This focus on sustainability aligns with the Salvation Army’s mission to provide long-term solutions and support, rather than temporary fixes․ By choosing to donate quality items that align with the Salvation Army’s valuation guidelines, donors contribute to a cycle of care and renewal that benefits individuals and communities alike․ This mindful approach to giving not only supports the Salvation Army’s programs but also fosters a culture of thoughtfulness and responsibility among donors․ In doing so, the Salvation Army’s donation value guides play a pivotal role in creating a more compassionate and sustainable charitable landscape․ Ultimately, the guides serve as a bridge between donors and those in need, facilitating meaningful connections and opportunities for positive change․ They remind us that every item donated has the potential to transform lives, and that the act of giving is not just about material goods but about the values of kindness, empathy, and service that they represent․ By using these guides, donors become part of a tradition of generosity and care that has defined the Salvation Army for over a century․ This legacy of compassion continues to inspire and guide donors in their efforts to make a difference, ensuring that the Salvation Army remains a beacon of hope and support for generations to come․ The guides also reflect the Salvation Army’s commitment to innovation and adaptability in the ever-evolving landscape of charitable giving․ By staying attuned to the needs of both donors and recipients, the organization ensures that its resources remain relevant and effective․ This forward-thinking approach allows the Salvation Army to address emerging challenges and opportunities, maintaining its position as a leader in the non-profit sector․ Through the donation value guides, the Salvation Army demonstrates its ability to balance tradition with innovation, ensuring that its mission remains both impactful and enduring․ As a result, donors can trust that their contributions are part of a well-considered and dynamic strategy to uplift and empower individuals in need․ The guides also serve as a reminder of the Salvation Army’s global reach and its commitment to serving diverse populations․ By providing standardized valuation guidelines, the organization ensures consistency in its operations across different regions, while still allowing for the flexibility needed to address local needs․ This balance of uniformity and adaptability enables the Salvation Army to maintain a strong, unified presence while being responsive to the unique challenges faced by different communities․ This approach not only enhances the efficiency of the donation process but also strengthens the organization’s ability to deliver targeted support where it is most needed․ In this way, the Salvation Army’s donation value guides are a testament to its organizational excellence and its dedication to making a meaningful impact on a global scale․ By leveraging these resources, donors can feel confident that their contributions are part of a coordinated and compassionate effort to serve humanity․ The guides also emphasize the importance of education and awareness in the charitable giving process․ By providing clear and accessible information, the Salvation Army empowers donors with the knowledge they need to make informed decisions about their contributions․ This educational aspect of the guides not only simplifies the donation process but also fosters a sense of ownership and responsibility among donors․ When individuals understand the value of their donations and how they are used, they are more likely to engage deeply with the organization’s mission and continue their support over time․ This educational component is a key factor in building a loyal and committed donor base, which is essential for the Salvation Army’s long-term success․ Furthermore, the guides highlight the Salvation Army’s commitment to financial transparency and accountability․ By providing detailed valuation information, the organization ensures that donors can trust how their contributions are being utilized․ This transparency is crucial in maintaining the trust and confidence of supporters, especially in an era where accountability is increasingly important to donors․ The Salvation Army’s dedication to clear and honest communication through its donation value guides reinforces its reputation as a trustworthy and reliable charitable organization․ This trust is a cornerstone of the Salvation Army’s ability to attract and retain donors, ensuring the continued viability of its programs and services․ In conclusion, the Salvation Army’s donation value guides are a comprehensive and essential resource for anyone looking to contribute to this esteemed organization․ They offer practical guidance, promote transparency, and empower donors to make a meaningful impact․ By utilizing these guides, individuals can confidently support the Salvation Army’s mission, knowing that their donations are being used effectively and responsibly․ The guides also stand as a testament to the organization’s enduring commitment to service, compassion, and excellence, inspiring continued generosity and involvement from donors worldwide․ Through these resources, the Salvation Army not only facilitates the donation process but also strengthens its connection with the community, ensuring that every contribution brings hope and transformation to those in need․ The guides serve as a bridge between donors and recipients, embodying the Salvation Army’s mission to serve as a catalyst for positive change․ By using these guides, donors become active participants in this mission, contributing to a legacy of care and compassion that continues to inspire and uplift individuals across the globe․ The Salvation Army’s donation value guides are, therefore, more than just a tool for valuation; they are a symbol of the organization’s unwavering dedication to making a difference in the lives of others․ They invite donors to join in this noble endeavor, ensuring that the Salvation Army’s impact endures for generations to come․ The guides also reflect the organization’s understanding of the evolving needs of society and its ability to adapt while remaining true to its core values․ By staying relevant and responsive, the Salvation Army continues to be a vital force for good, and its donation value guides play a crucial role in this ongoing effort․ Donors can take pride in knowing that their contributions, guided by these resources, are part of a dynamic and compassionate movement that transforms lives and strengthens communities․ In every way, the Salvation Army’s donation value guides exemplify the organization’s commitment to excellence, transparency, and the higher purpose of serving humanity․ They are a shining example of how charitable giving can be both meaningful and impactful when guided by clear principles and a shared vision of a better world․ Through these guides, the Salvation Army continues to lead the way in ethical and effective charitable practices, inspiring others to follow in its footsteps and join in the noble work of serving those in need․ The guides also serve as a

The Process of Donating to the Salvation Army

Scheduling a pickup or finding a drop-off location is easy using The Salvation Army’s online tool․ Enter your zip code to locate nearby services and prepare your donations for collection or delivery, ensuring they align with the organization’s acceptance guidelines to support their rehabilitation programs effectively․

Scheduling a Pickup or Finding Drop-Off Locations

Scheduling a pickup or finding a drop-off location for Salvation Army donations is straightforward with their online locator tool․ By visiting their official website, donors can enter their zip code or city and state to find the nearest facilities․ This convenient service ensures that donors can efficiently contribute to their cause․ Additionally, the organization offers pickup services for larger donations, making it easier for individuals to support the community․ Donors can also contact their local Salvation Army centers directly for assistance․ This streamlined process helps maximize the impact of donations, supporting vital programs like rehabilitation centers and local community aid initiatives․

Preparing Your Donations for Pickup or Drop-Off

Properly preparing your donations ensures they can be effectively used to support The Salvation Army’s mission․ Start by gathering clean, gently used items like clothing, furniture, and household goods․ Ensure all items are in good condition and functional․ Remove any broken or soiled items, as they cannot be sold or repurposed․ Pack items securely, using sturdy boxes for fragile goods, and label them clearly․ Separate donations by category (e․g․, clothing, books, furniture) to streamline processing․ Check The Salvation Army’s website for specific guidelines on acceptable items․ By preparing your donations thoughtfully, you help maximize their impact and contribute to vital community programs․

Tax Considerations for Salvation Army Donations

Donations to The Salvation Army may qualify for tax deductions․ Keep receipts and document the fair market value of items donated to support your charitable contribution claims․

frosthaven coral guide

Overview of the Coral Class in Frosthaven

The Coral class in Frosthaven is a versatile and impactful character, excelling at controlling water tiles to enhance offense and defense. Coral’s abilities create dynamic combat opportunities, making it a standout choice for strategic players seeking both utility and strength in various scenarios.

Coral is a unique and versatile class in Frosthaven, designed to manipulate water tiles for both offensive and defensive purposes. Its abilities revolve around controlling and moving water, creating dynamic combat scenarios. Coral excels at enhancing party members’ attacks while hindering enemies, making it a valuable asset in strategic team play. With its straightforward yet powerful mechanics, Coral is ideal for players seeking a class that balances utility with raw strength. Its role is pivotal in managing battlefield conditions, making it a cornerstone of effective party coordination and tactical gameplay.

1.2 Key Features and Abilities

Coral’s core abilities center around water manipulation, enabling unique combat strategies. Its standout feature is the ability to control and move water tiles, enhancing its own attacks and hindering foes. Key abilities include Crashing Tide and Cleansing Swell, which initiate battles and clear negative effects. Coral excels at area control, using water to buffer allies or disrupt enemies. Its abilities synergize well with party members, offering both offensive and defensive utility. This makes Coral a versatile class, capable of adapting to various scenarios while maintaining a strong presence in combat through its water-based mechanics.

1.3 Coral’s Strengths and Weaknesses

Coral shines with its water manipulation, offering strong utility and versatility. Its ability to control water tiles enhances offensive and defensive capabilities, making it a valuable asset. However, Coral’s effectiveness depends on water tile availability, limiting its potential in scenarios with scarce water. Its complex mechanics require strategic planning, which can be challenging for new players. While Coral excels in team synergy, it may struggle in solo play without proper setup. Balancing its abilities between offense and defense can be tricky, as it lacks pure specialization in either area. Despite this, Coral remains a formidable choice for adaptive playstyles in Frosthaven.

Core Strategies for Playing Coral

Mastering Coral requires strategic water tile manipulation to control the battlefield. Positioning is key to maximize ability effects, while synergizing skills enhances both offensive and defensive play, ensuring adaptability in combat scenarios.

2.1 Positioning and Water Tile Management

Positioning Coral effectively is crucial, as its abilities depend on water tiles. By strategically placing water tiles adjacent to Coral, players can enhance their attacks and disrupt enemies. Managing water tiles allows Coral to control the battlefield flow, creating opportunities for both offense and defense. Proper positioning ensures maximum utility of abilities like Crashing Tide and Cleansing Swell, making Coral a versatile and powerful class in Frosthaven. Mastering this aspect is key to unlocking Coral’s full potential in various combat scenarios.

2.2 Synergizing Abilities for Maximum Impact

Coral’s abilities are designed to work in harmony, allowing for powerful synergies that amplify their effects. By combining Crashing Tide with Cleansing Swell, players can create devastating area-of-effect attacks while maintaining battlefield control. Crashing Surge and Cresting Force can be chained to deliver massive damage bursts. Additionally, using Overwhelming Wave after setting up water tiles ensures enemies are disoriented and vulnerable. Synergizing these abilities strategically enhances Coral’s offensive and defensive capabilities, making it a formidable class in both solo and co-op play. Proper timing and setup are key to maximizing Coral’s impact in Frosthaven.

2.3 Defensive and Offensive Playstyles

Coral excels at balancing defense and offense through water tile manipulation. Defensively, Coral can create barriers and push enemies away, controlling their movement and protecting allies. Offensively, Coral unleashes powerful water-based attacks, dealing area-of-effect damage and disrupting enemy positioning. The class thrives in versatility, allowing players to adapt to situations by toggling between protective and aggressive strategies. Effective use of water tiles enhances both playstyles, making Coral a dynamic and adaptable character in Frosthaven. This duality ensures Coral remains impactful in various combat scenarios, whether focusing on survival or dealing maximum damage.

Coral’s Ability Cards and Their Uses

Coral’s ability cards, like Crashing Tide and Cleansing Swell, manipulate water tiles to enhance offense and defense, offering versatile tools for controlling combat dynamics and maximizing strategic impact in Frosthaven.

3.1 Crashing Tide and Cleansing Swell

Crashing Tide and Cleansing Swell are cornerstone abilities for Coral, enabling water tile manipulation. Crashing Tide enhances attacks when adjacent to water, while Cleansing Swell removes negative effects and heals. Together, they exemplify Coral’s water-based versatility, allowing strategic control over combat dynamics and resource management. These abilities are essential for maximizing Coral’s impact in both offensive and defensive playstyles, making them central to any effective Coral build in Frosthaven.

3.2 Crashing Surge and Cresting Force

Crashing Surge and Cresting Force are powerful abilities that highlight Coral’s water-based versatility. Crashing Surge deals damage and pulls enemies into water, creating tactical advantages, while Cresting Force pushes foes back and grants a defensive boost. These abilities synergize well with water tiles, enhancing Coral’s offensive and defensive capabilities. Players can use Crashing Surge to disrupt enemy formations and Cresting Force to protect allies or maintain distance. Together, they exemplify Coral’s dynamic playstyle, offering both crowd control and utility in various combat scenarios within Frosthaven.

3.3 Overwhelming Wave and Mighty Claws

Overwhelming Wave unleashes a devastating area-of-effect attack, dealing significant damage to multiple enemies, while also pushing them back. This ability is ideal for clearing clusters of foes or creating space. Mighty Claws, on the other hand, delivers a powerful melee strike, making Coral a formidable opponent in close combat. Both abilities shine when water tiles are strategically positioned, enhancing Coral’s offensive potential. Overwhelming Wave is particularly effective in tight scenarios, while Mighty Claws excels in direct confrontations. Together, they showcase Coral’s adaptability and strength in both ranged and melee combat situations within Frosthaven.

Coral Solo Scenario Guide

Gaz’s solo attempt highlights Coral’s potential in isolated missions, emphasizing strategic water tile management and ability synergy to survive challenging encounters in Frosthaven’s harsh environment.

4.1 Tips for Surviving Solo Missions

To survive solo missions as Coral, focus on mastering water tile placement and positioning to control combat flow. Utilize abilities like Crashing Tide and Cleansing Swell to manipulate the battlefield and protect yourself. Prioritize managing your resources efficiently, as Coral’s strength lies in ability synergy. Adapt to enemy movements and plan ahead to minimize damage. Gaz’s solo attempt highlights the importance of strategic planning and quick decision-making. Practice builds confidence in navigating Frosthaven’s challenging solo scenarios, ensuring Coral remains a formidable solo contender in harsh environments.

4.2 Gaz’s Experience with Coral Solo

Gaz’s attempt at the Coral Solo Scenario offered valuable insights into the class’s potential and challenges. He found Coral’s water tile manipulation and ability synergy crucial for survival. By strategically using Crashing Tide and Cleansing Swell, Gaz managed to control enemy movements and enhance his own attacks. However, the solo scenario’s intensity highlighted Coral’s vulnerability without support. Gaz’s experience emphasized the importance of precise positioning, resource management, and adaptability. His playthrough demonstrated Coral’s versatility but also revealed the need for careful planning to overcome the solo mode’s harsh conditions and enemy pressures.

Community Insights and Resources

The community offers extensive guides, class reviews, and tools for Coral, including fan-made apps and resources like the Battle Goal Picker for streamlined play and strategy optimization.

5.1 Class Reviews and Guides

The Coral class in Frosthaven has garnered significant attention, with players and reviewers praising its versatility and potency. Guides highlight Coral’s ability to dominate through water tile manipulation, offering insights into optimal builds and strategies. Many emphasize its strengths in both offensive and defensive playstyles, making it a favorite among experienced players. Community discussions often debate Coral’s effectiveness, with some labeling it as “broken” due to its powerful synergies. Resources like Rage Badger’s guides and Gaz’s solo scenario attempts provide valuable perspectives, helping players maximize Coral’s potential in various scenarios.

5.2 Fan-Made Tools for Coral Island

Fans of Frosthaven have developed various tools to enhance gameplay, particularly for Coral Island. These include apps like the Battle Goal Picker, which streamlines scenario setup, and detailed guides for water tile management. Community-created resources offer insights into Coral’s ability cards and optimal strategies, while fan-made projects provide organized information for better gameplay. These tools not only improve accessibility but also deepen players’ understanding of Coral’s mechanics, making them invaluable for both newcomers and seasoned players aiming to master the class.